WooCommerce & Cloudways: The Ultimate Beginners Guide To Ecommerce Success


I will show you how to handle the tech to launch a simple eCommerce business. It’ll be easy & you’ll be up and running in no-time.
My goal is to help you get the site online, show you how to add your products, & accept payment via Stripe & Paypal. Of course, we’ll also make the site secure and super fast. This type of site is perfect if you want to start selling your products without a lot of frills — and you can always add bells & whistles later on.
My choice for the eCommerce platform is WooCommerce. I’ll be hosting the store on Cloudways.
SPONSORED CONTENT
This guide and video were made possible thanks to Cloudways.
Why I Chose WooCommerce
The WooCommerce plug-in runs inside WordPress. That means you can expand the functionality of WooCommerce core with other WordPress plug-ins.
Need to sell a physical product, digital products, or even take-out for a local restaurant?
If you can sell it online, you can sell it with WooCommerce if you add the right extensions. There is no need for expensive developers, which I love.
Why I Chose Cloudways Cloud Hosting Platform
WooCommerce also comes with some responsibility. You need to keep your site up-to-date and secure. Uptime and the safety of your customer’s data are your responsibility.
I recommend Cloudways for people who don’t want to spend a lot of time managing tech, but still a fast & modern site.
I’ve been a fan of Cloudways since 2018. This is sponsored content, but nothing I’m saying here isn’t something I haven’t posted on the web before.
What is Cloudways?
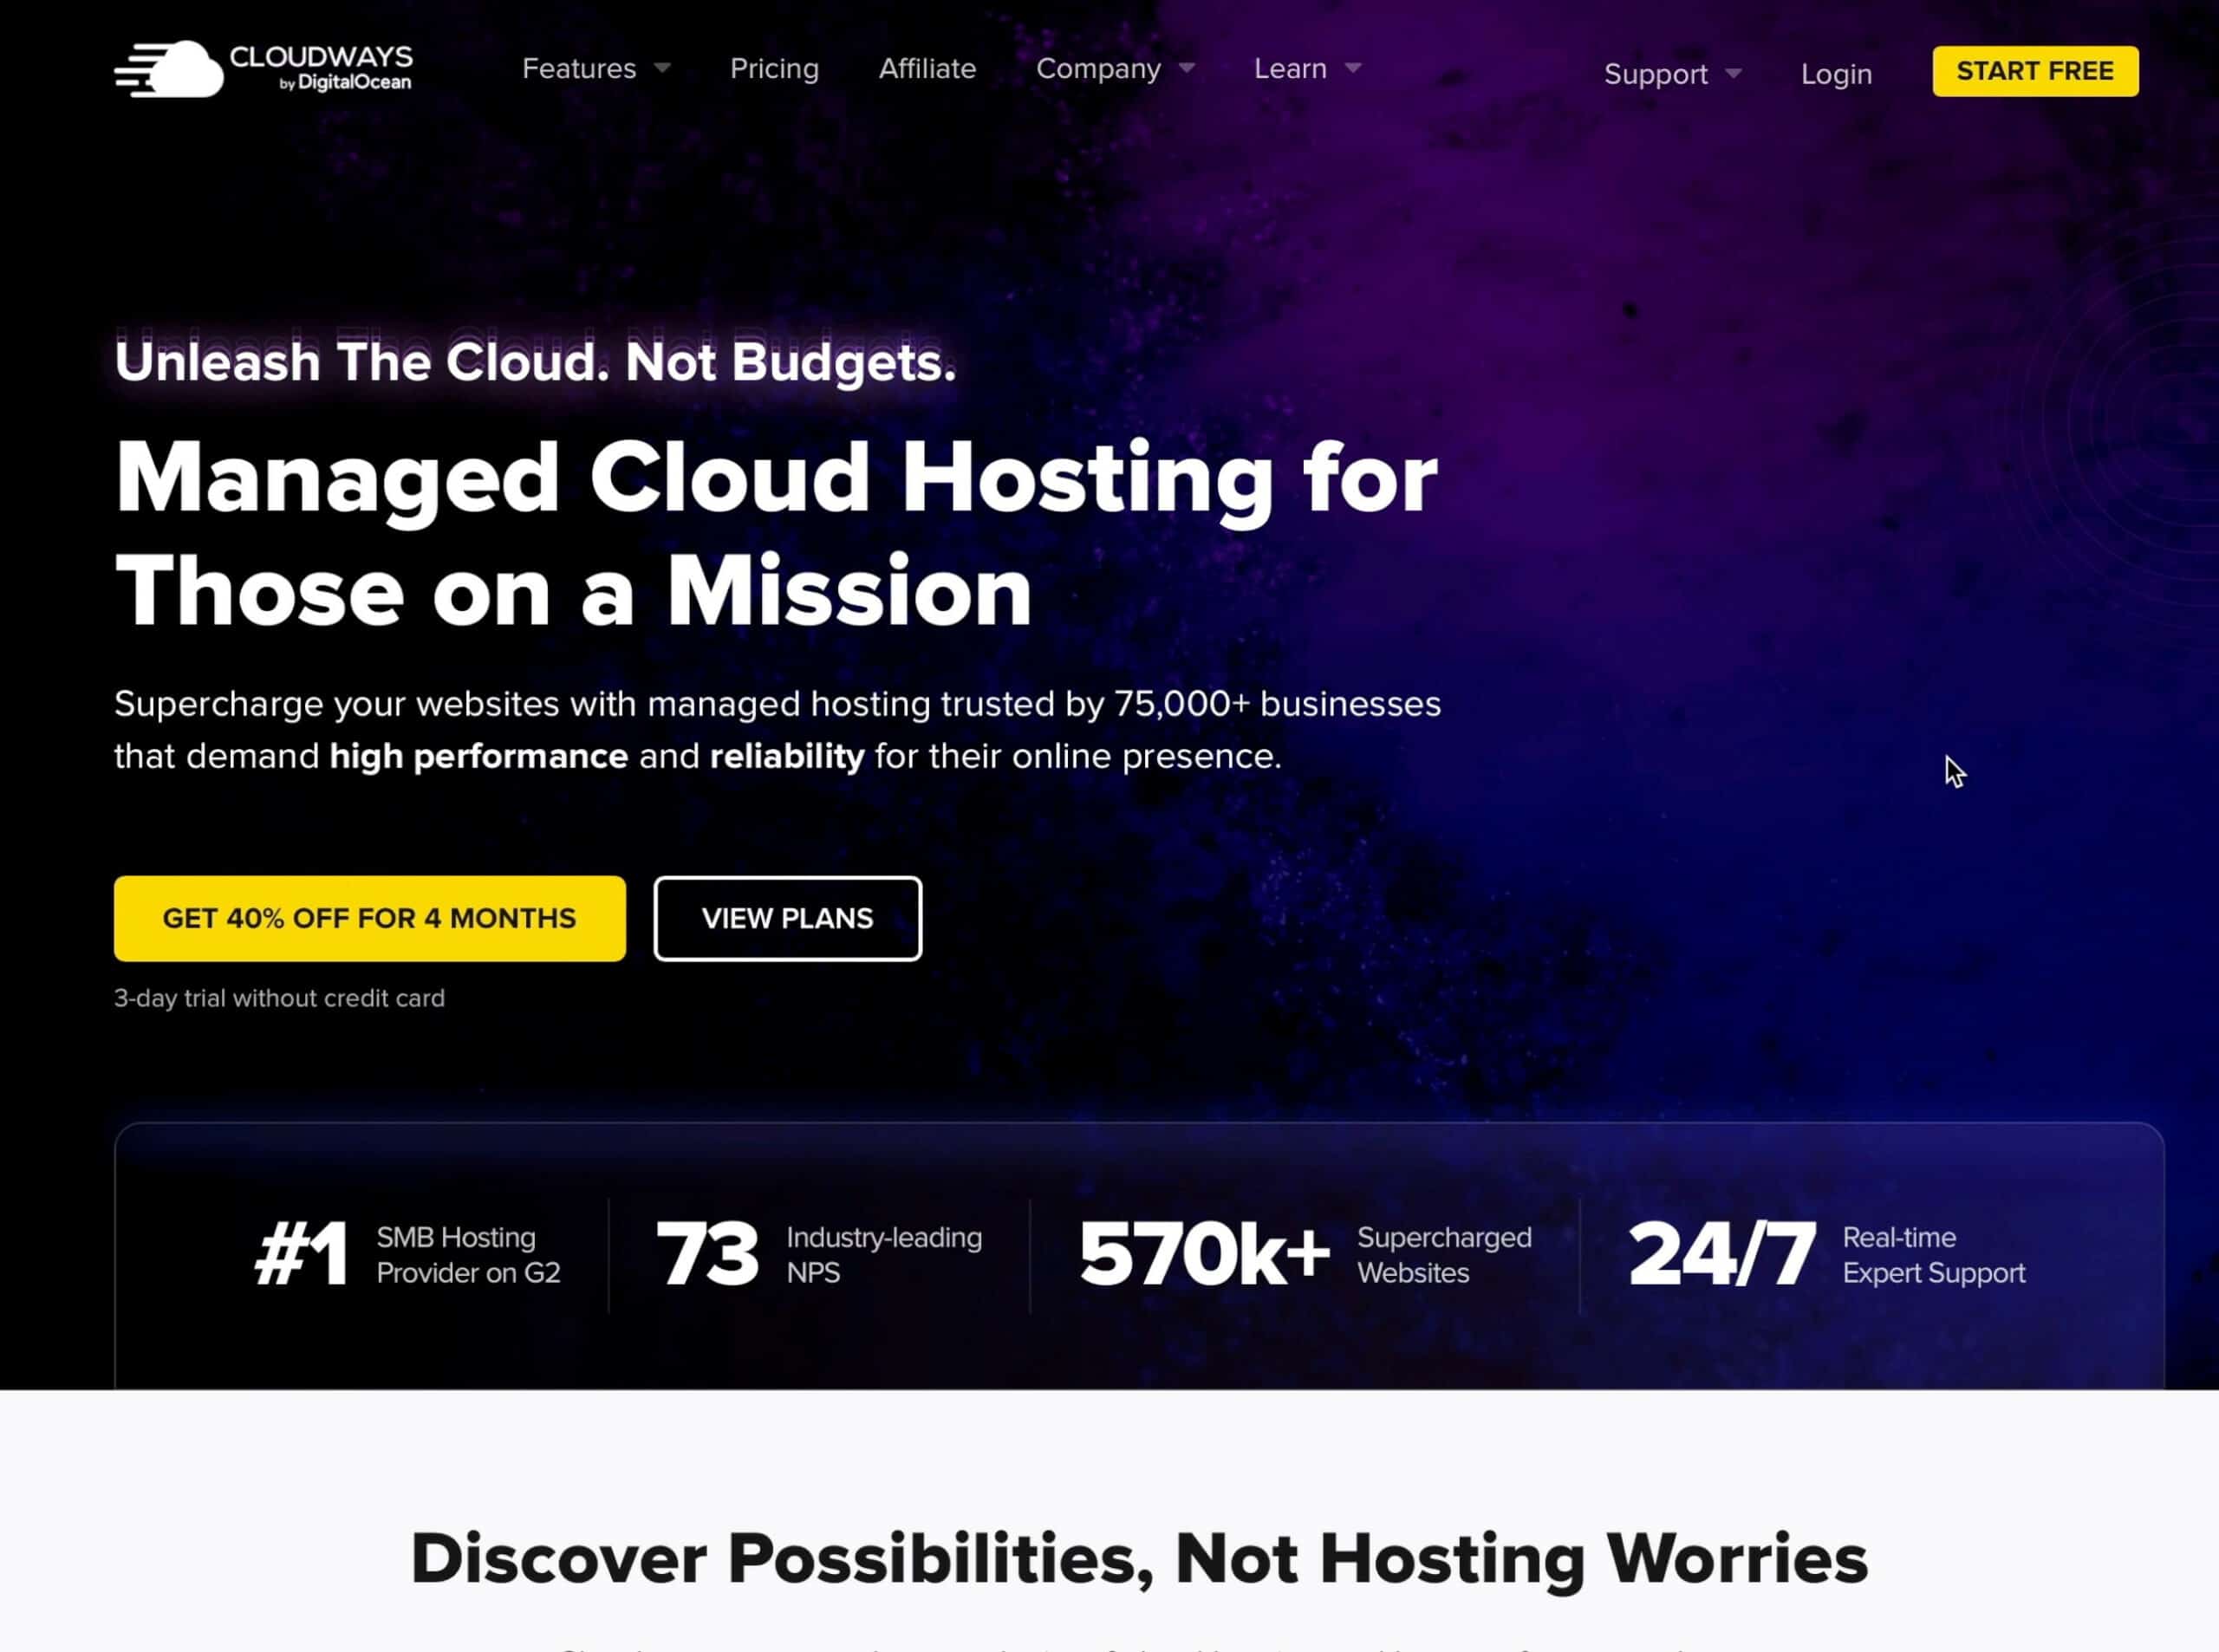
Cloudways is your control panel to launch and configure websites. It’s like the old cPanel you often find on shared hosts, except for the modern age. I think I appreciate Cloudways so much because I spent years with old-school hosts. When Cloudways came on the scene, they changed the game.

No need for your own aws or Google cloud platform accounts
Cloudways connects to big-name providers that the most popular sites on the web use. Amazon AWS, Google Cloud Platform, and of course, Digital Ocean. Digital Ocean acquired Cloudways in August of 2022.
I love that you don’t need to have personal accounts on any of these platforms. You pay Cloudways directly for the server. You never have to deal with things like the AWS interface.
Cloudways manages the server, you manage WordPress
Server management is Cloudways’ responsibility. You don’t need to worry about SSH into your server to perform security patches. But you still have immense power to configure the server. Virtually any service can be turned on with a toggle switch. For example, you can change the MySQL version or turn on Elasticsearch with a few clicks.
If you have the technical know-how, you can configure your servers precisely as you’d like. If you don’t have the technical expertise, it’ll come pre-configured with everything you need to succeed.
The software is excellent, but perhaps best of all, you have the power of these massive commodity cloud providers at your disposal. You can scale your site to handle a monstrous amount of traffic in just a few clicks — perfect for those holiday shopping rushes—more on scaling up in a moment.
Launching An Ecommerce Website in Less Than 30 Minutes
Creating a Server
Let’s get started with a server.
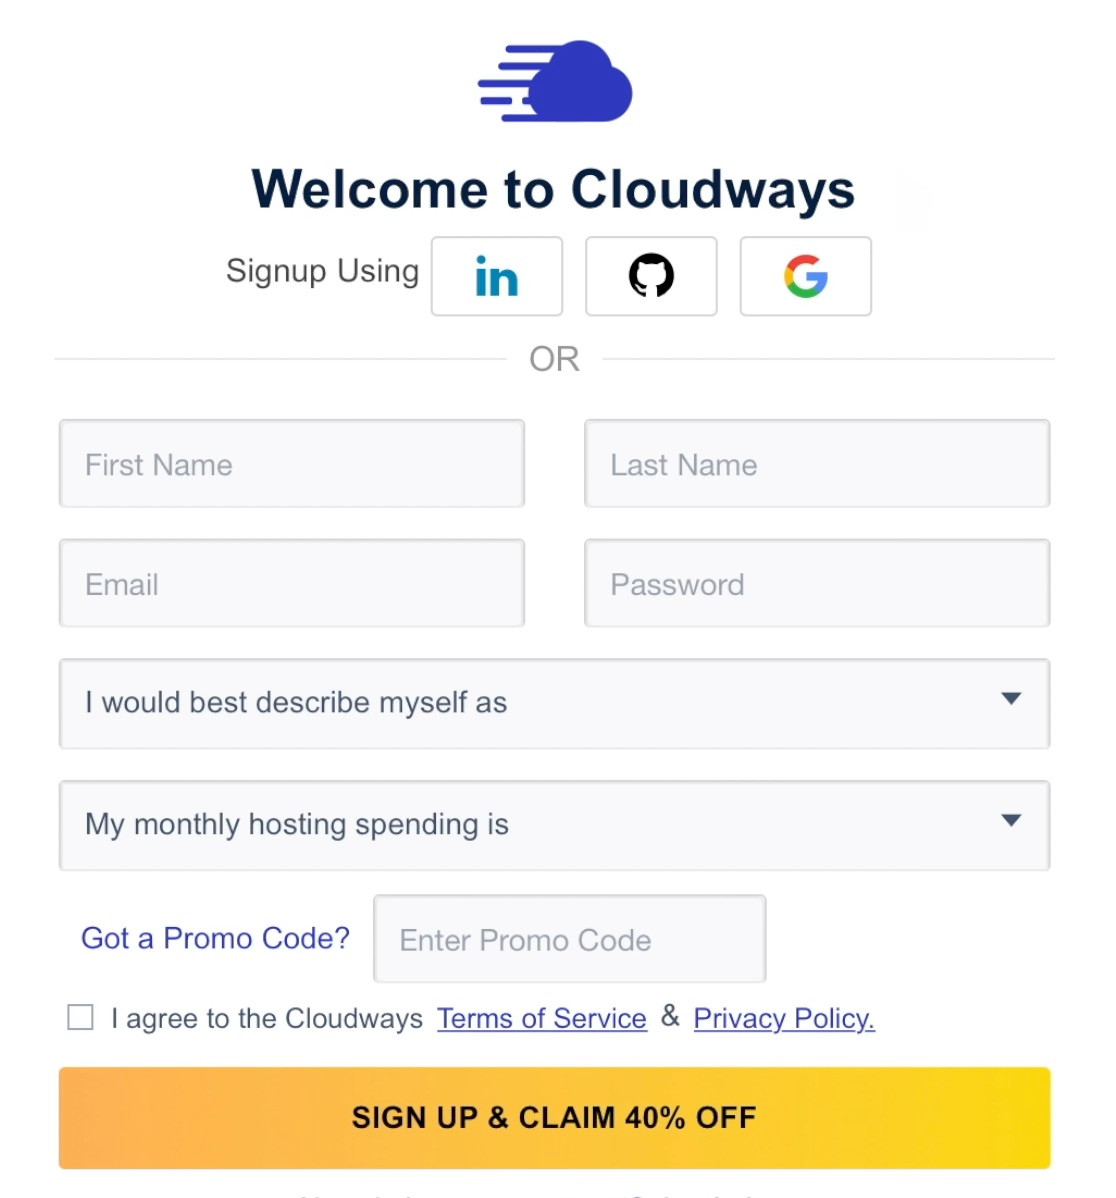
Create a free Cloudways account here. Use code’daveswift‘ for a $10 credit.
When you’re signed in, click “Launch Now.”
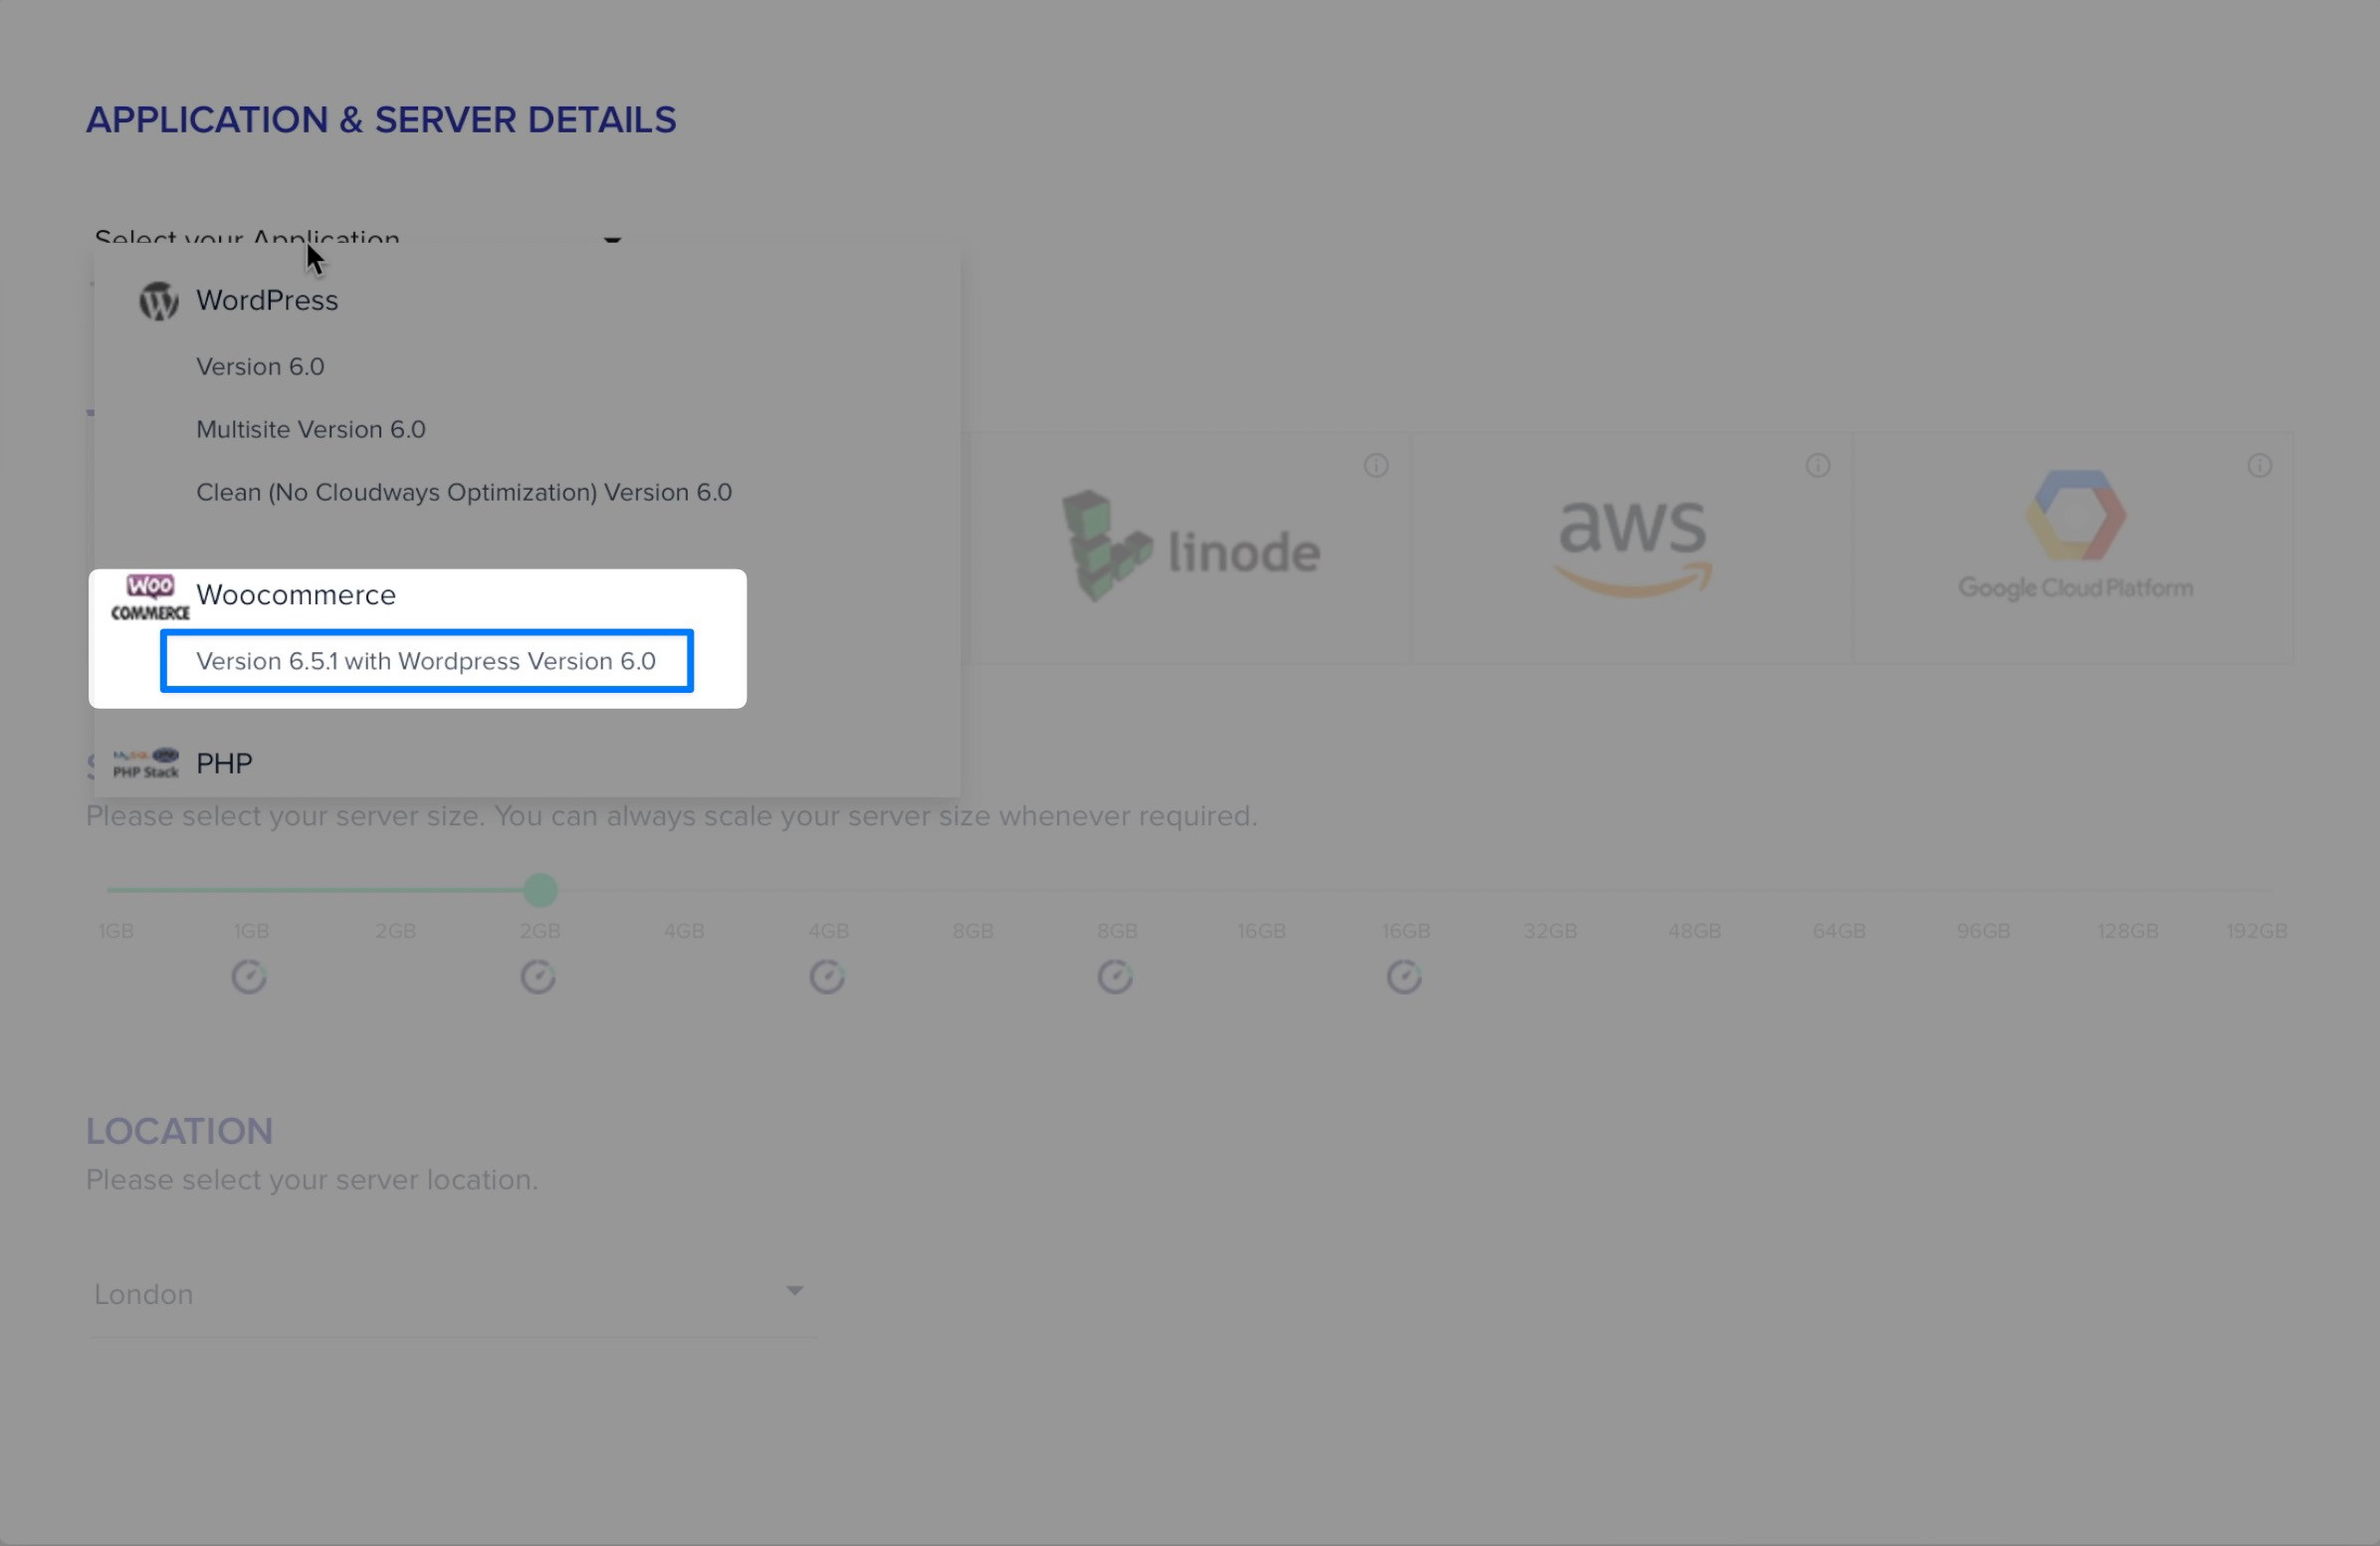
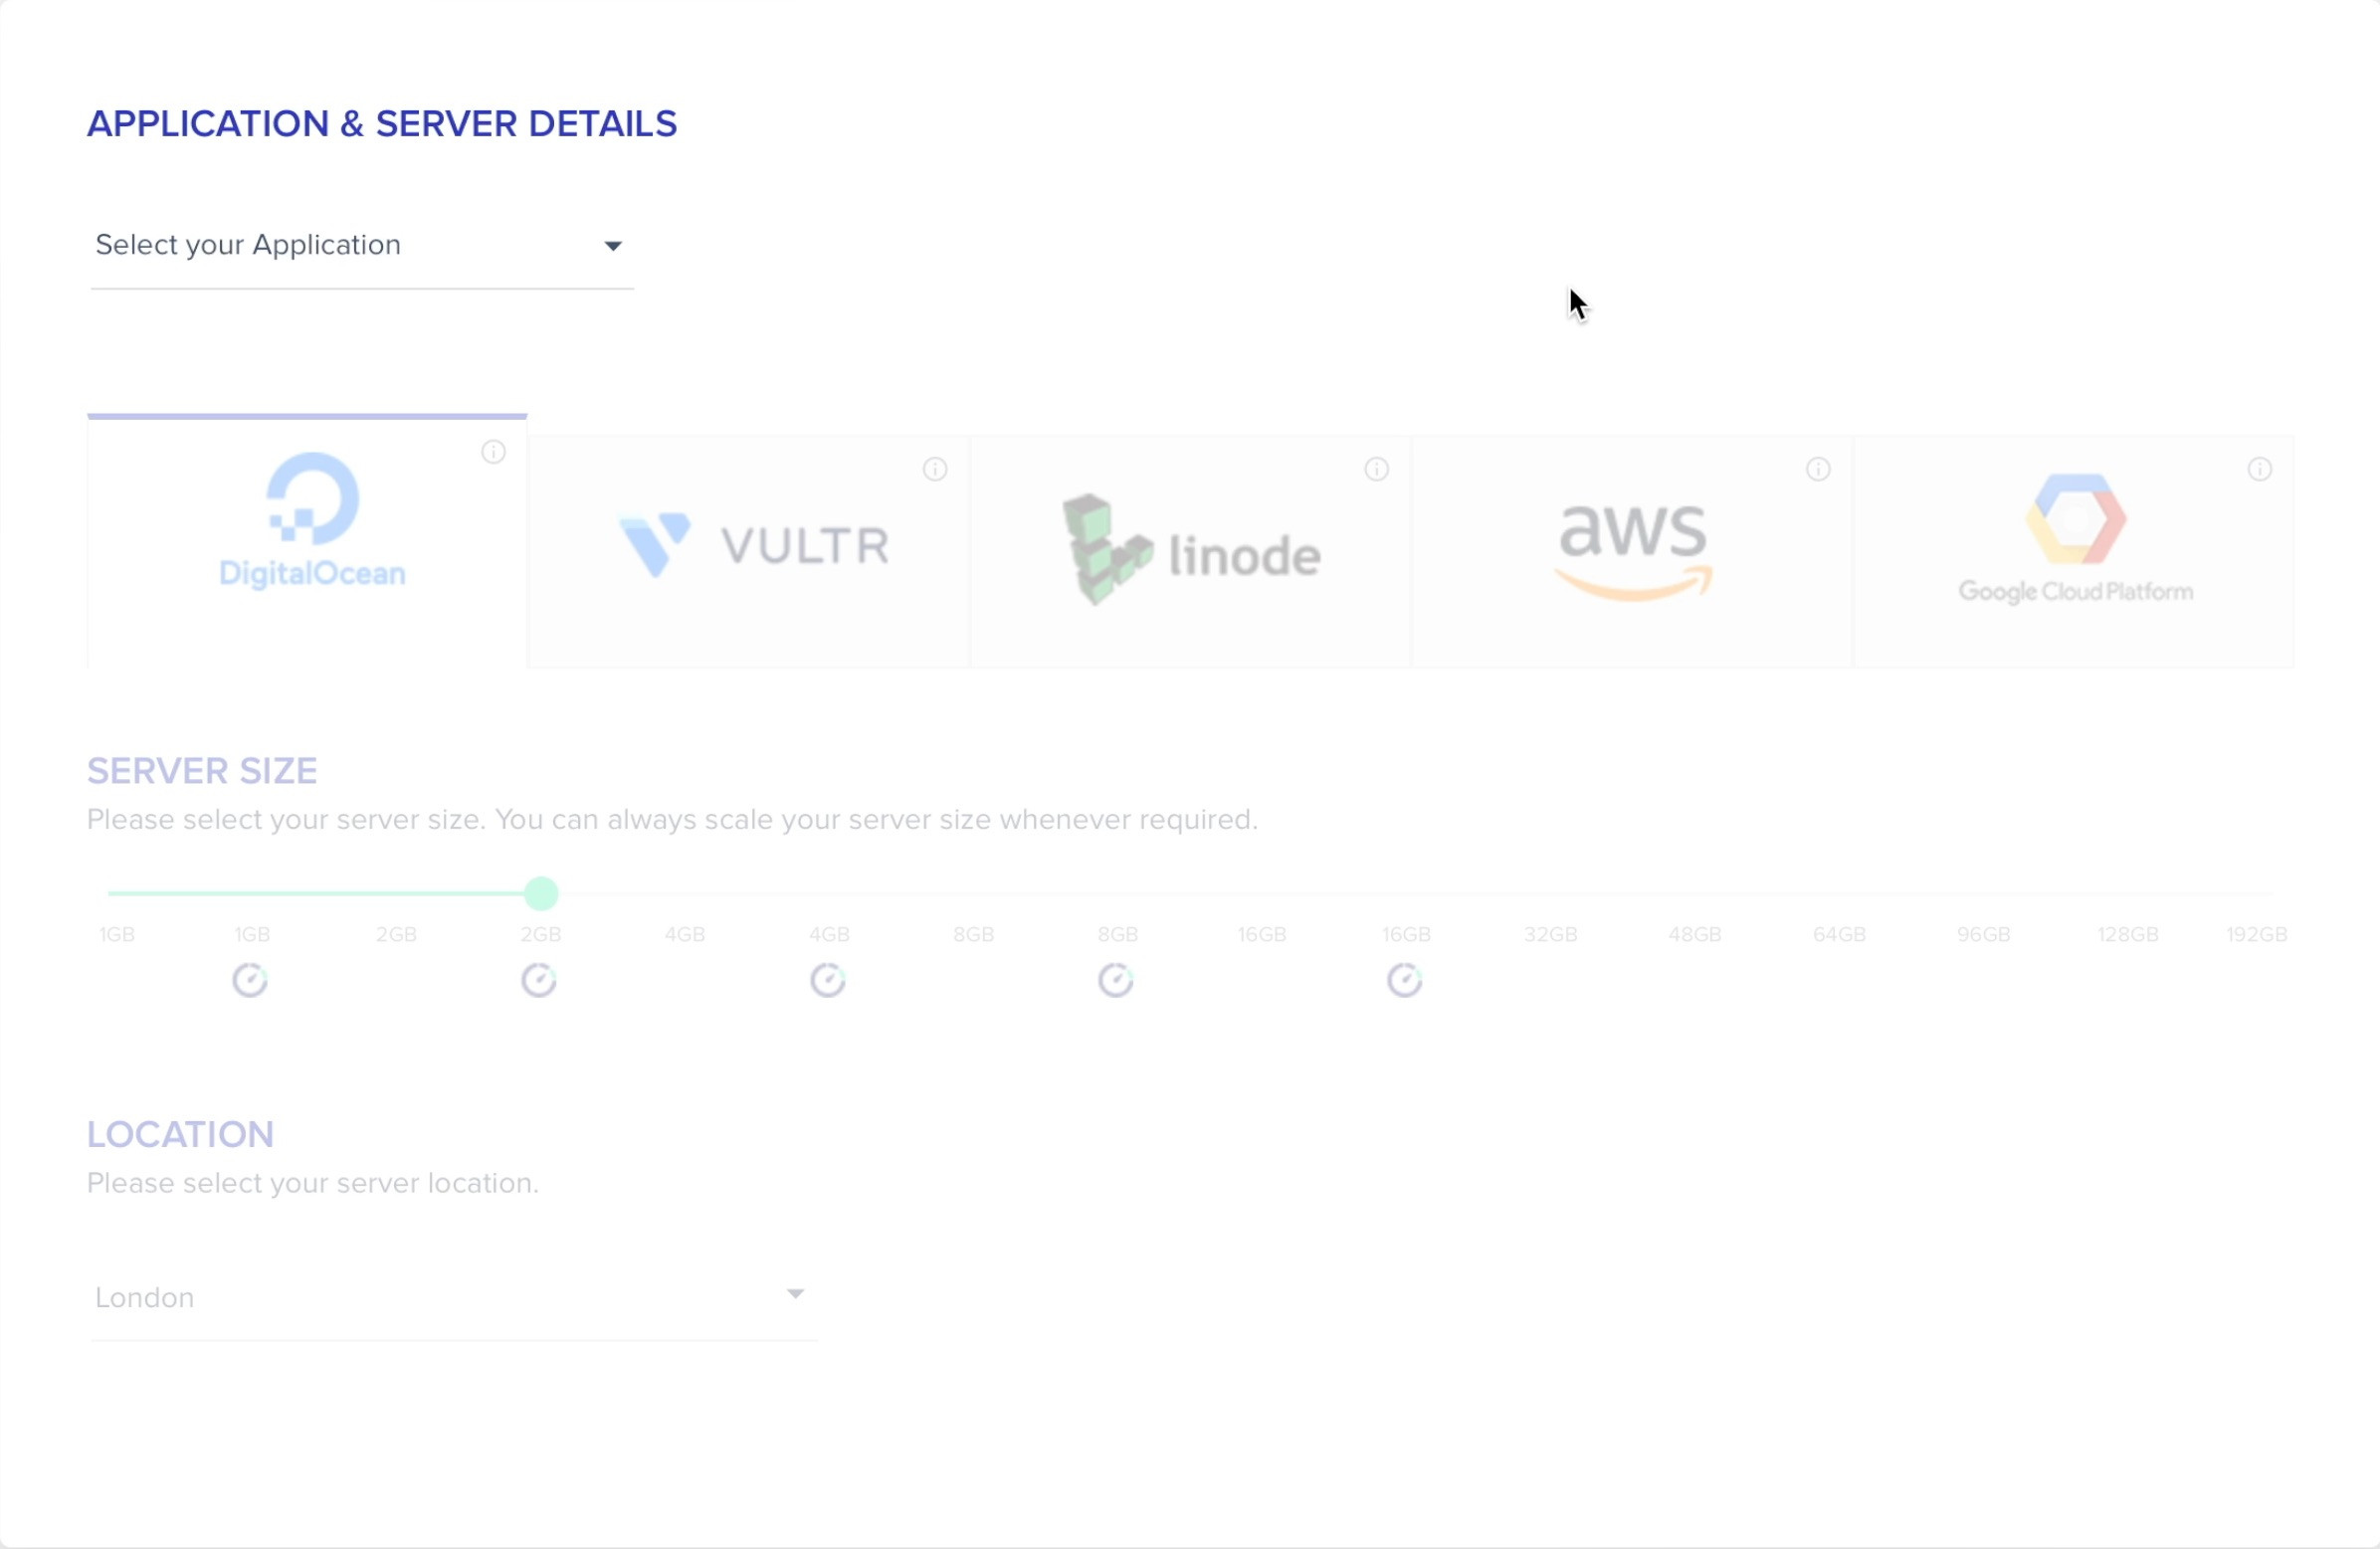
Click on the dropdown and choose WooCommerce. This will install an optimized version of WordPress for eCommerce traffic.
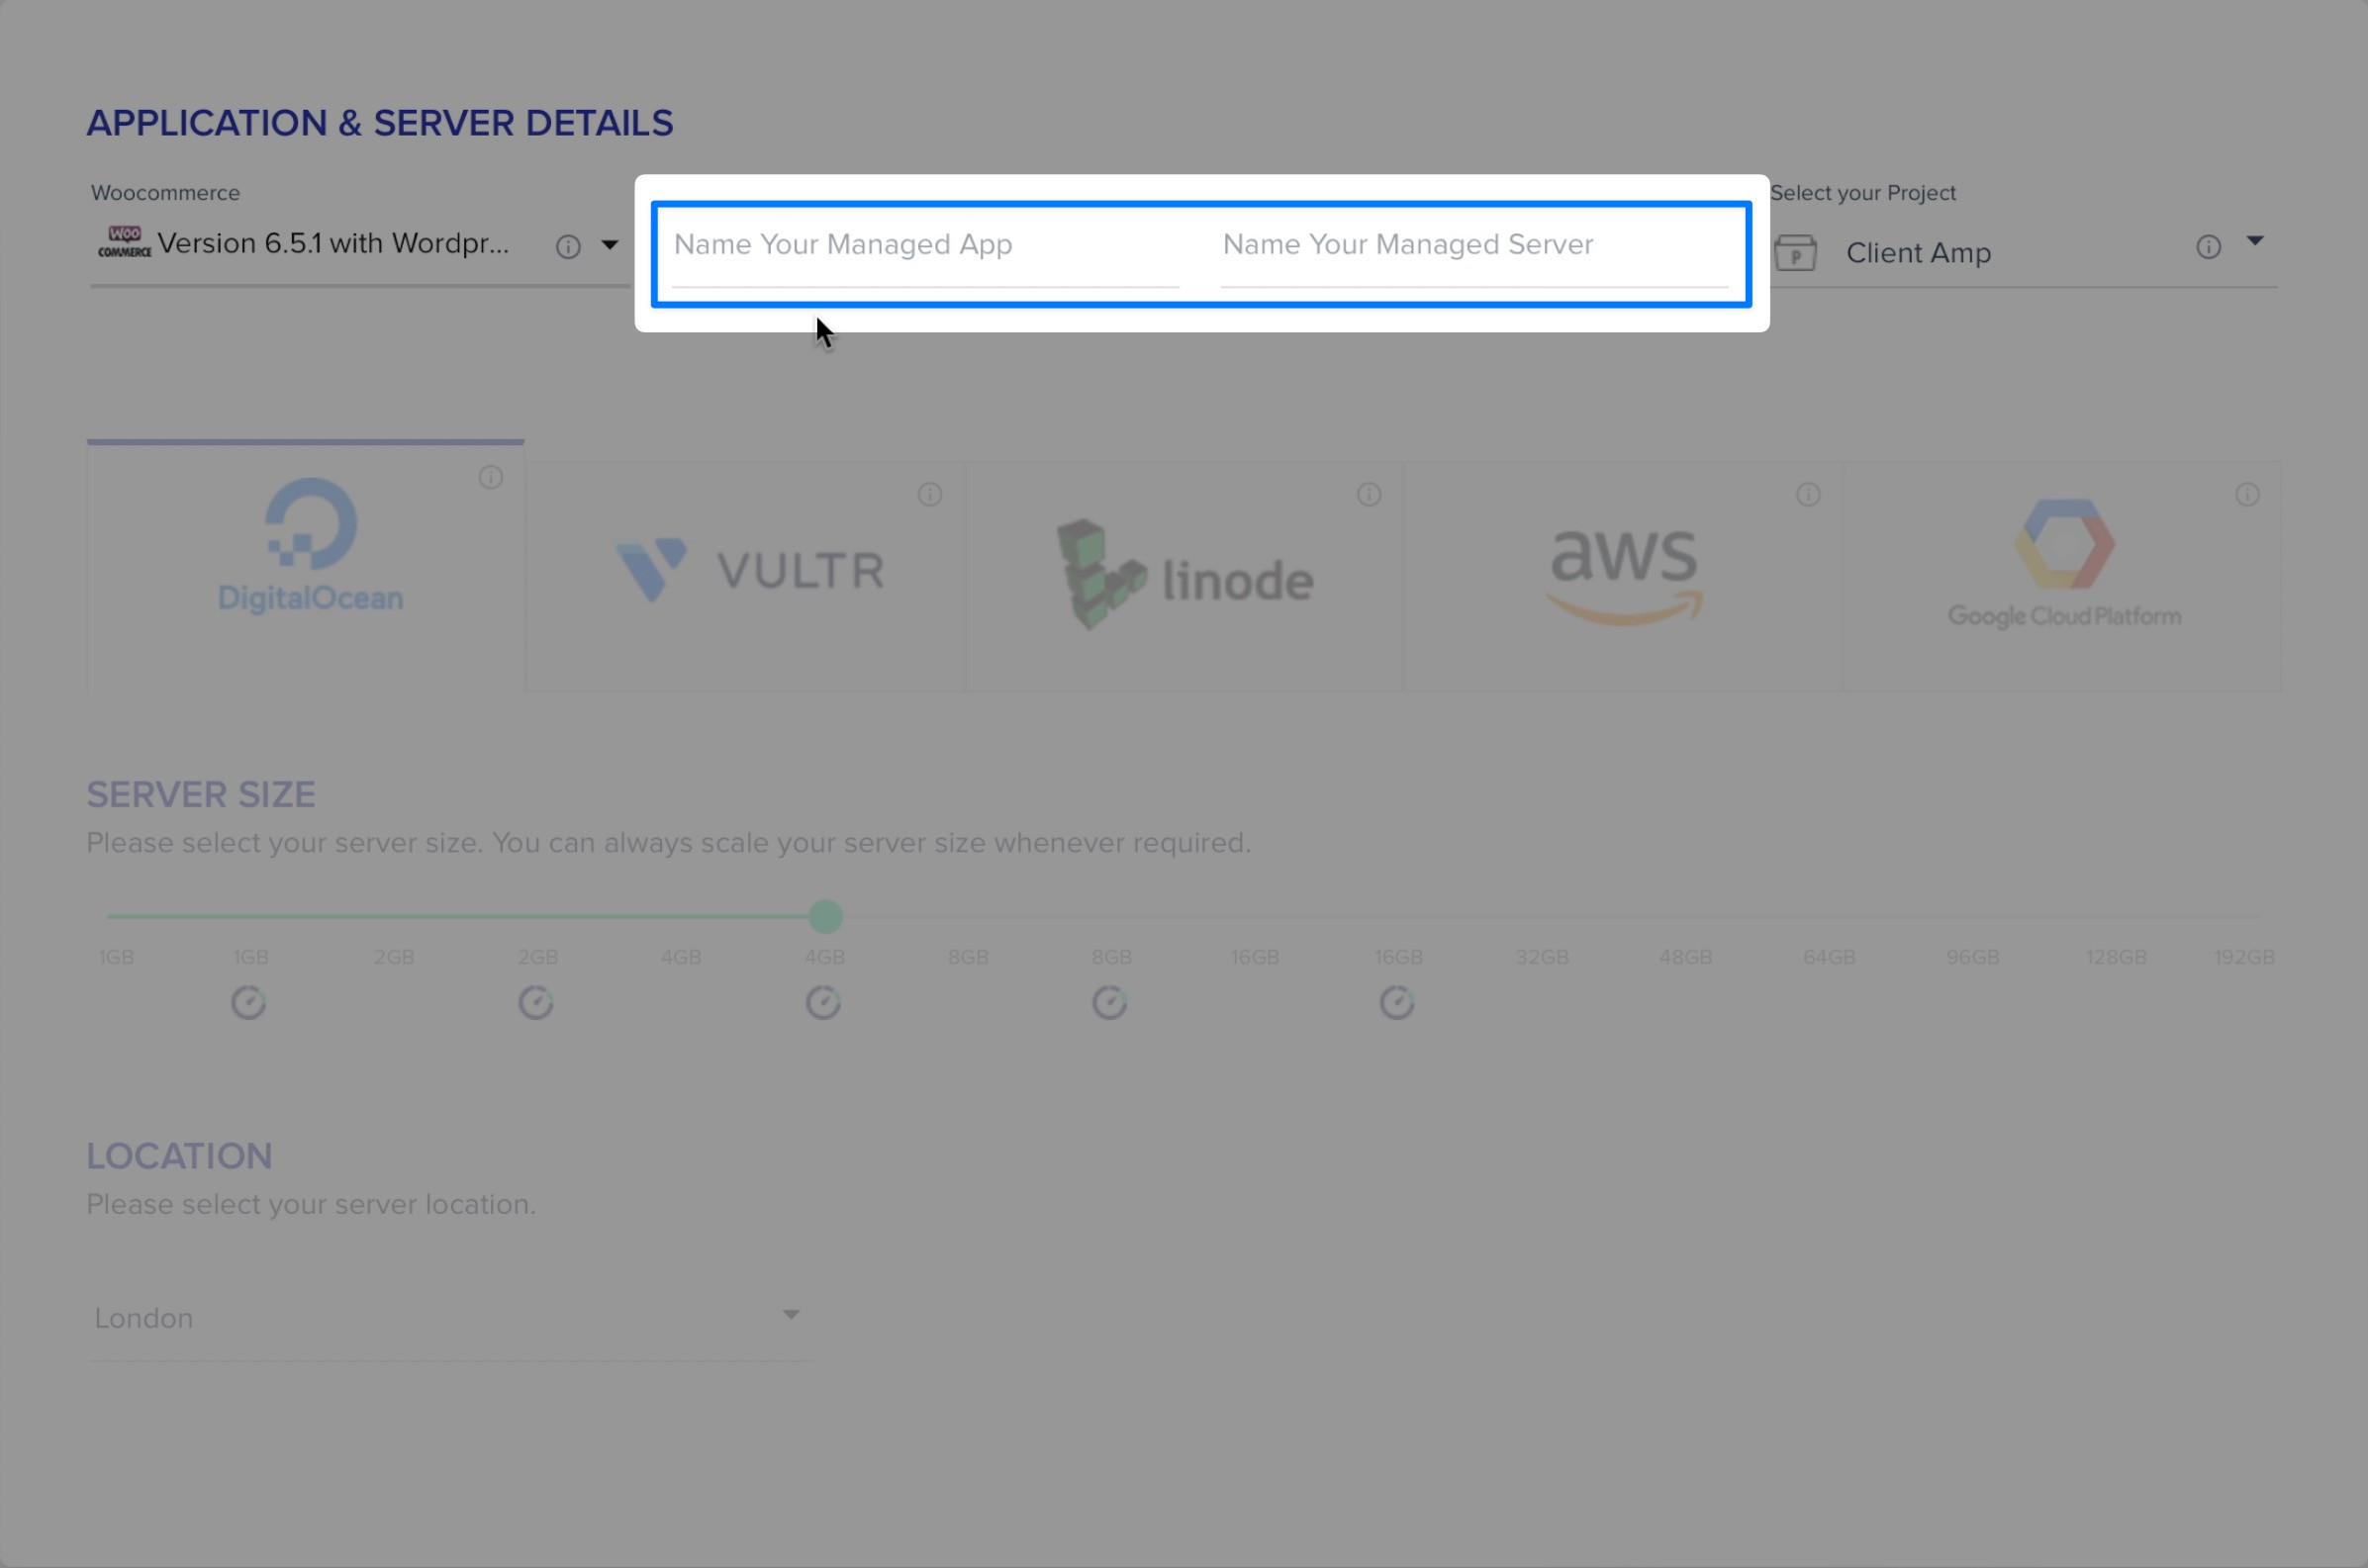
Next, give your app and your server a name. With Cloudways, you set up an app for each site. In this case, the app is a WordPress installation. The server is the computer it’s running on. I like to name the app based on the URL. I’ll call the server something similar in this case since it will only house a single site.
You can run as many sites on each server as you’d like — but when you’re doing eCommerce, I recommend one site per server. WooCommerce requires a lot of resources, and we want to keep the site stable.
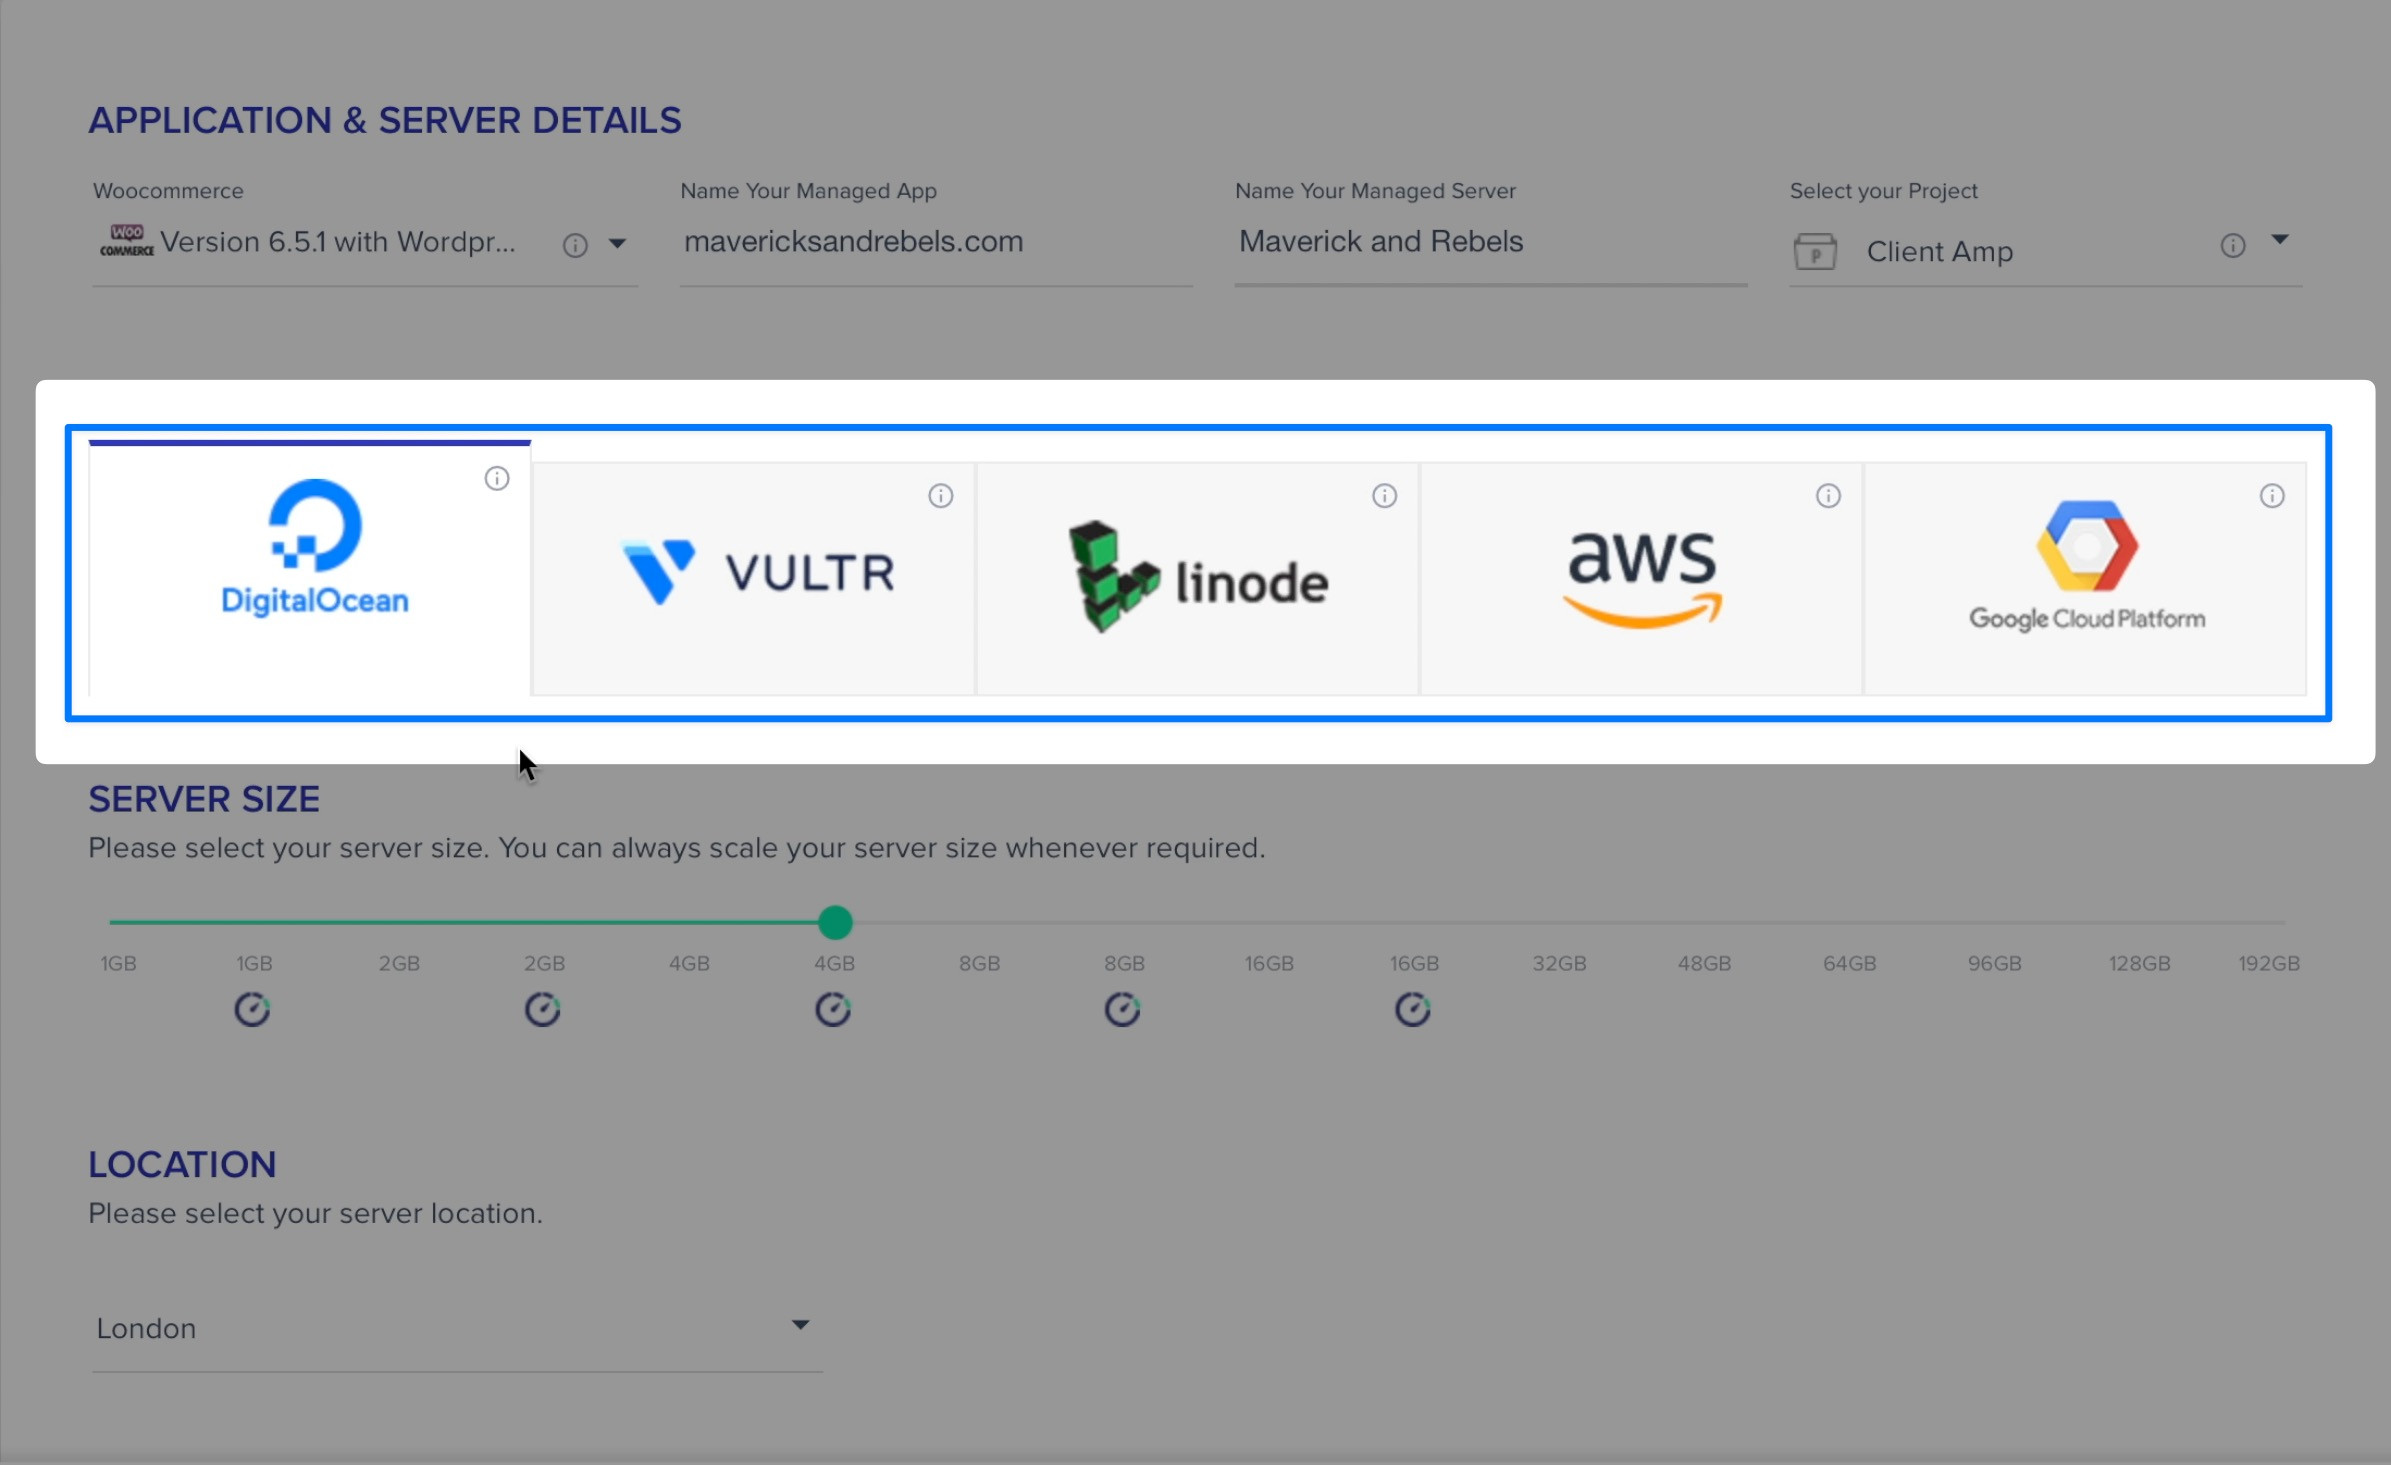
Now we’re going to choose a hosting provider. I’ll go with Digital Ocean here. Digital Ocean is a great provider and one I’ve been using for many years. I’m stoked they acquired Cloudways.
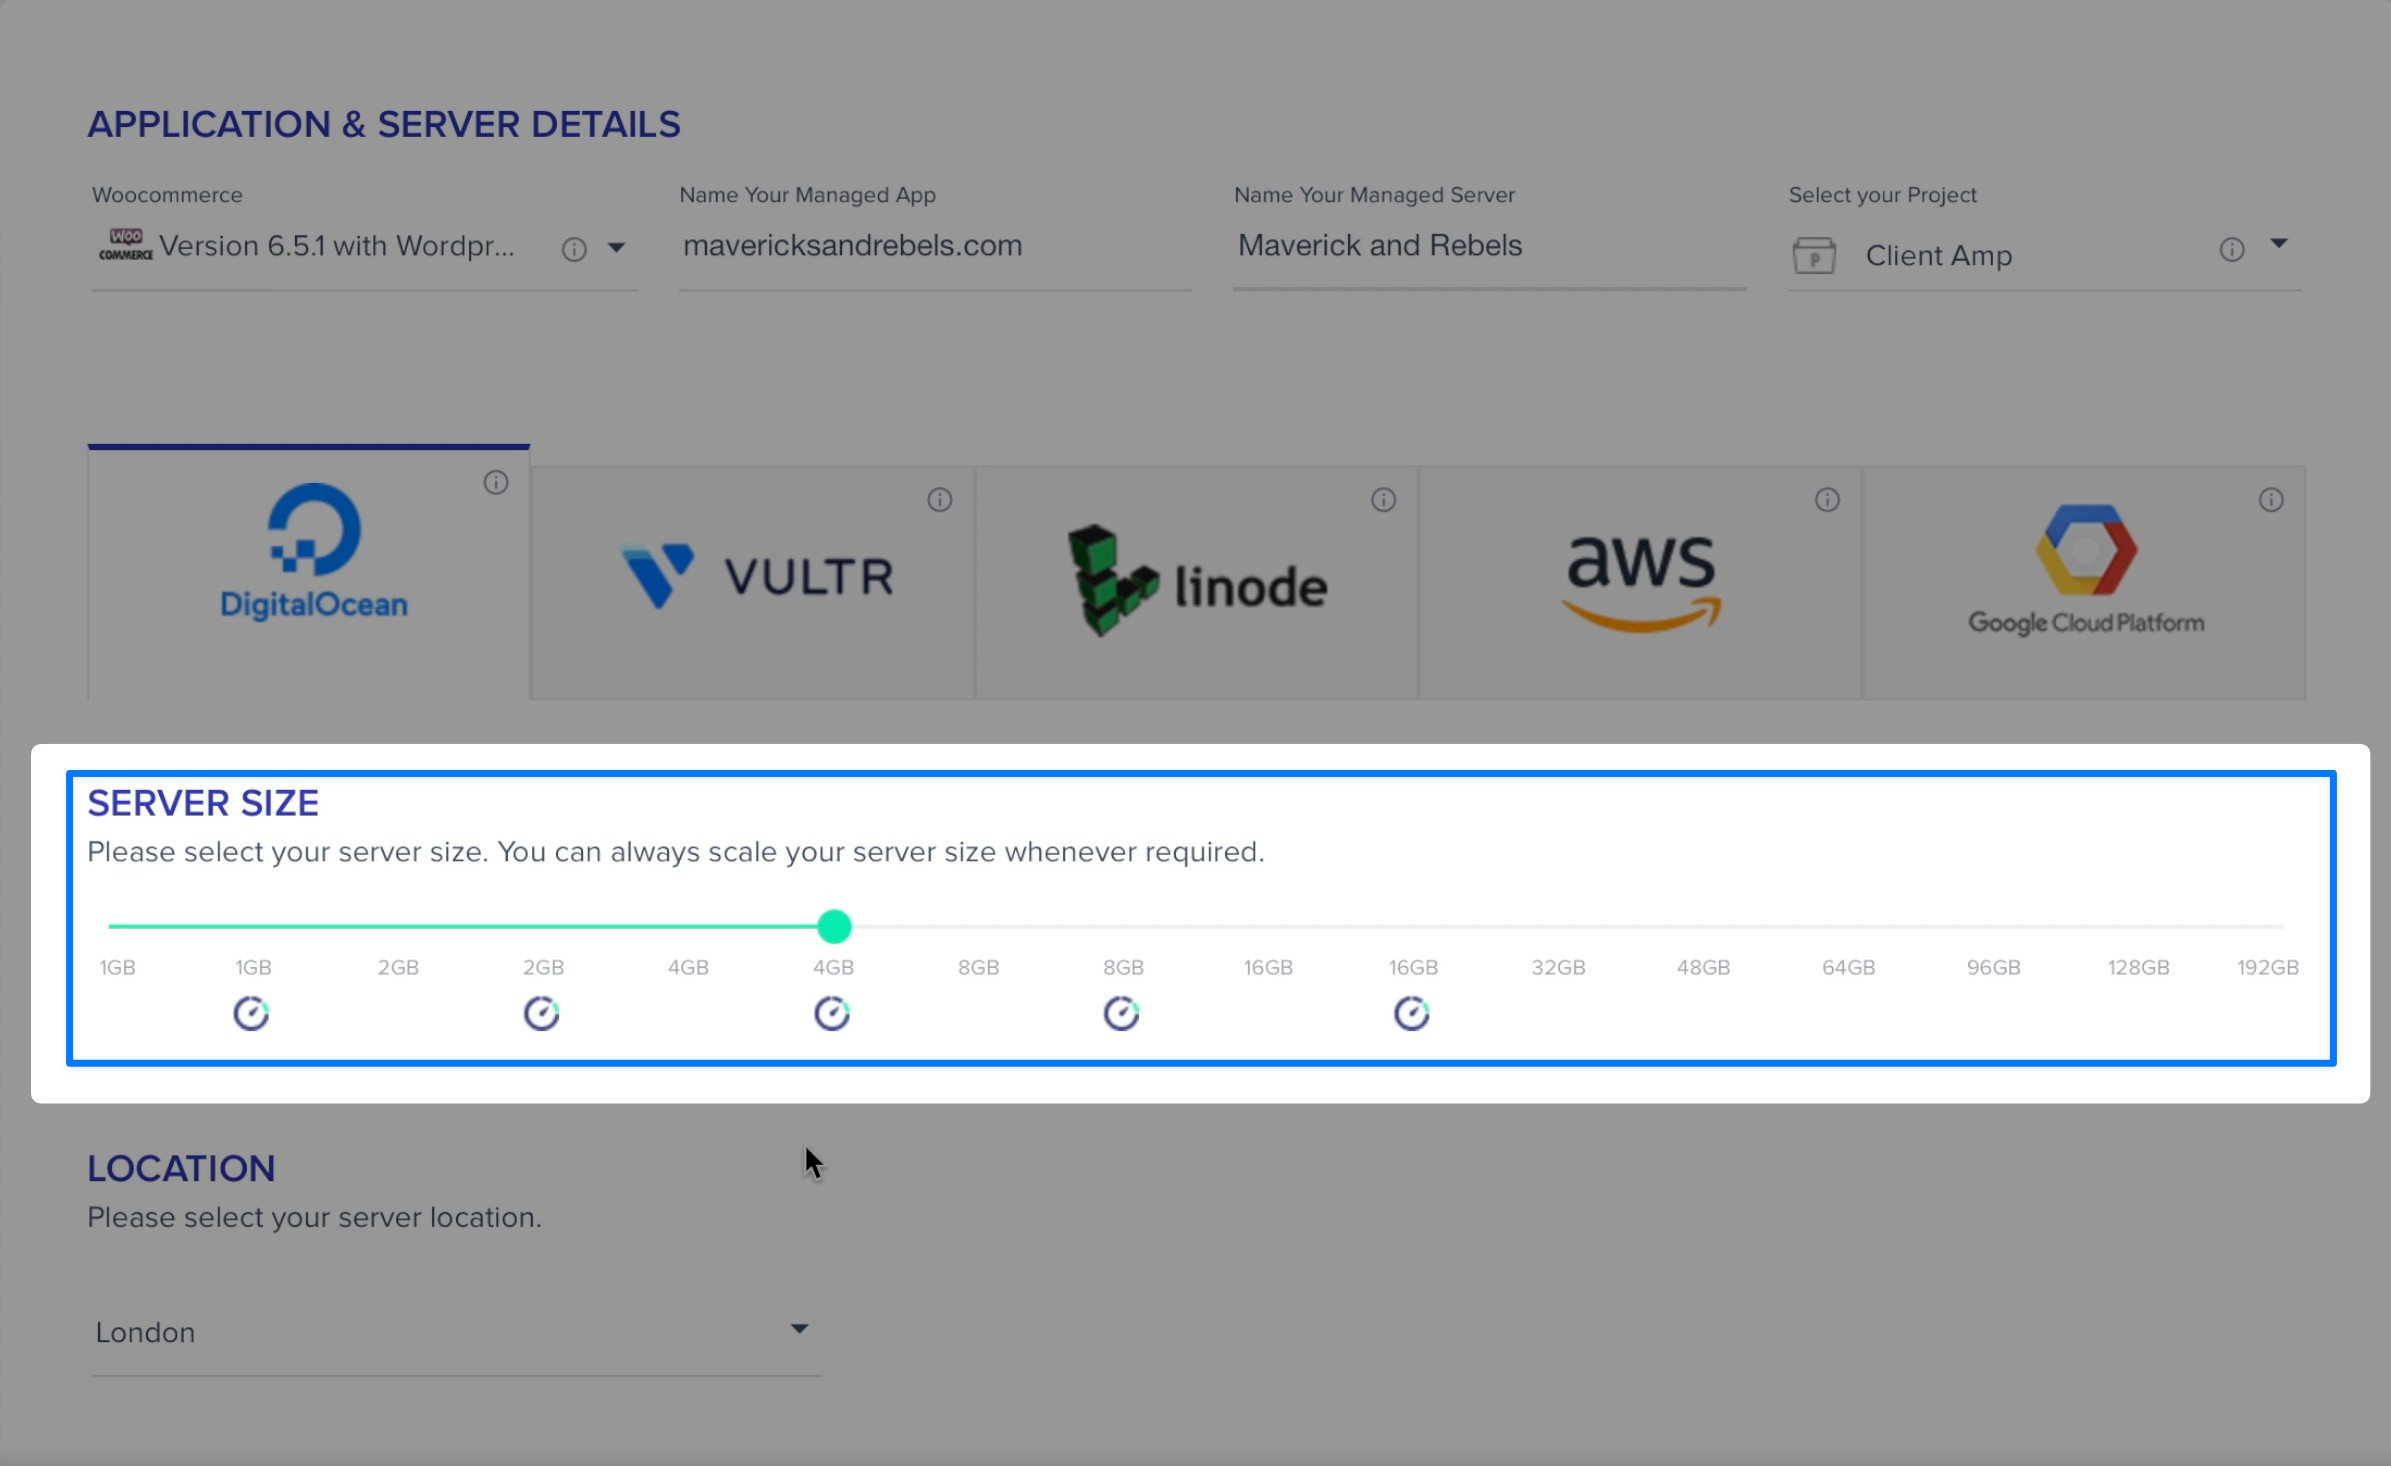
Next, choose your server size. The recommended configuration for a production Woocomerce site is 4GB. Look for the speedometer icons on the slider. These are high-performance servers with faster CPUs. I recommend choosing one of these servers. They are only a few dollars more per month but can handle many more transac tions without slowing your site down.
If you know you’re not going to publish your site immediately, you can choose a smaller server and scale it up later. This will save you a few bucks, although maybe not as much as you’d think.
Cloudways Billing Explained (Compared to Managed WordPress Hosting)
Let me explain how Cloudways billing works. They use a pay-as-yo-go billing system.
This is a big deal. Many managed WordPress hosting providers will try to lock you in for long-term contracts. You’ll pay a lump sum upfront that averages out to a reasonable monthly rate. The problem is that you’ll pay 2x or 3x the previous fees after the contract expires.
With Cloudways, the pricing is transparent. There are no long-term contracts. You can spin up a server, use it for an hour, and delete it. It’ll probably cost you about seventy cents.
This is amazing for a new business. Maybe you’re still testing product market fit. You might not know if you’ll be around in a year, so why pay upfront for three years of hosting?
Returning to Cloudways, choose a server location, and click launch now.
Connecting Your Domain To Your WordPress Site
DNS RECORDS
You’re going to need a domain for your website. Cloudways handles the hosting, but they don’t get involved with domains. So head over to NameCheap or your registrar of choice and grab a domain for your store if you don’t have one already.
Here is the domain for my new t-shirt shop: mavericksandrebels.com.
Connecting Your Domain to a Cloudways Server
I will create some DNS records to connect my domain to my new Cloudways server. This way, when people type my domain name into their browser, they will go to my website.
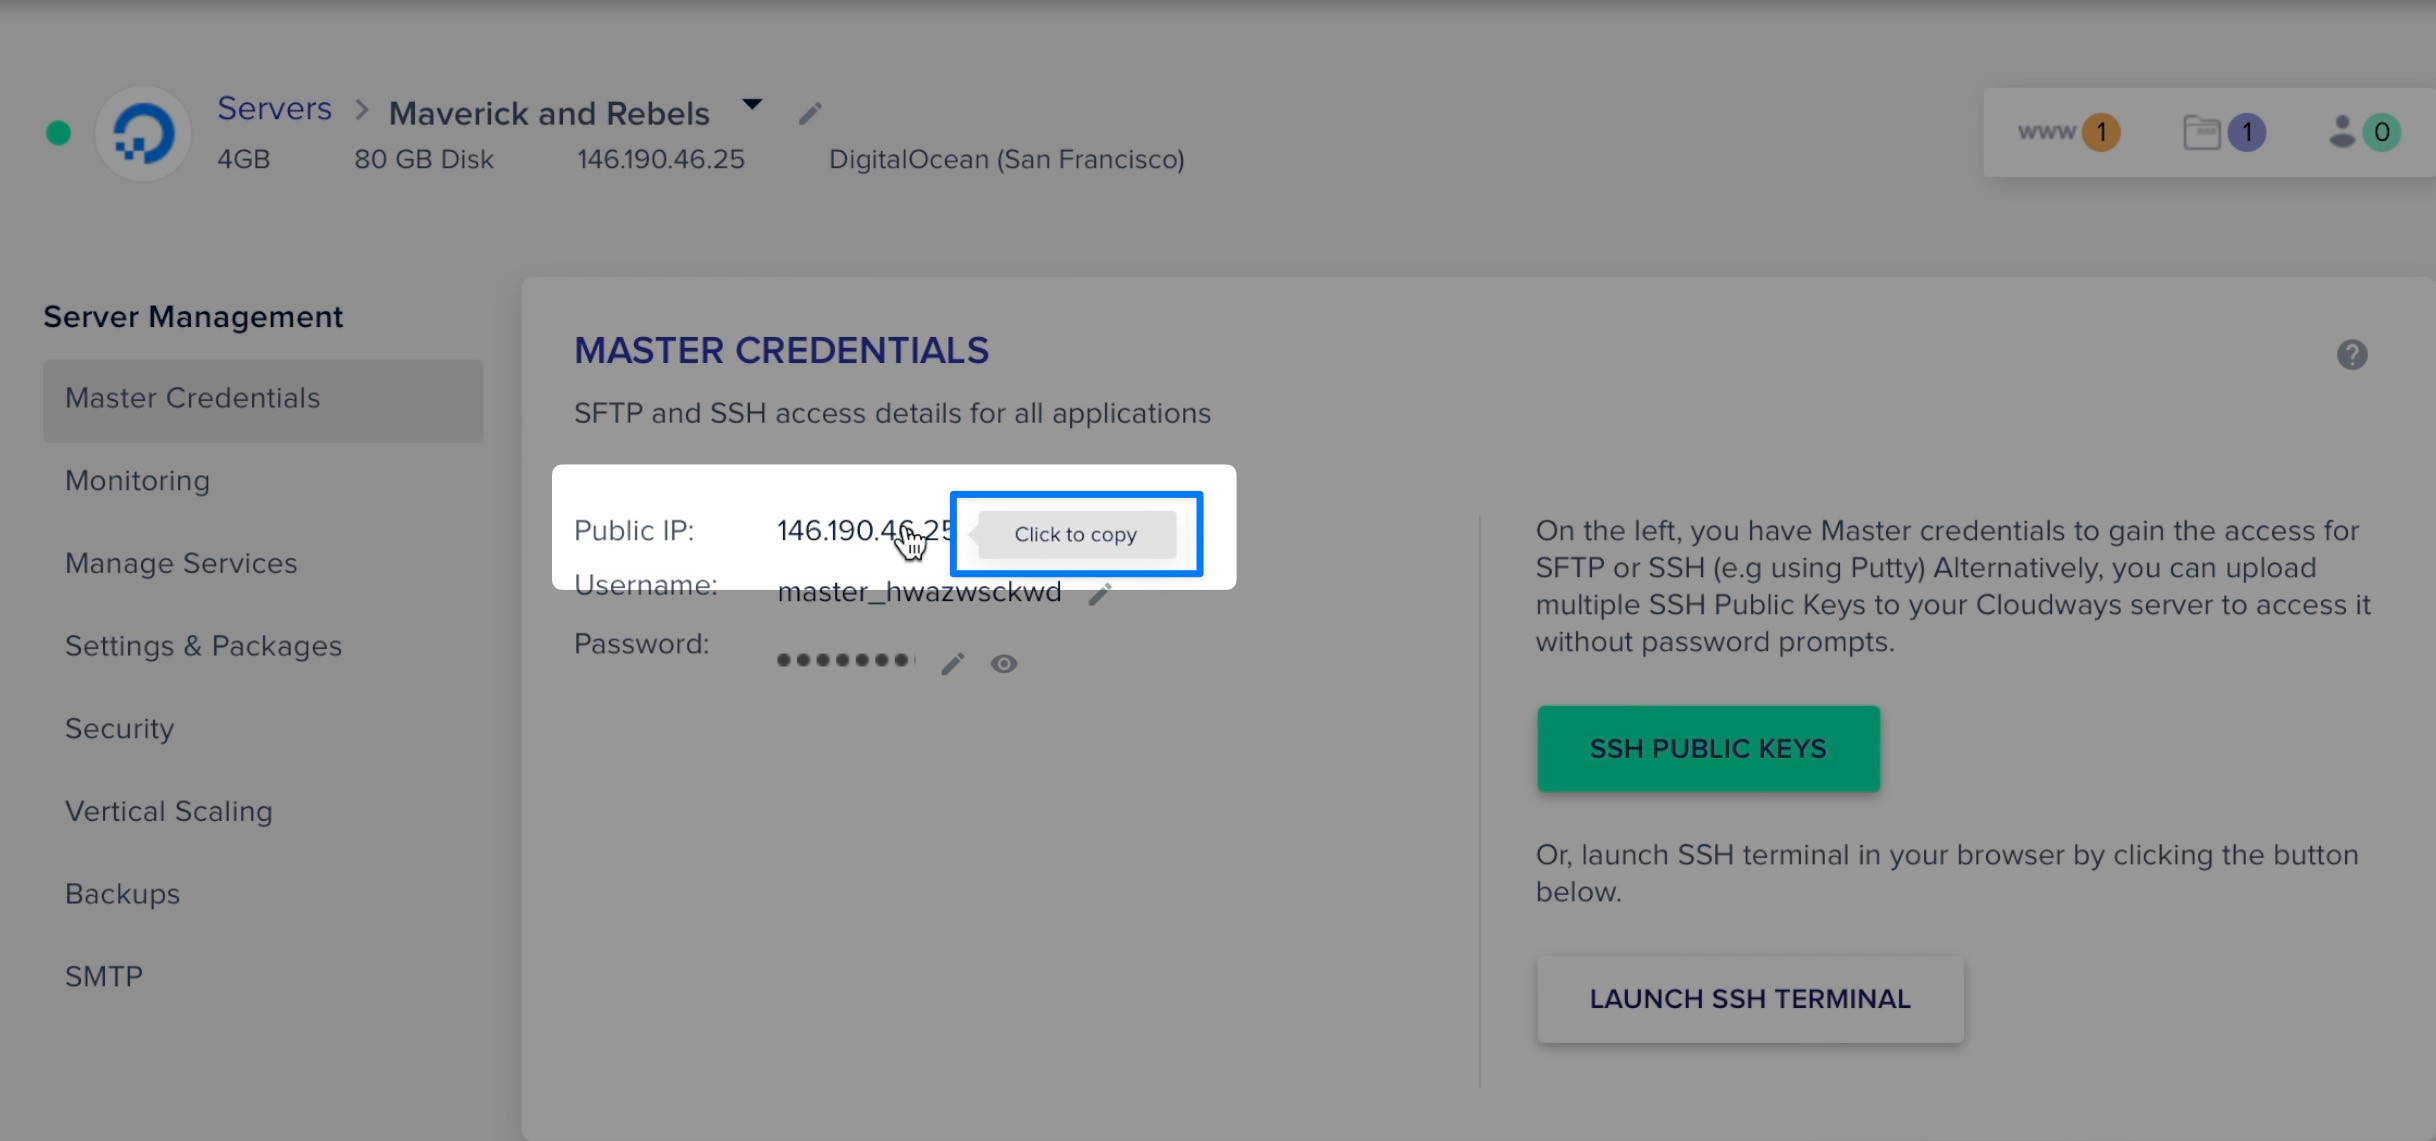
The first thing I want to do is get the public IP from my Cloudways server. Cloudways makes it super easy, click on the number, and it’s copied to the clipboard.
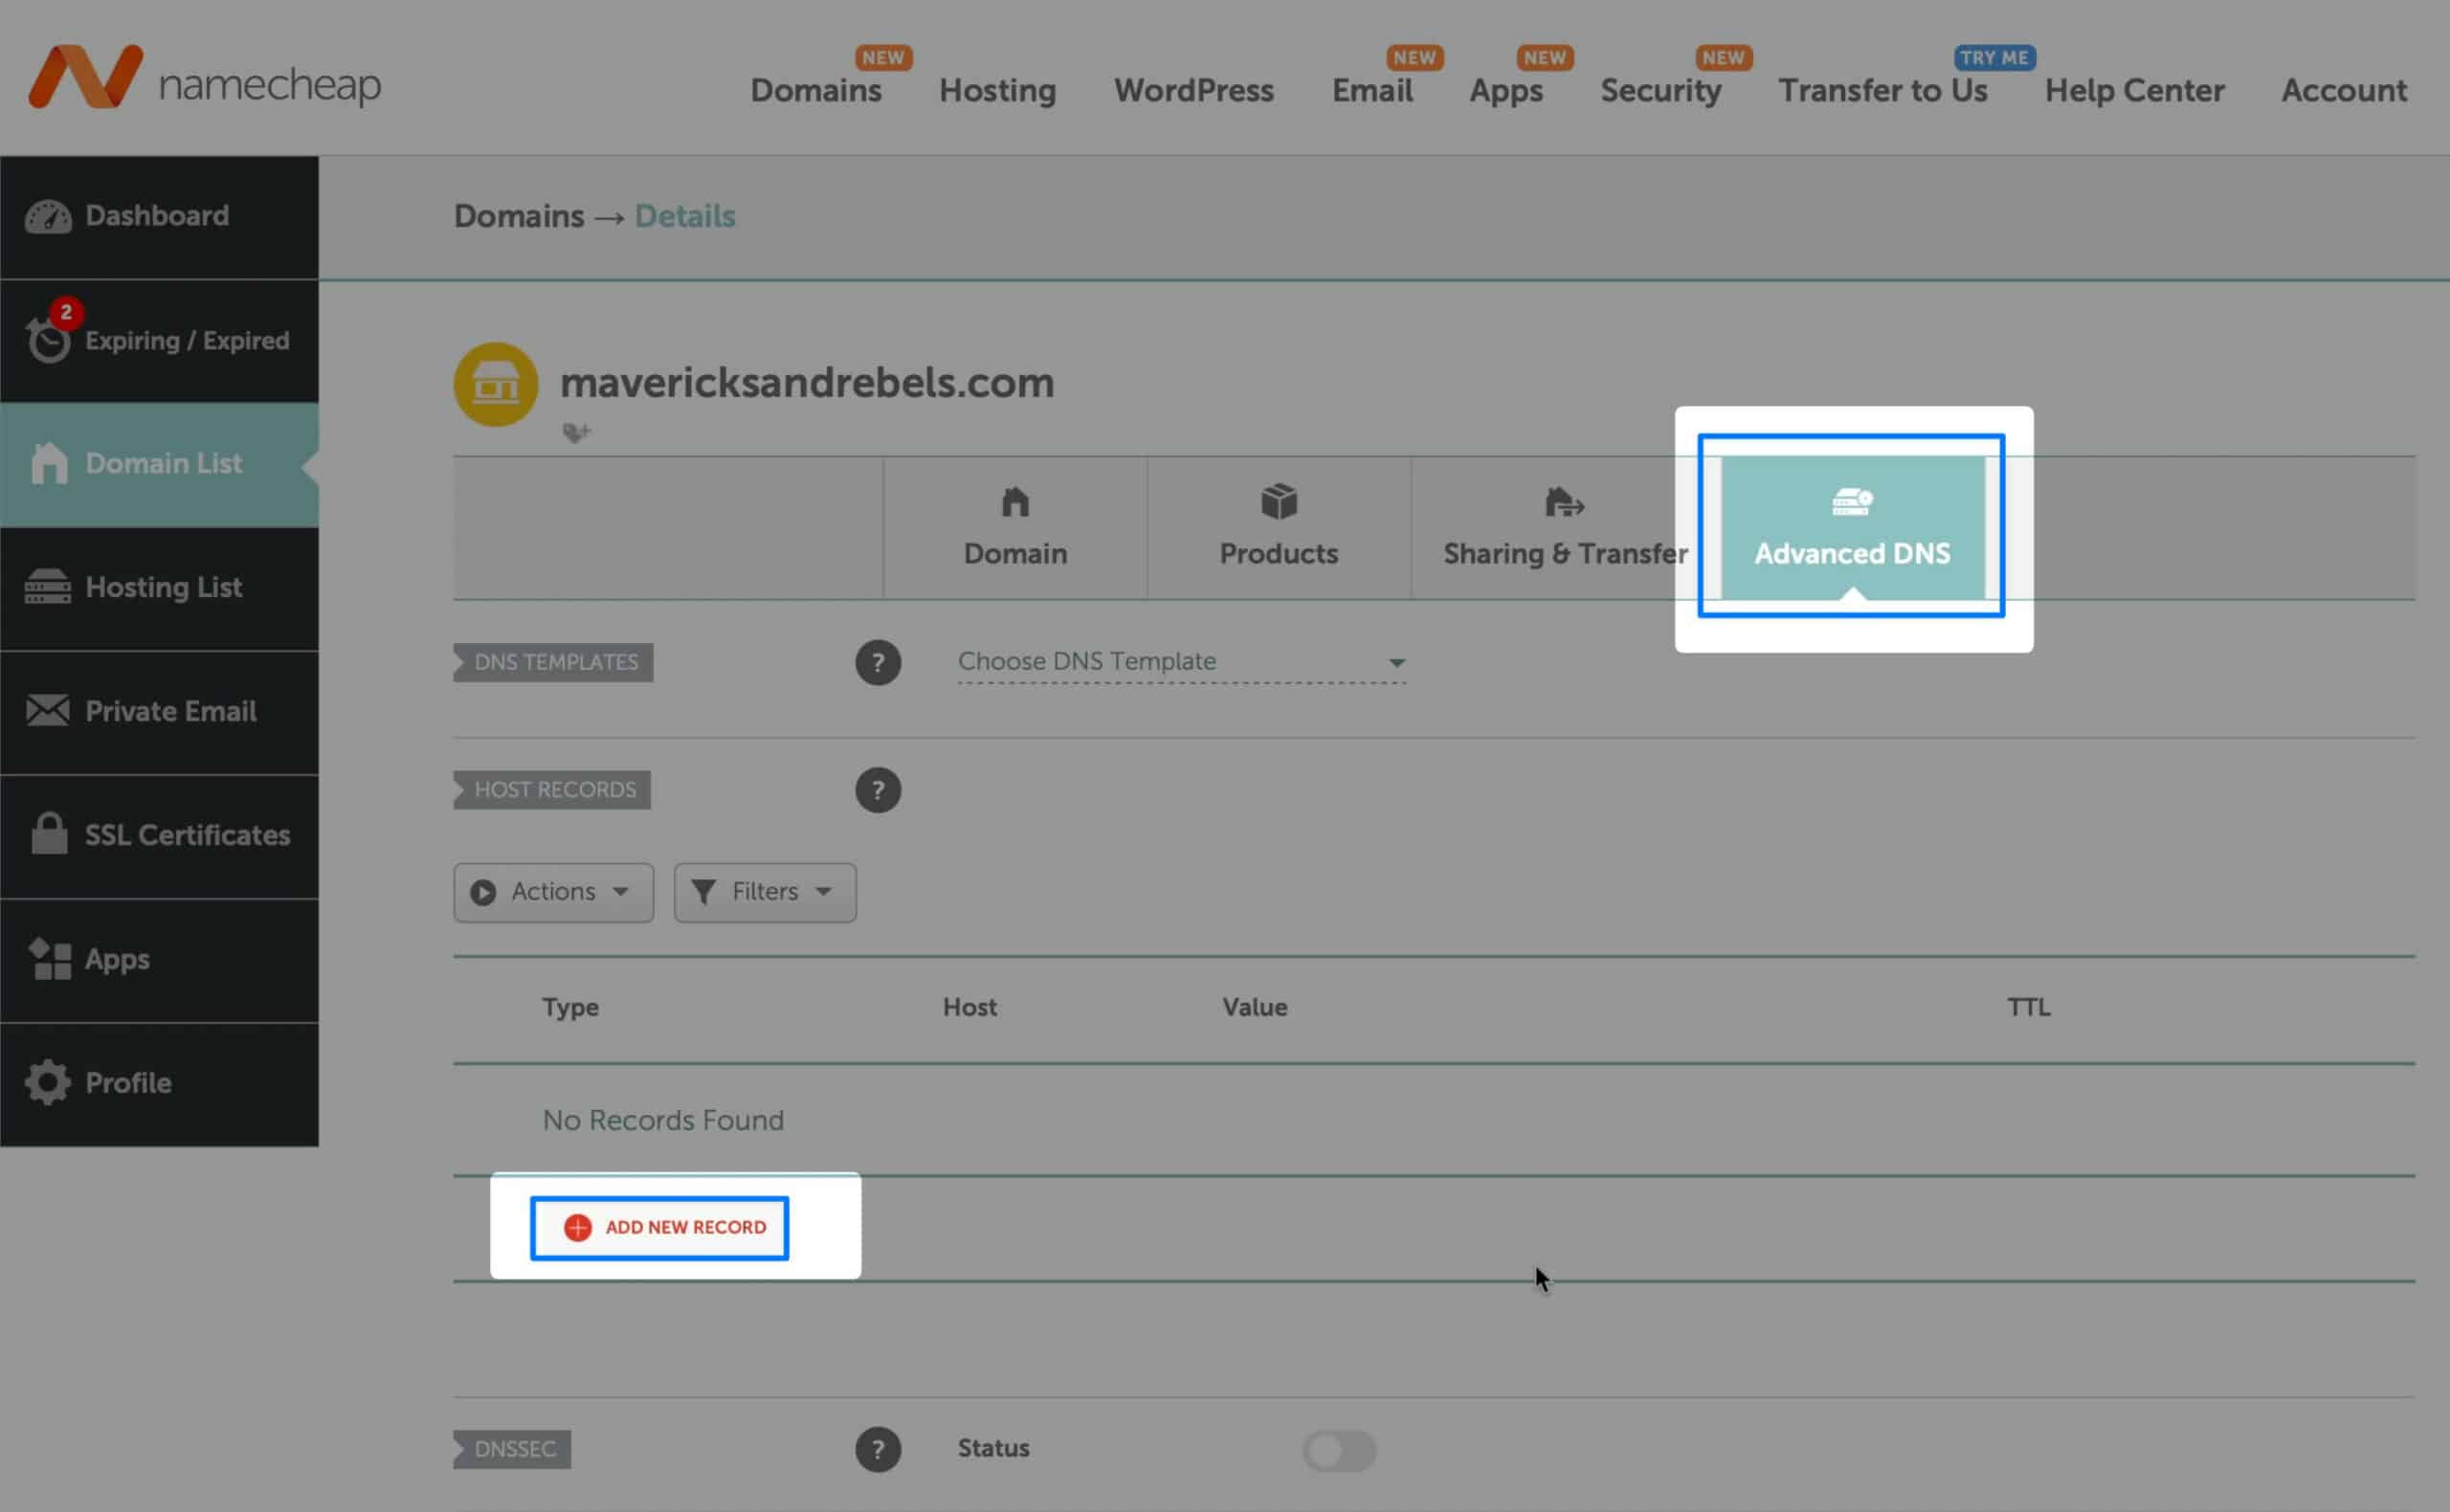
Next, go back to your domain and create an A record. Since I’m using NameCheap, I go to Advanced DNS and choose Add New Record. If you’re using a different provider, check the Cloudways docs, they have specific instructions for all of the most popular registrars.
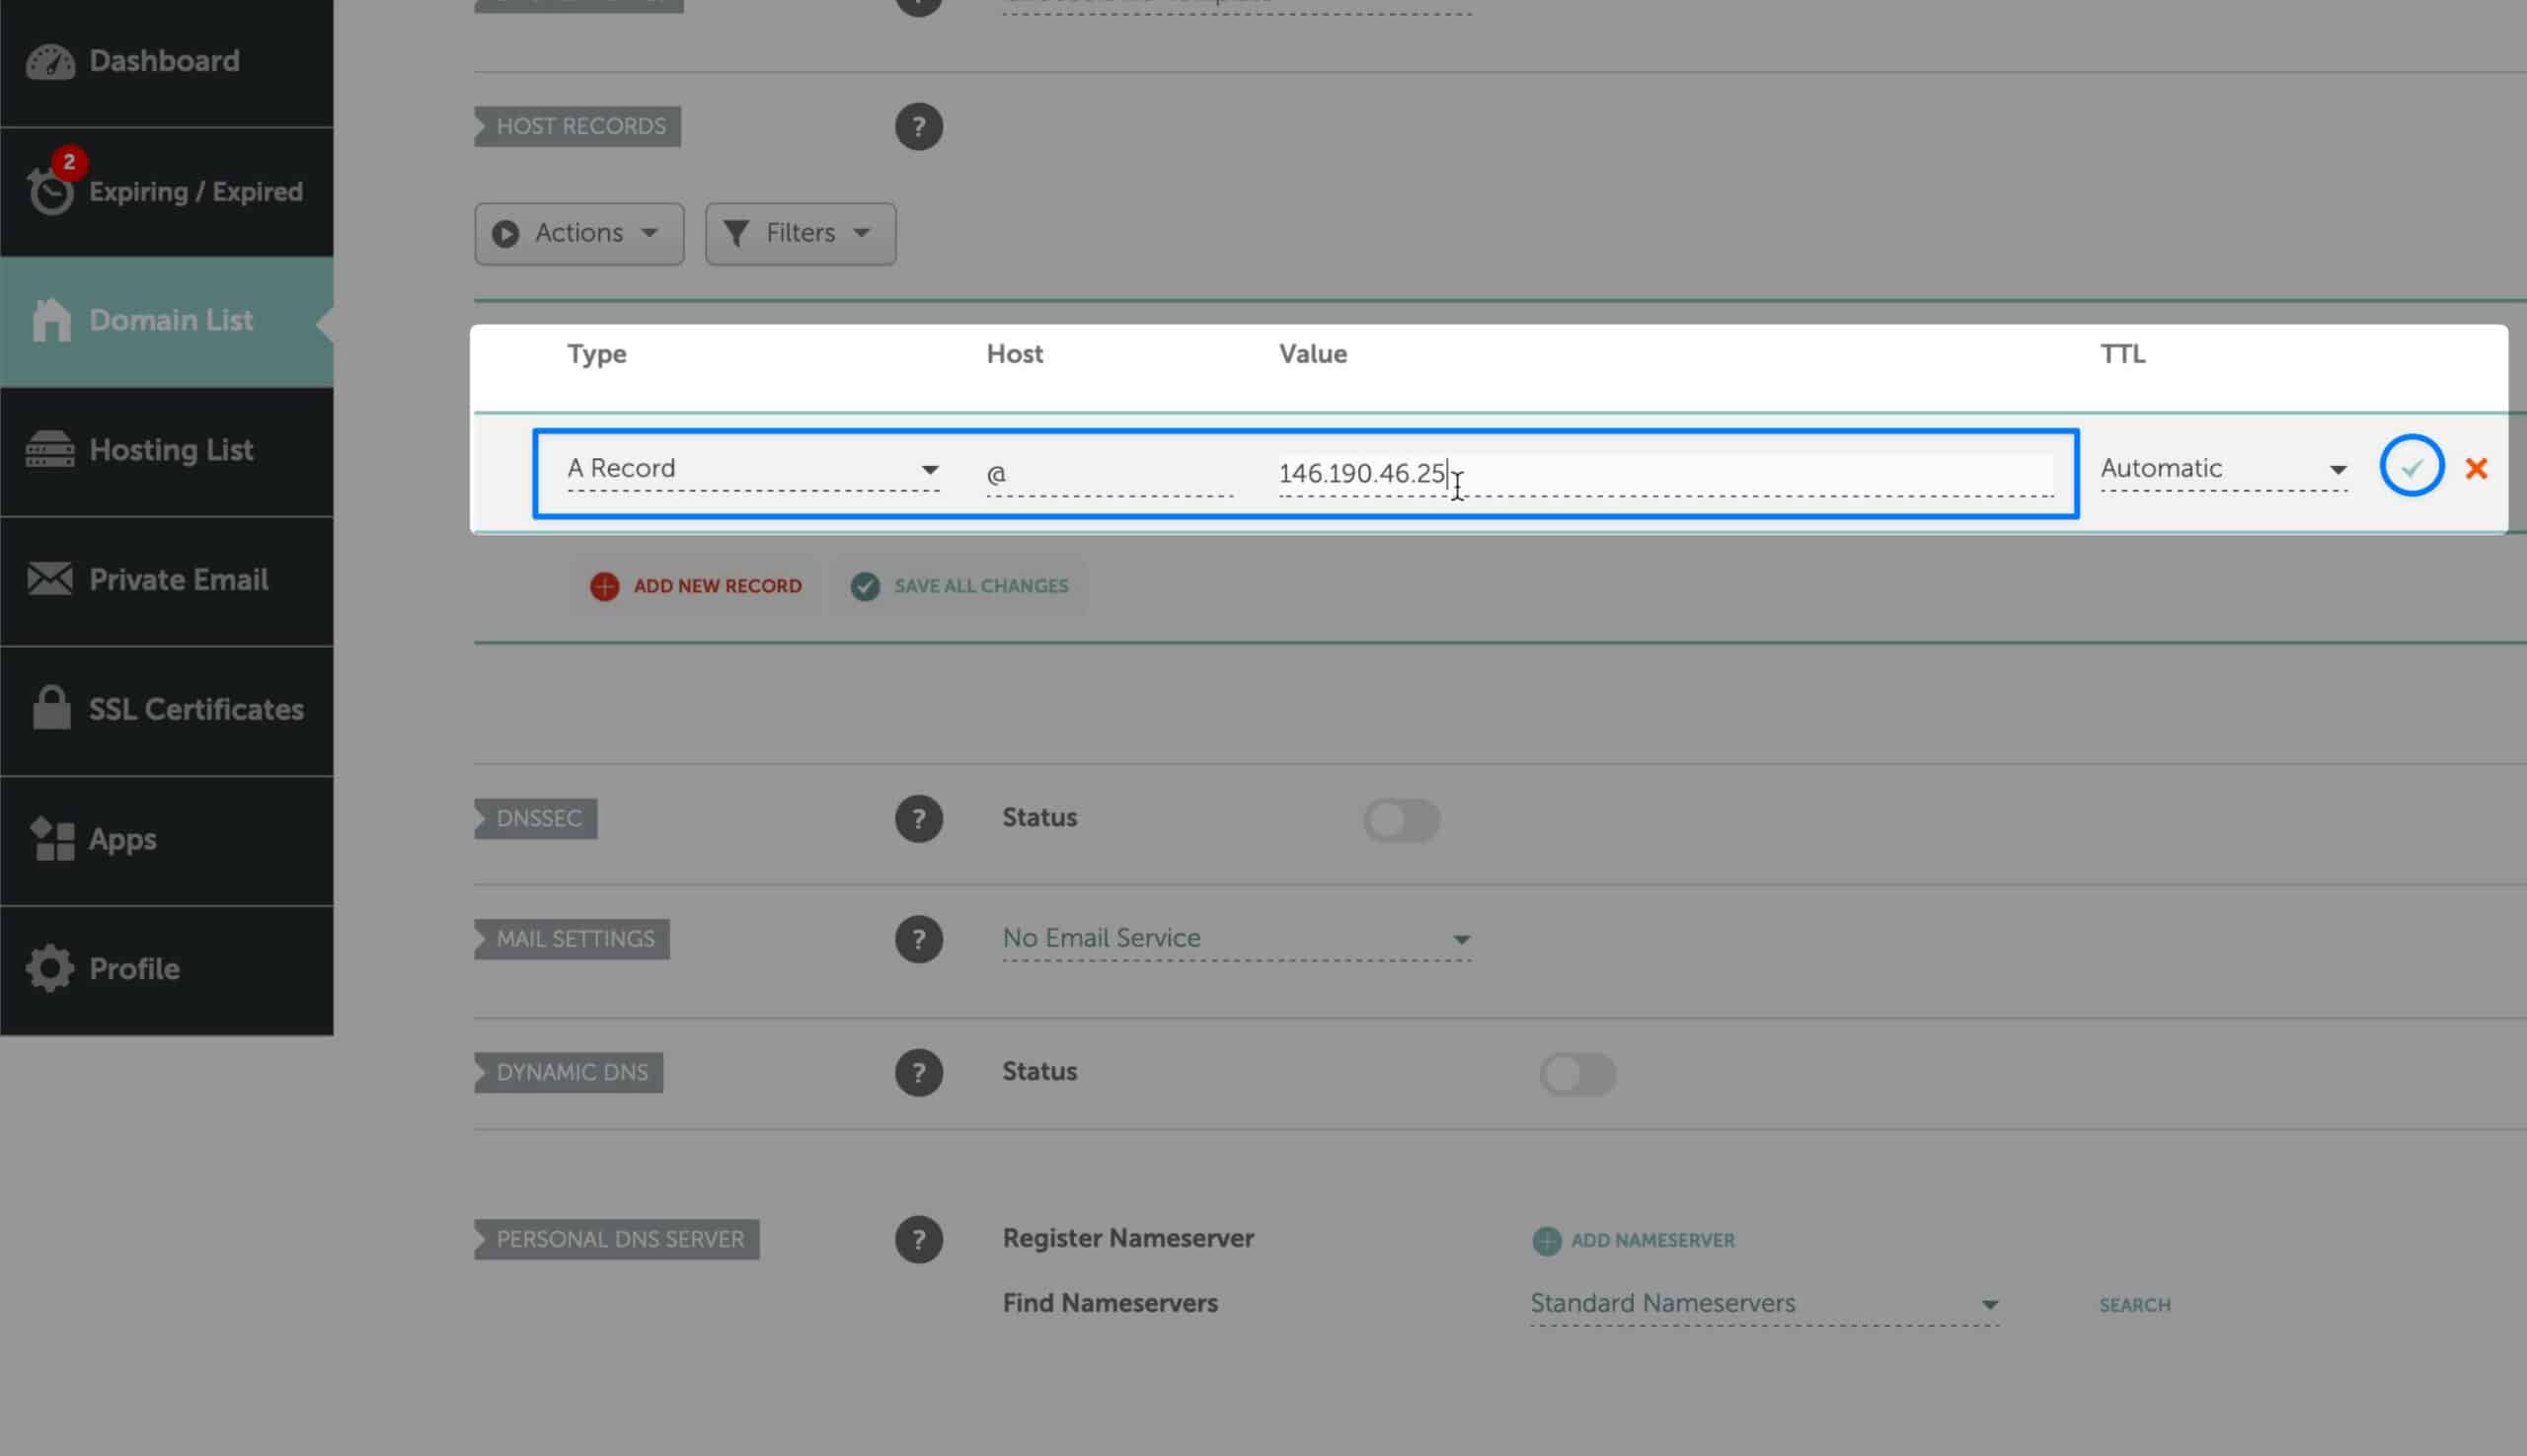
I want to create an A record. An A record points the domain name to the server’s IP address. Use the @ symbol for the host field. Then I’ll paste my IP address in the value field and click the green check.
I also want my site to work with www before the site name; I will add a CNAME record. CNAME records are redirects.
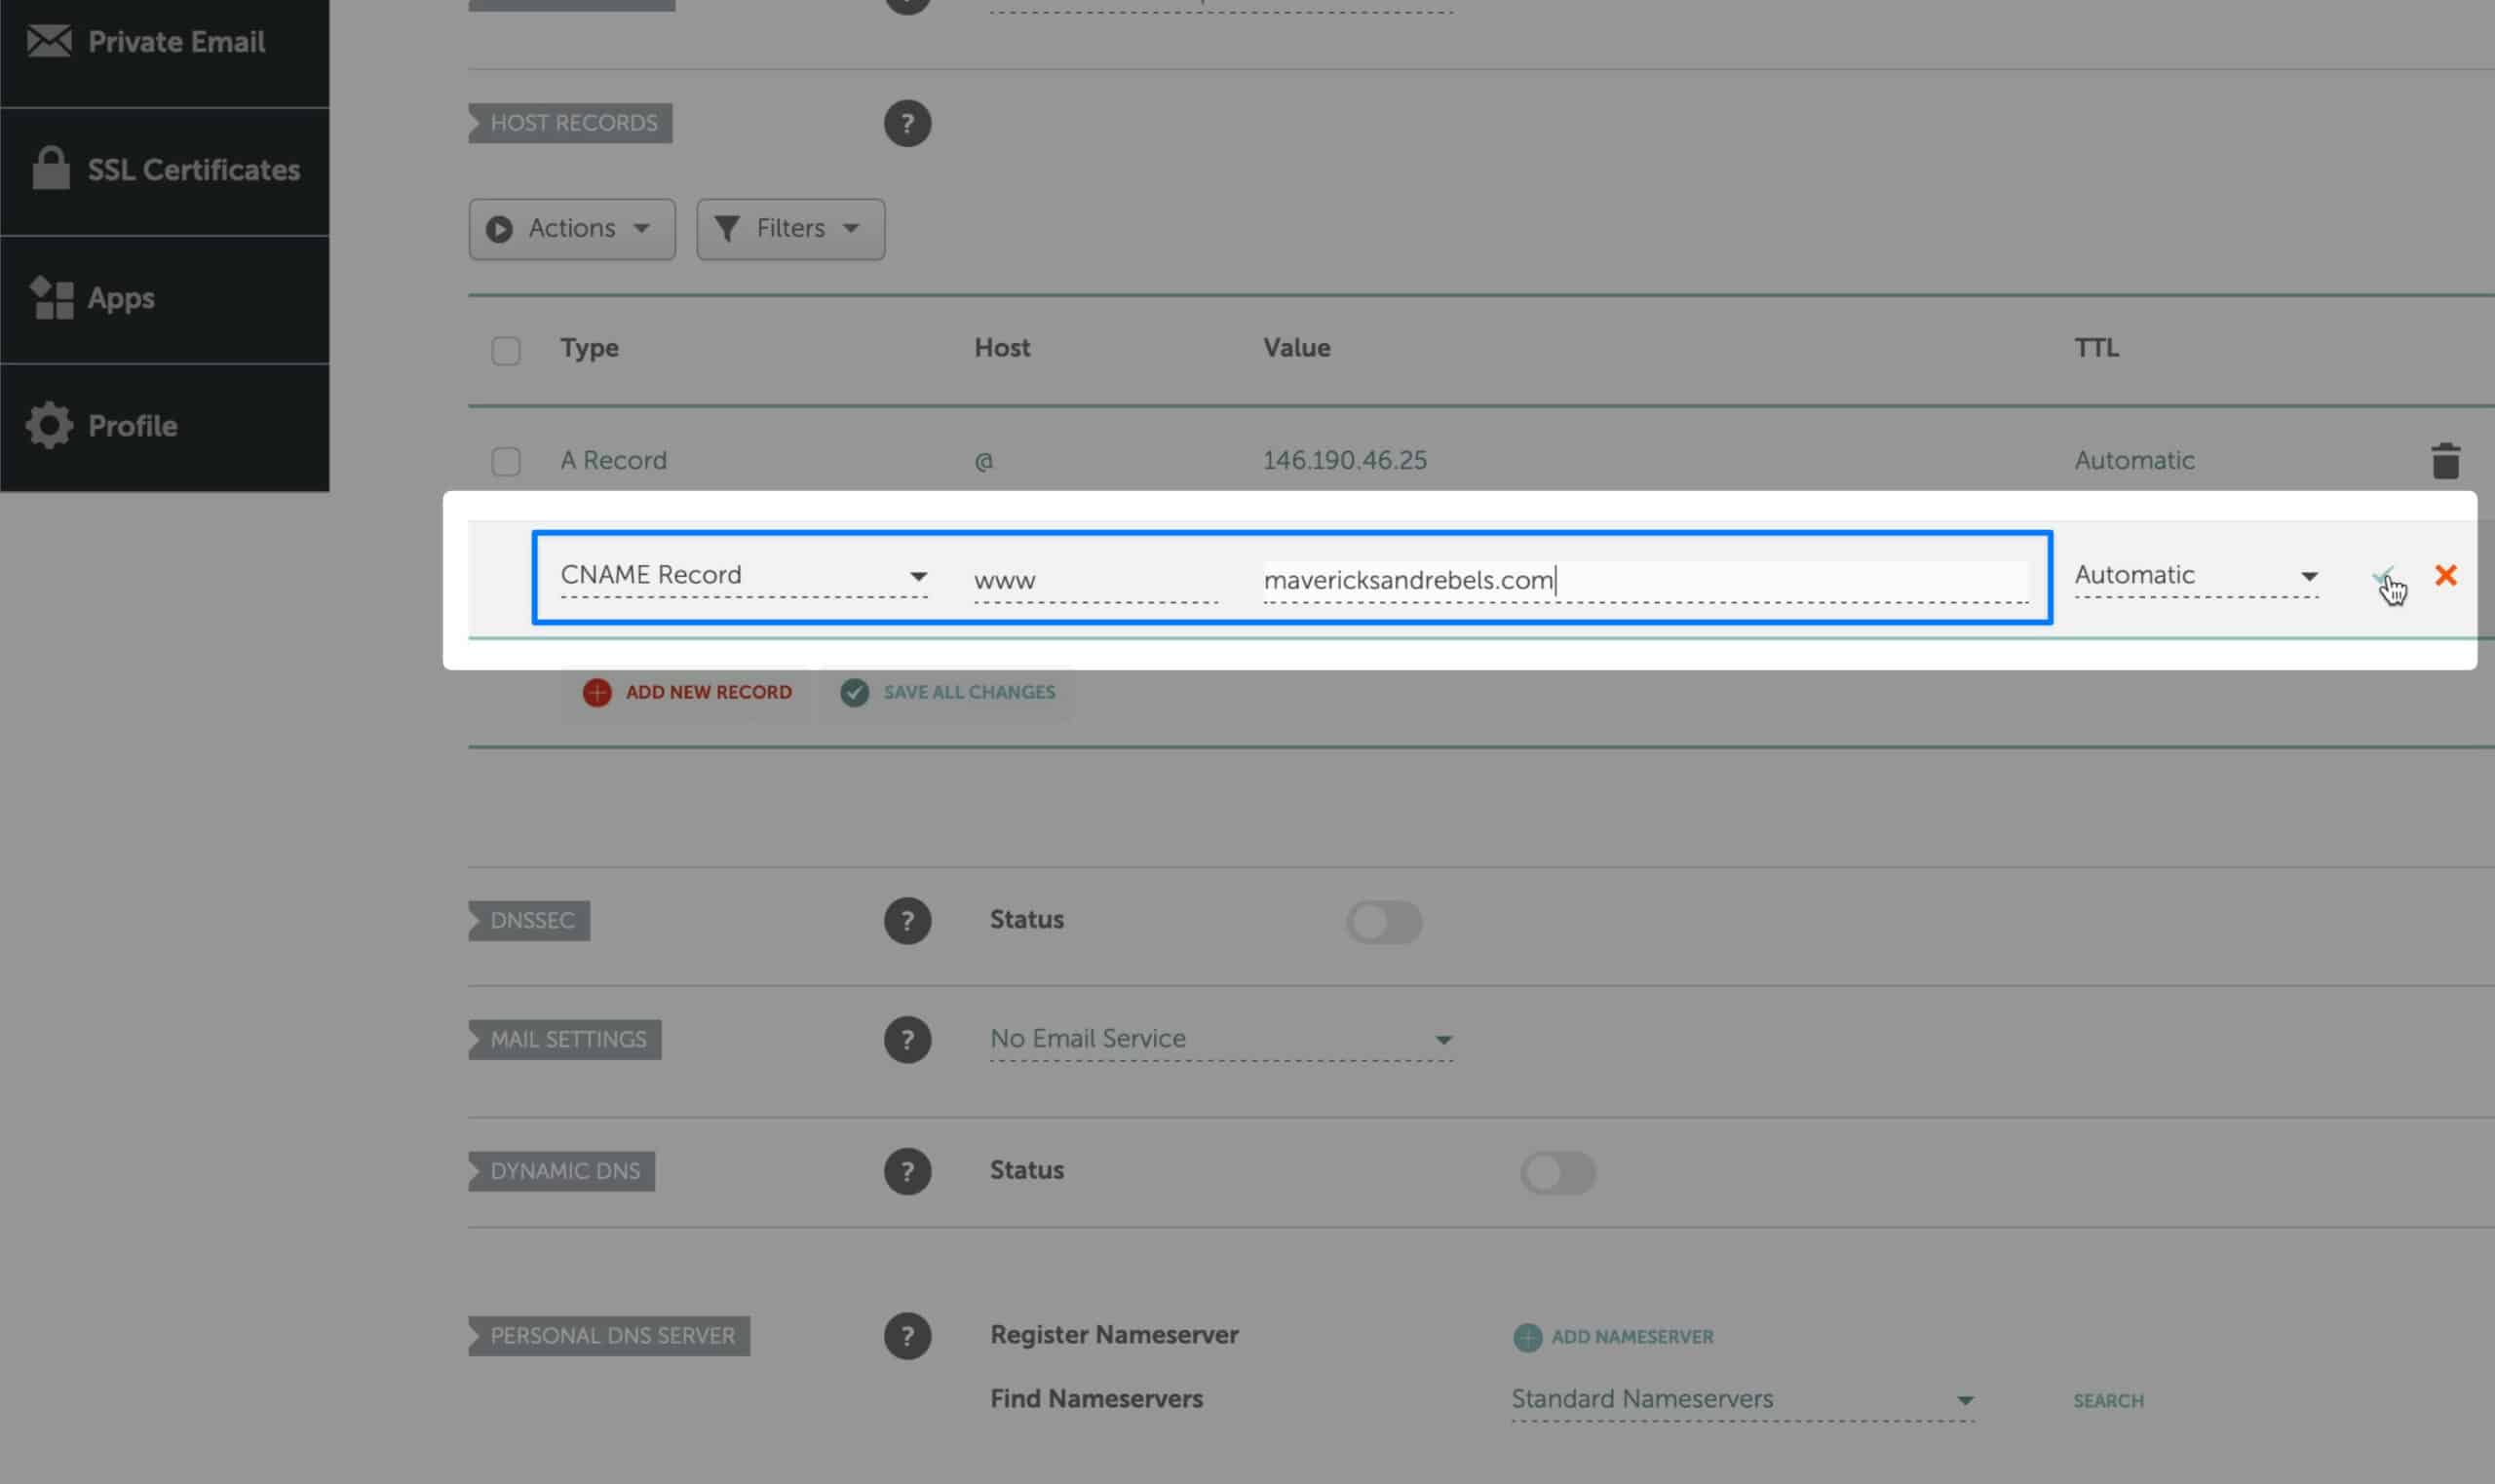
I’ll add a new CNAME record, the host will be www & the value will be your domain name. This will redirect the ‘www’ version to the non-www version.
We’re all done with DNS. Let’s head back to Cloudways to let them know what we’ve done.
Link your domain in Cloudways.
Back in Cloudways, we need to go to our application to add our new domain to the configuration.
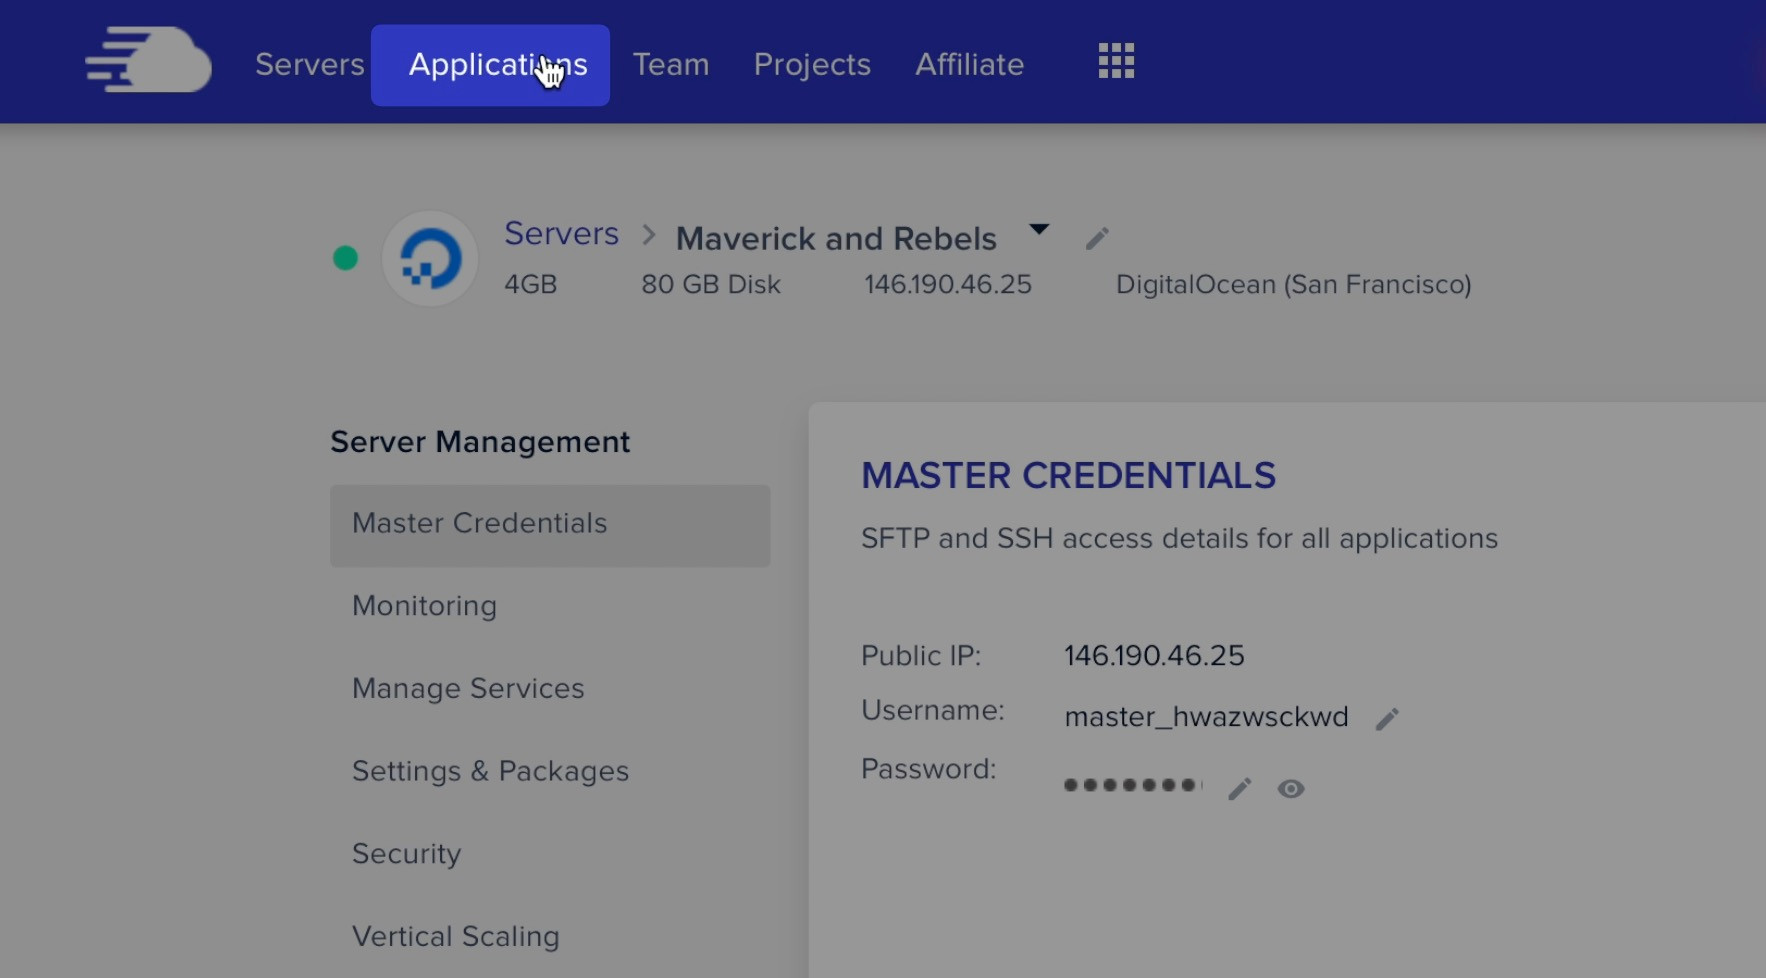
Click Applications from the top menu and then click on your new WooCommerce store application.
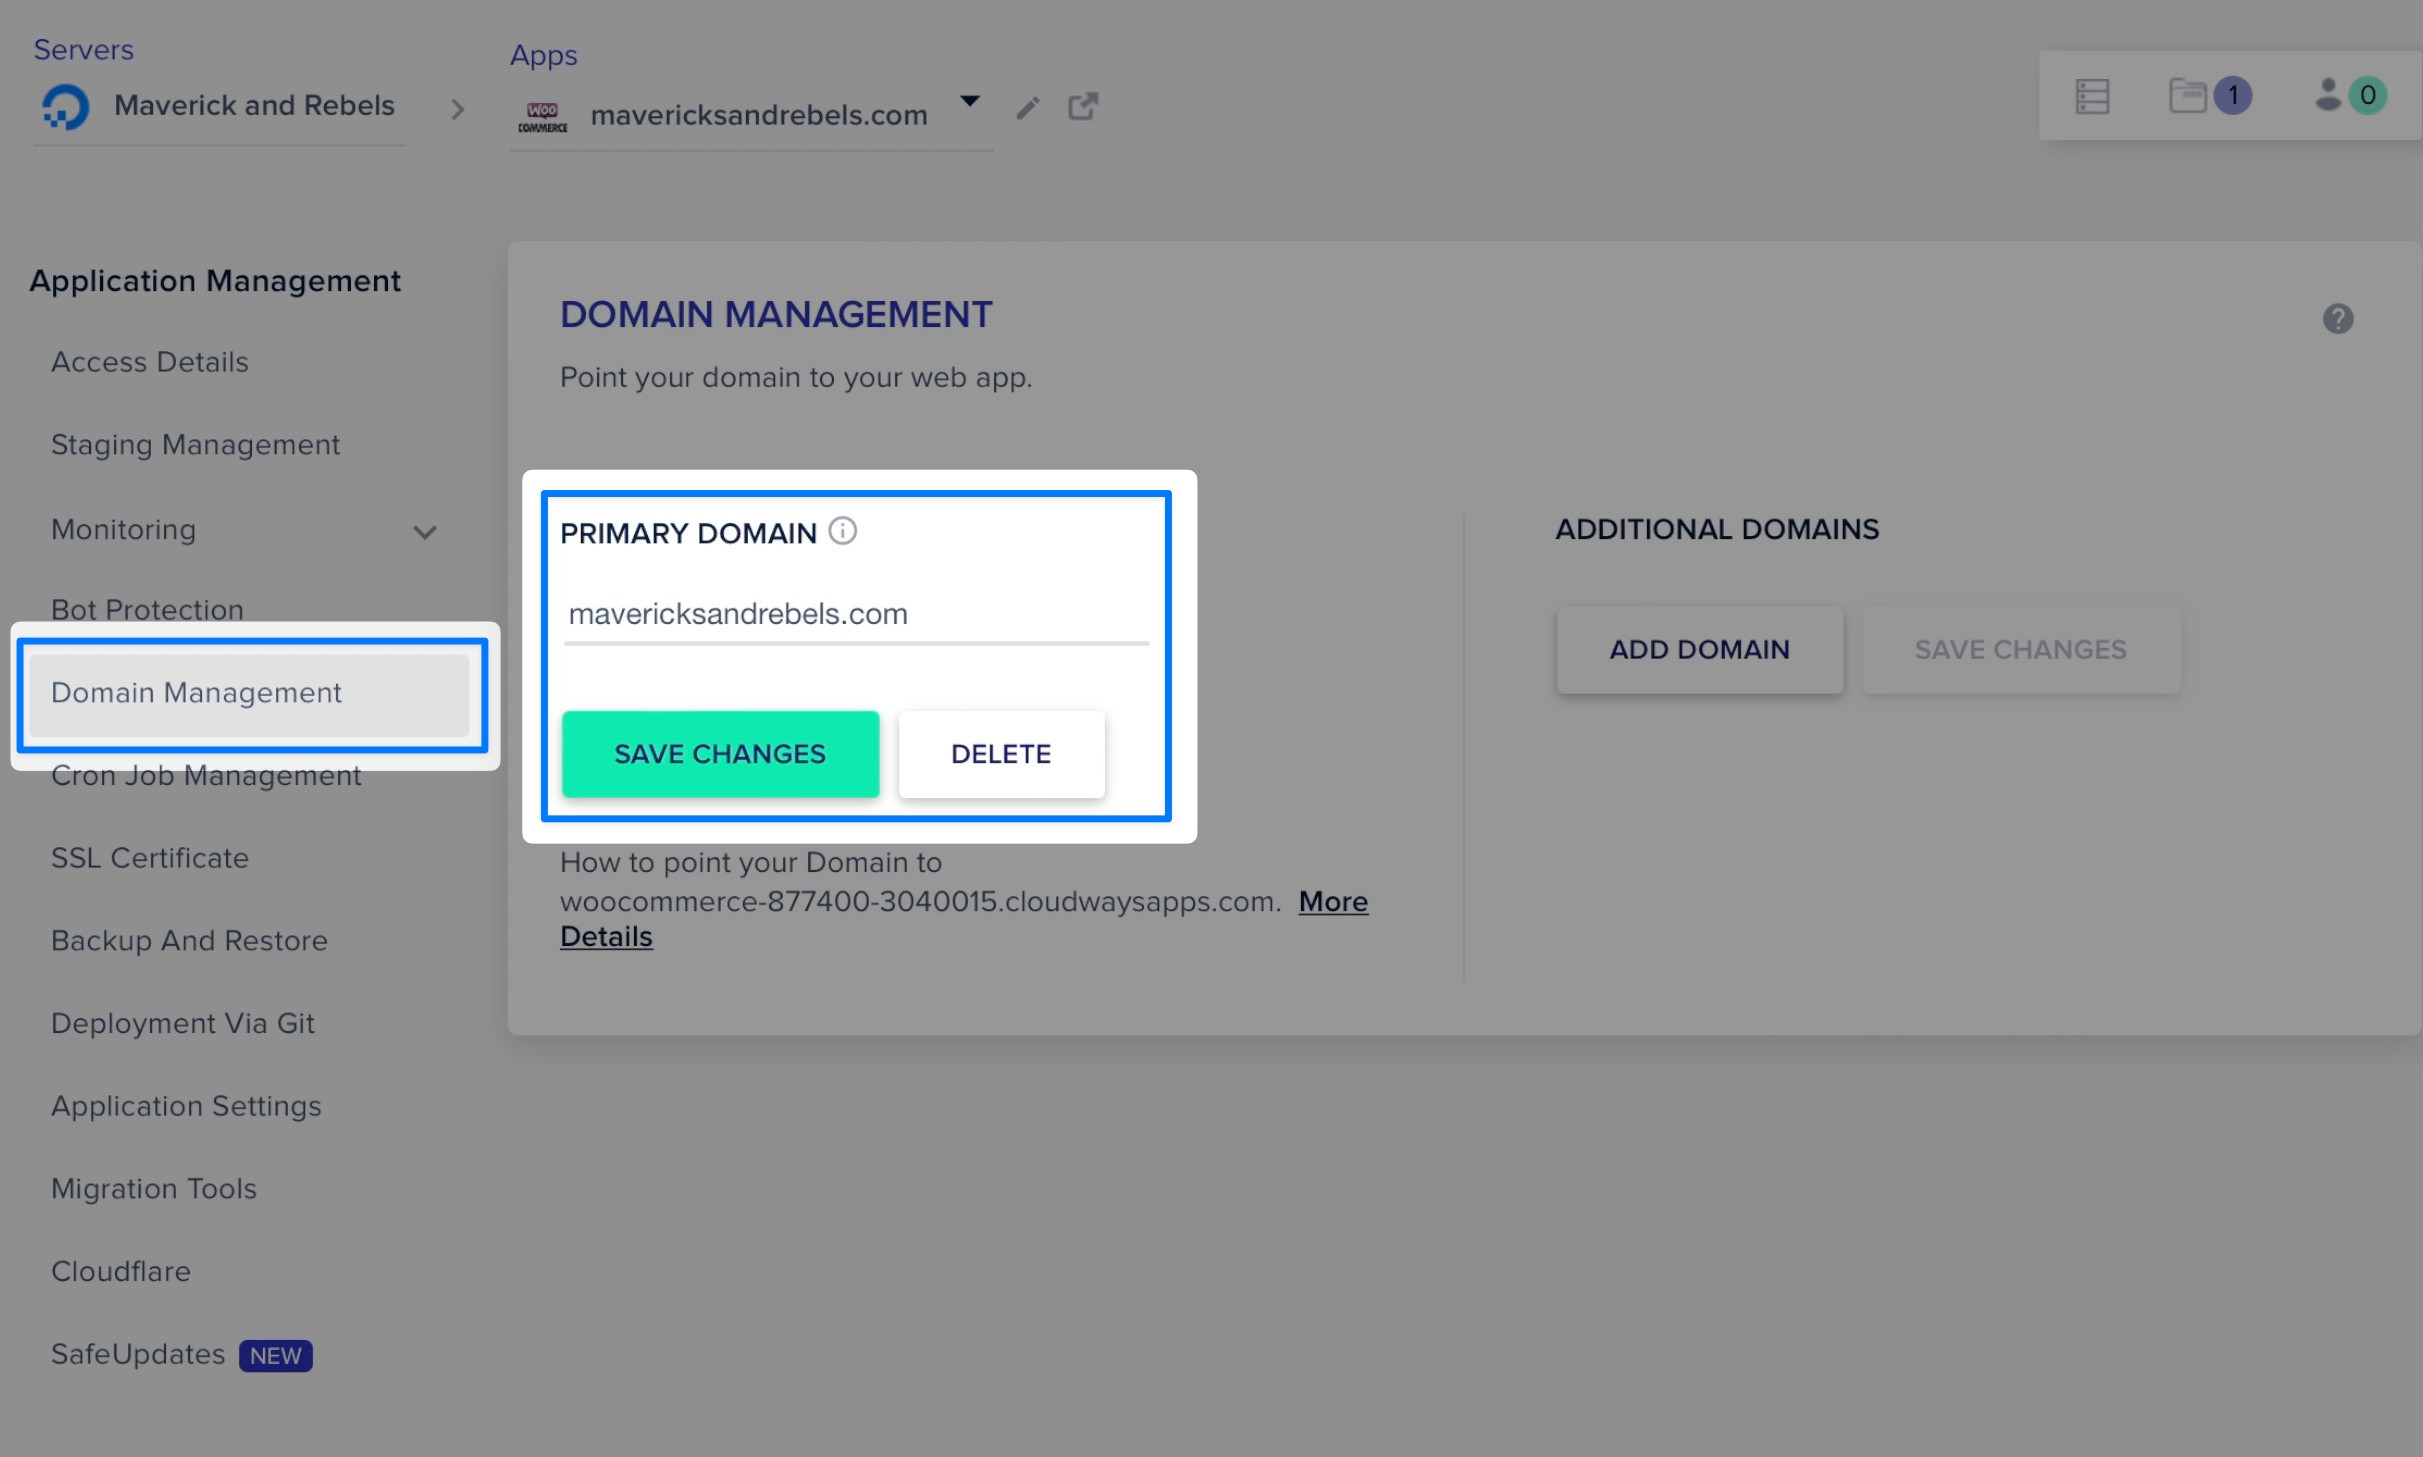
From the Application Management sidebar, choose Domain Management.
Next, enter your domain name. For me, that’s rebelsandmavericks.com. Now click Save Changes.
Issue an SSL Certificate to Your WordPress Website
Next, let’s add an SSL certificate so our site is encrypted and we have that nice padlock icon in the URL.
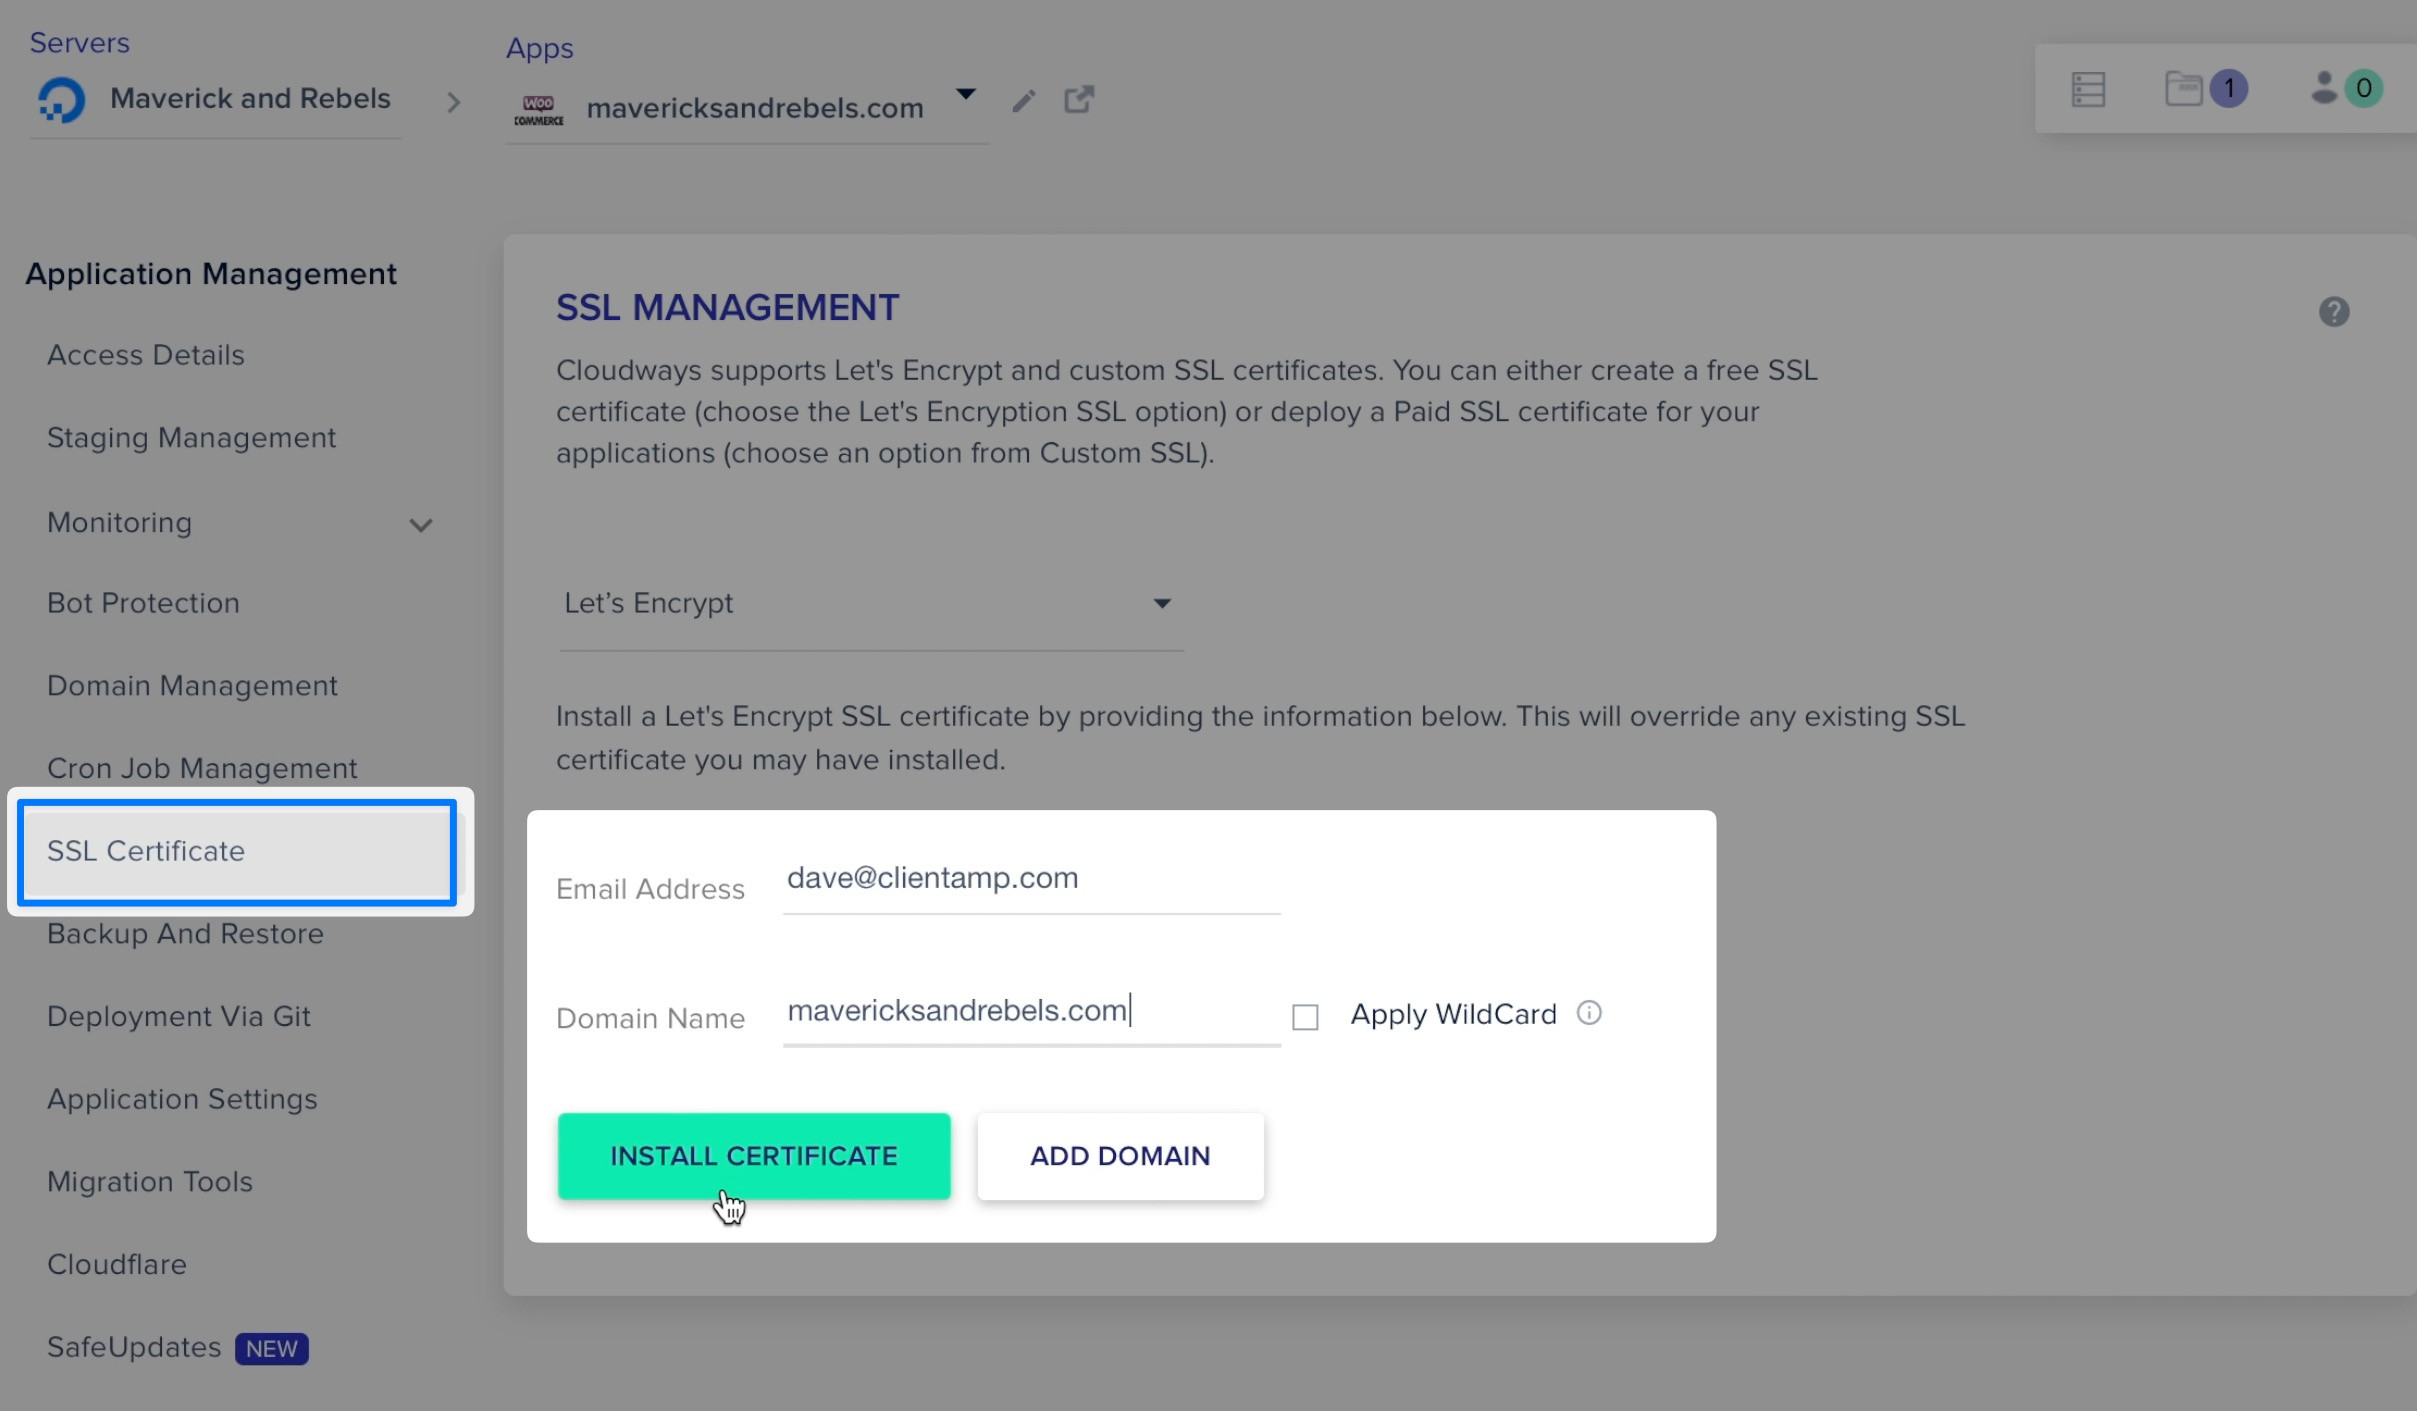
Again from the Application Management sidebar, this time, choose SSL Certificate. Enter your email address and domain name, and then click install certificate.
After this completes successfully, notice that the SSL certificate automatically renews. We won’t need to worry about SSL again.
Let’s try to visit our website for the first time.
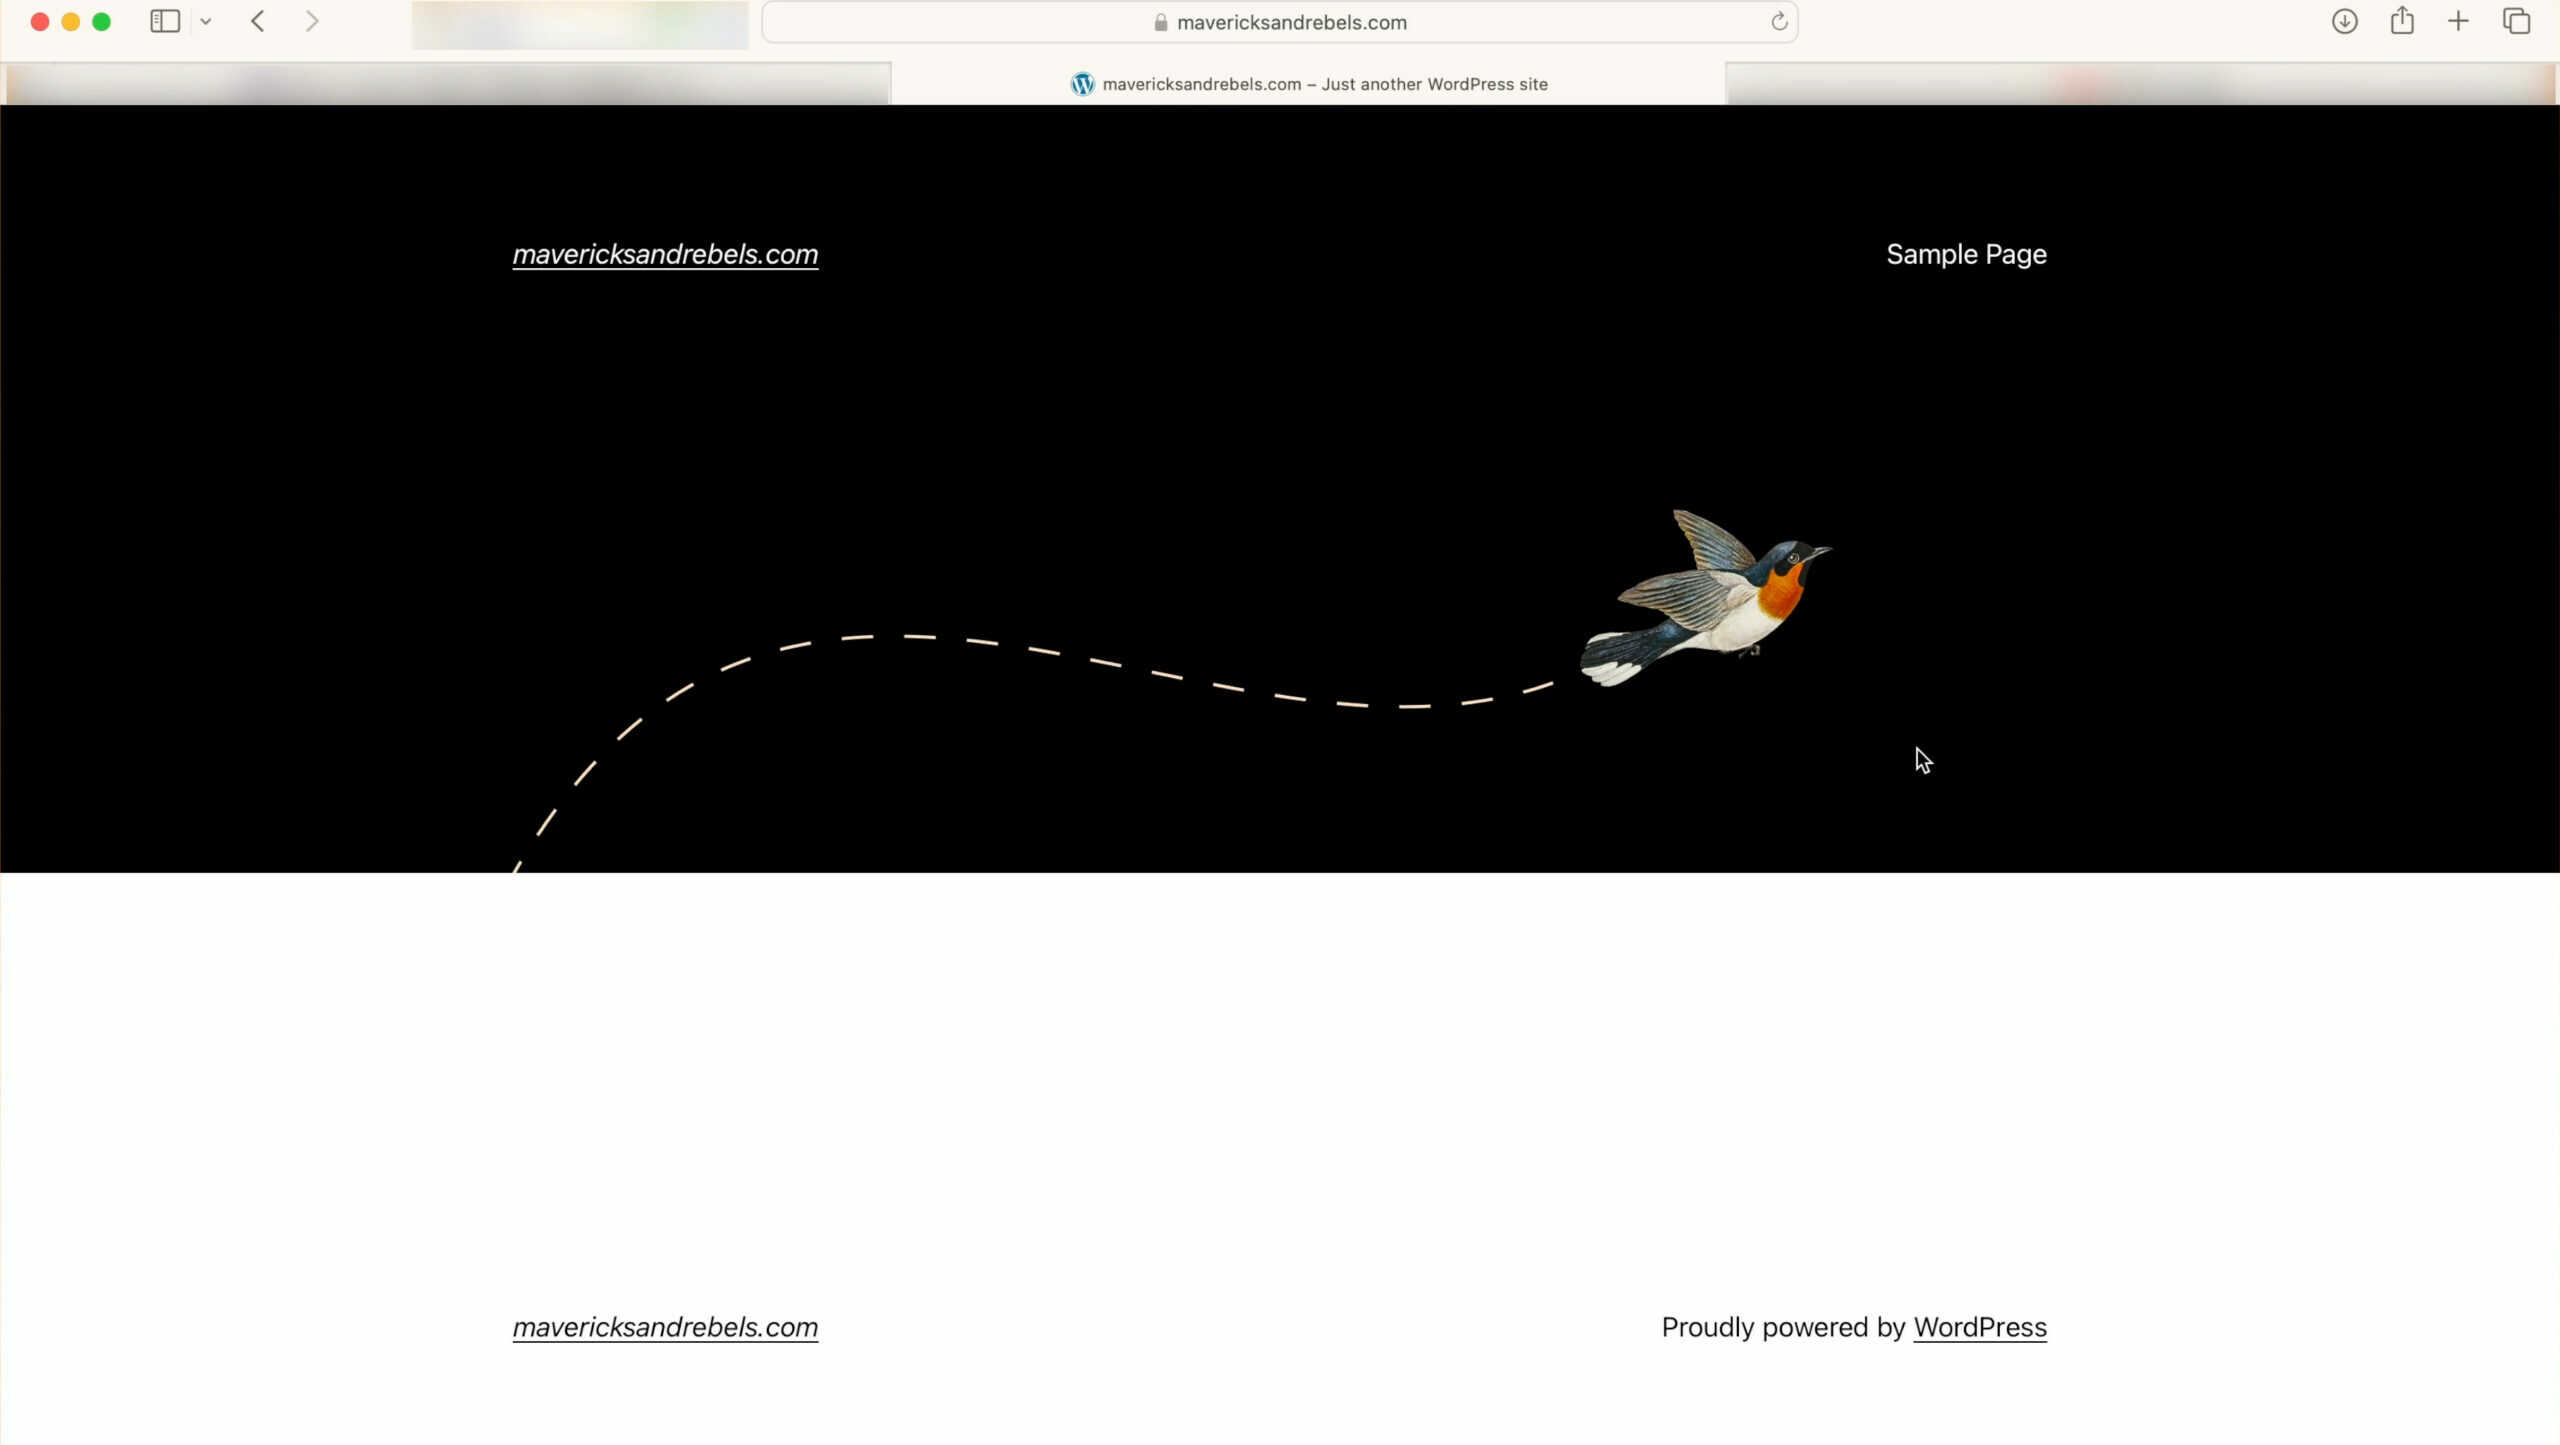
I’ll open a new tab and type mavericksandrebels.com. Bingo, look at that. The site loads with no problem. Well, there is one problem, it looks ugly. Let’s change that.
Installing Astra
If you’re already a WordPress expert, you might have a theme you like to use, and that’s great. You can use any WordPress tools you’d like on Cloudways.
I think
To get your free
You’ll see the
I’ve already got
Logging Into WordPress For The First Time
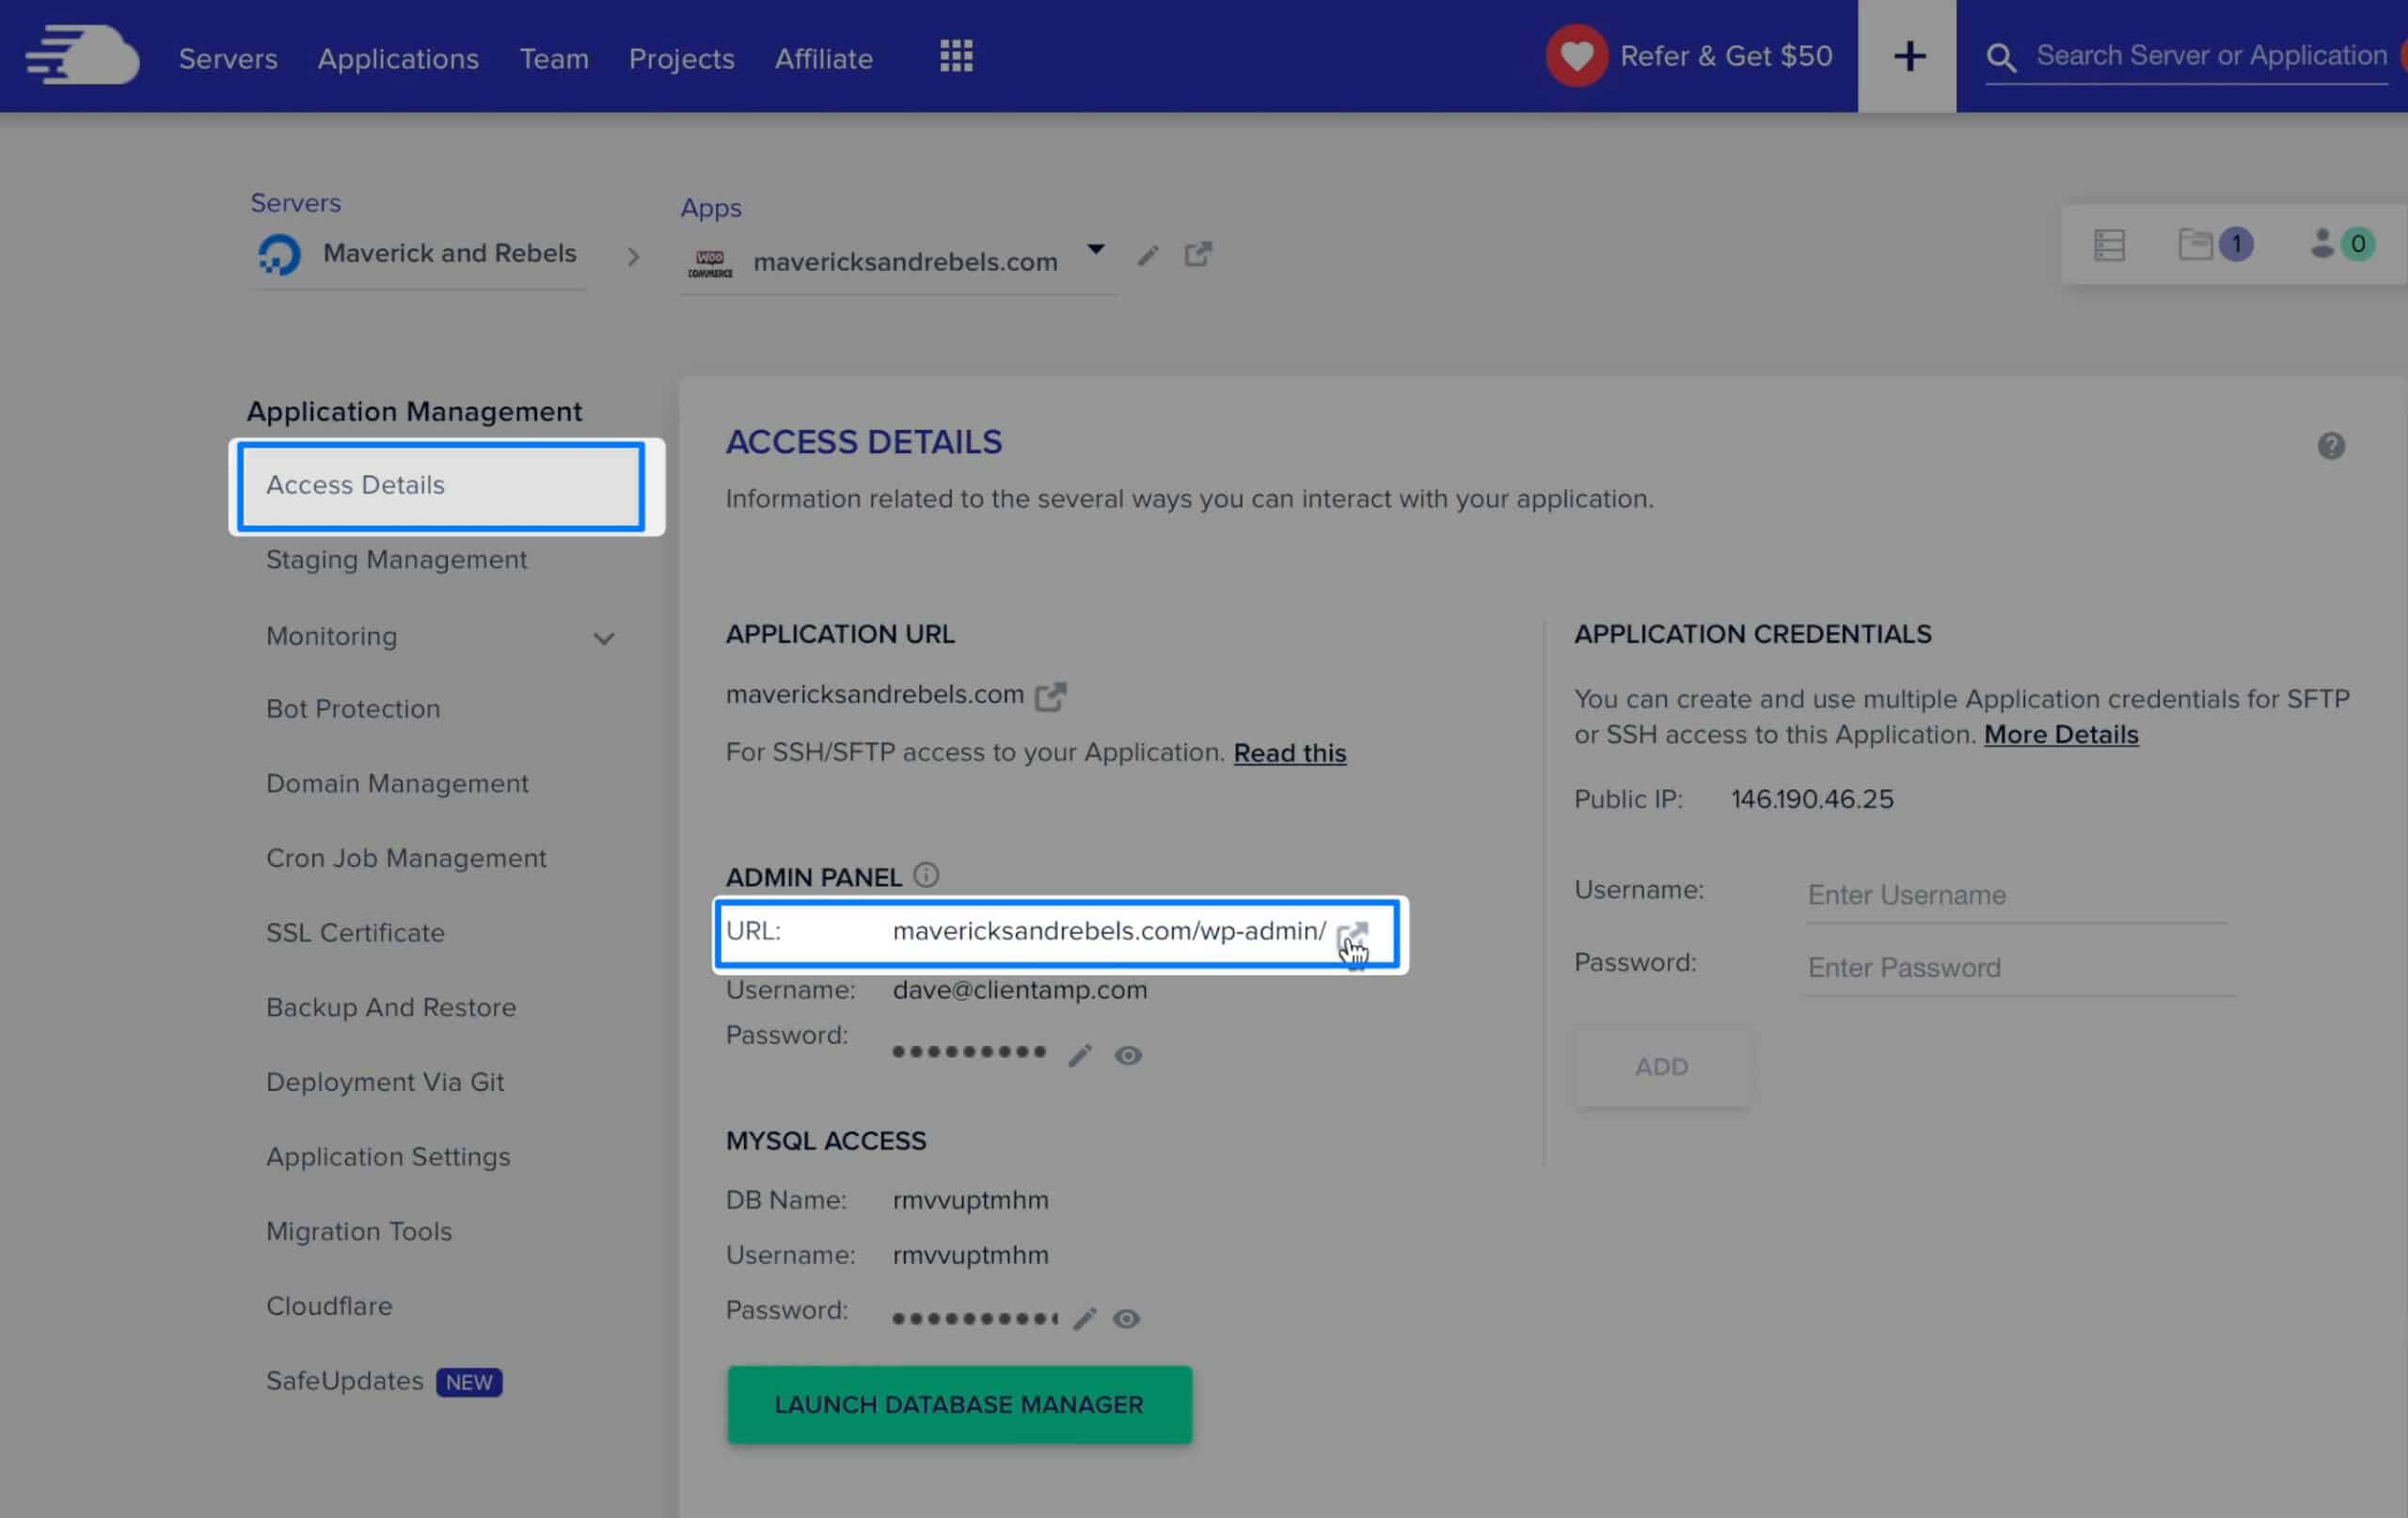
From Cloudways, in the Application Management sidebar, you’ll click Access Details. You’ll see a link to log in to your Website’s Administration dashboard.
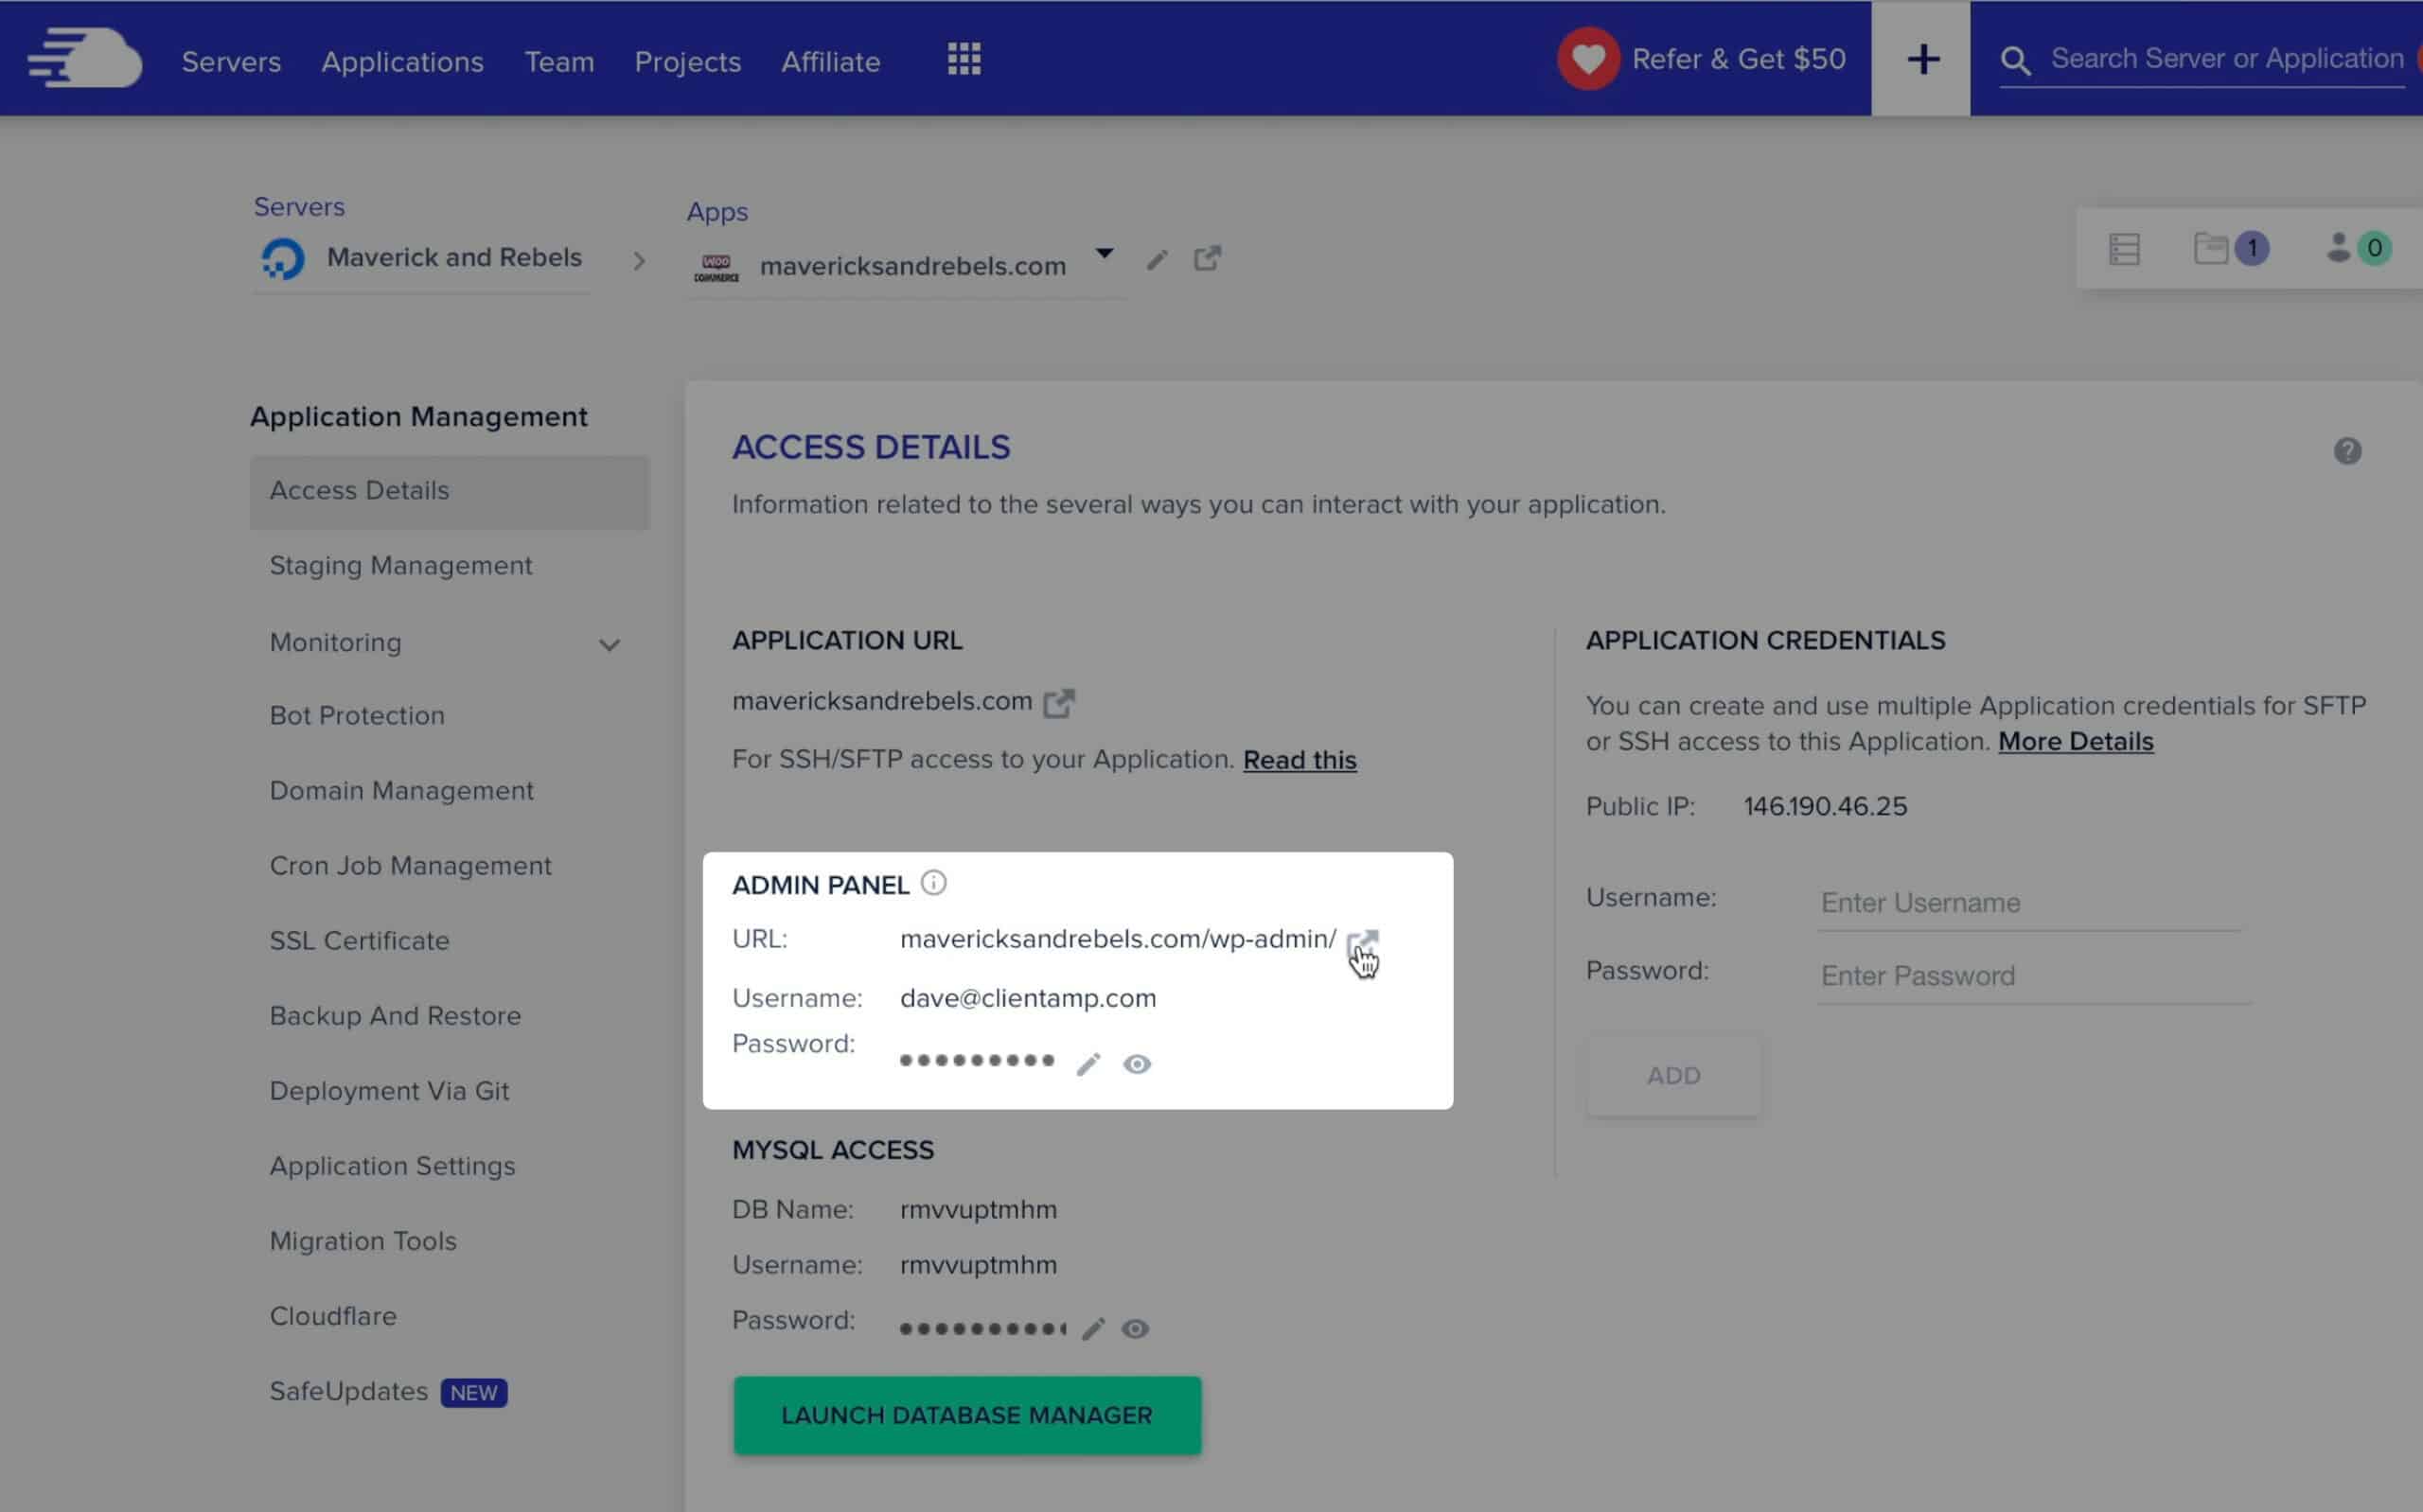
Under Admin Panel, click to copy your password, then click on the URL to open the login screen.
Type the email address as the login, and paste in your password.
Activating the Astra Theme
Now that we’re inside WordPress for the first time. Let’s activate the
By default, Cloudways installs the Storefront theme for WooCommerce sites. Storefront is a good theme, but I prefer the look and speed of
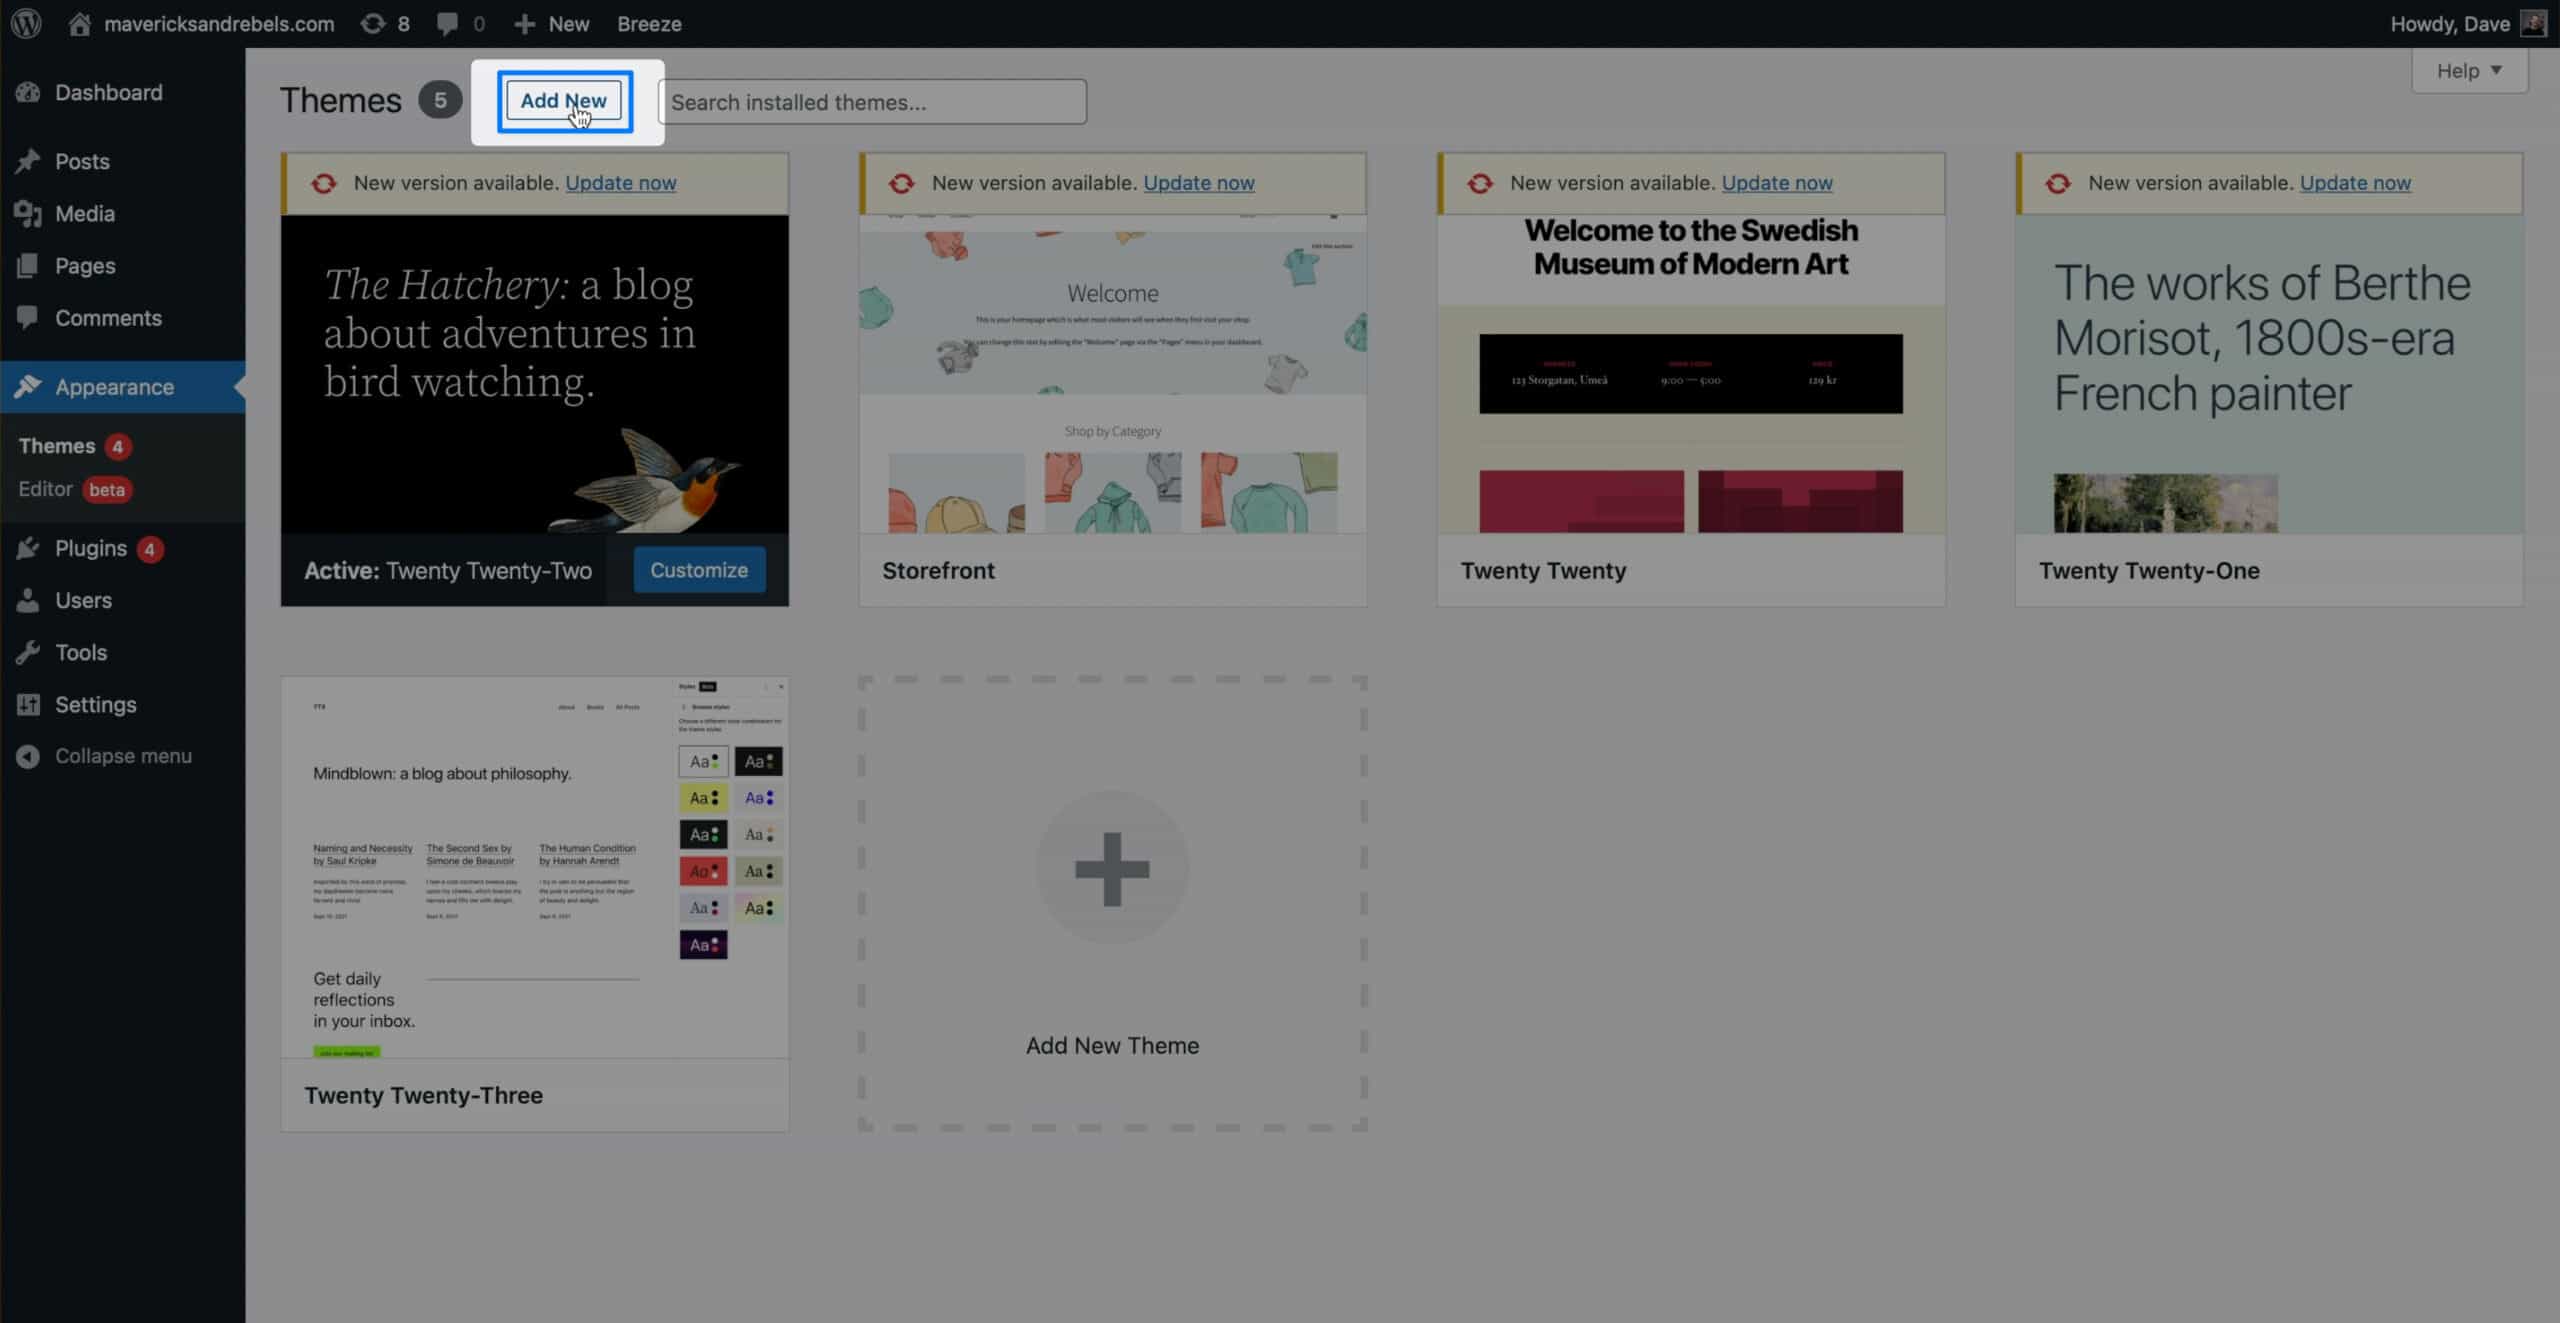

Click “Add New” at the top of the screen. Search for
Click on the home icon above to view your store. It’s not too impressive yet. Let’s get
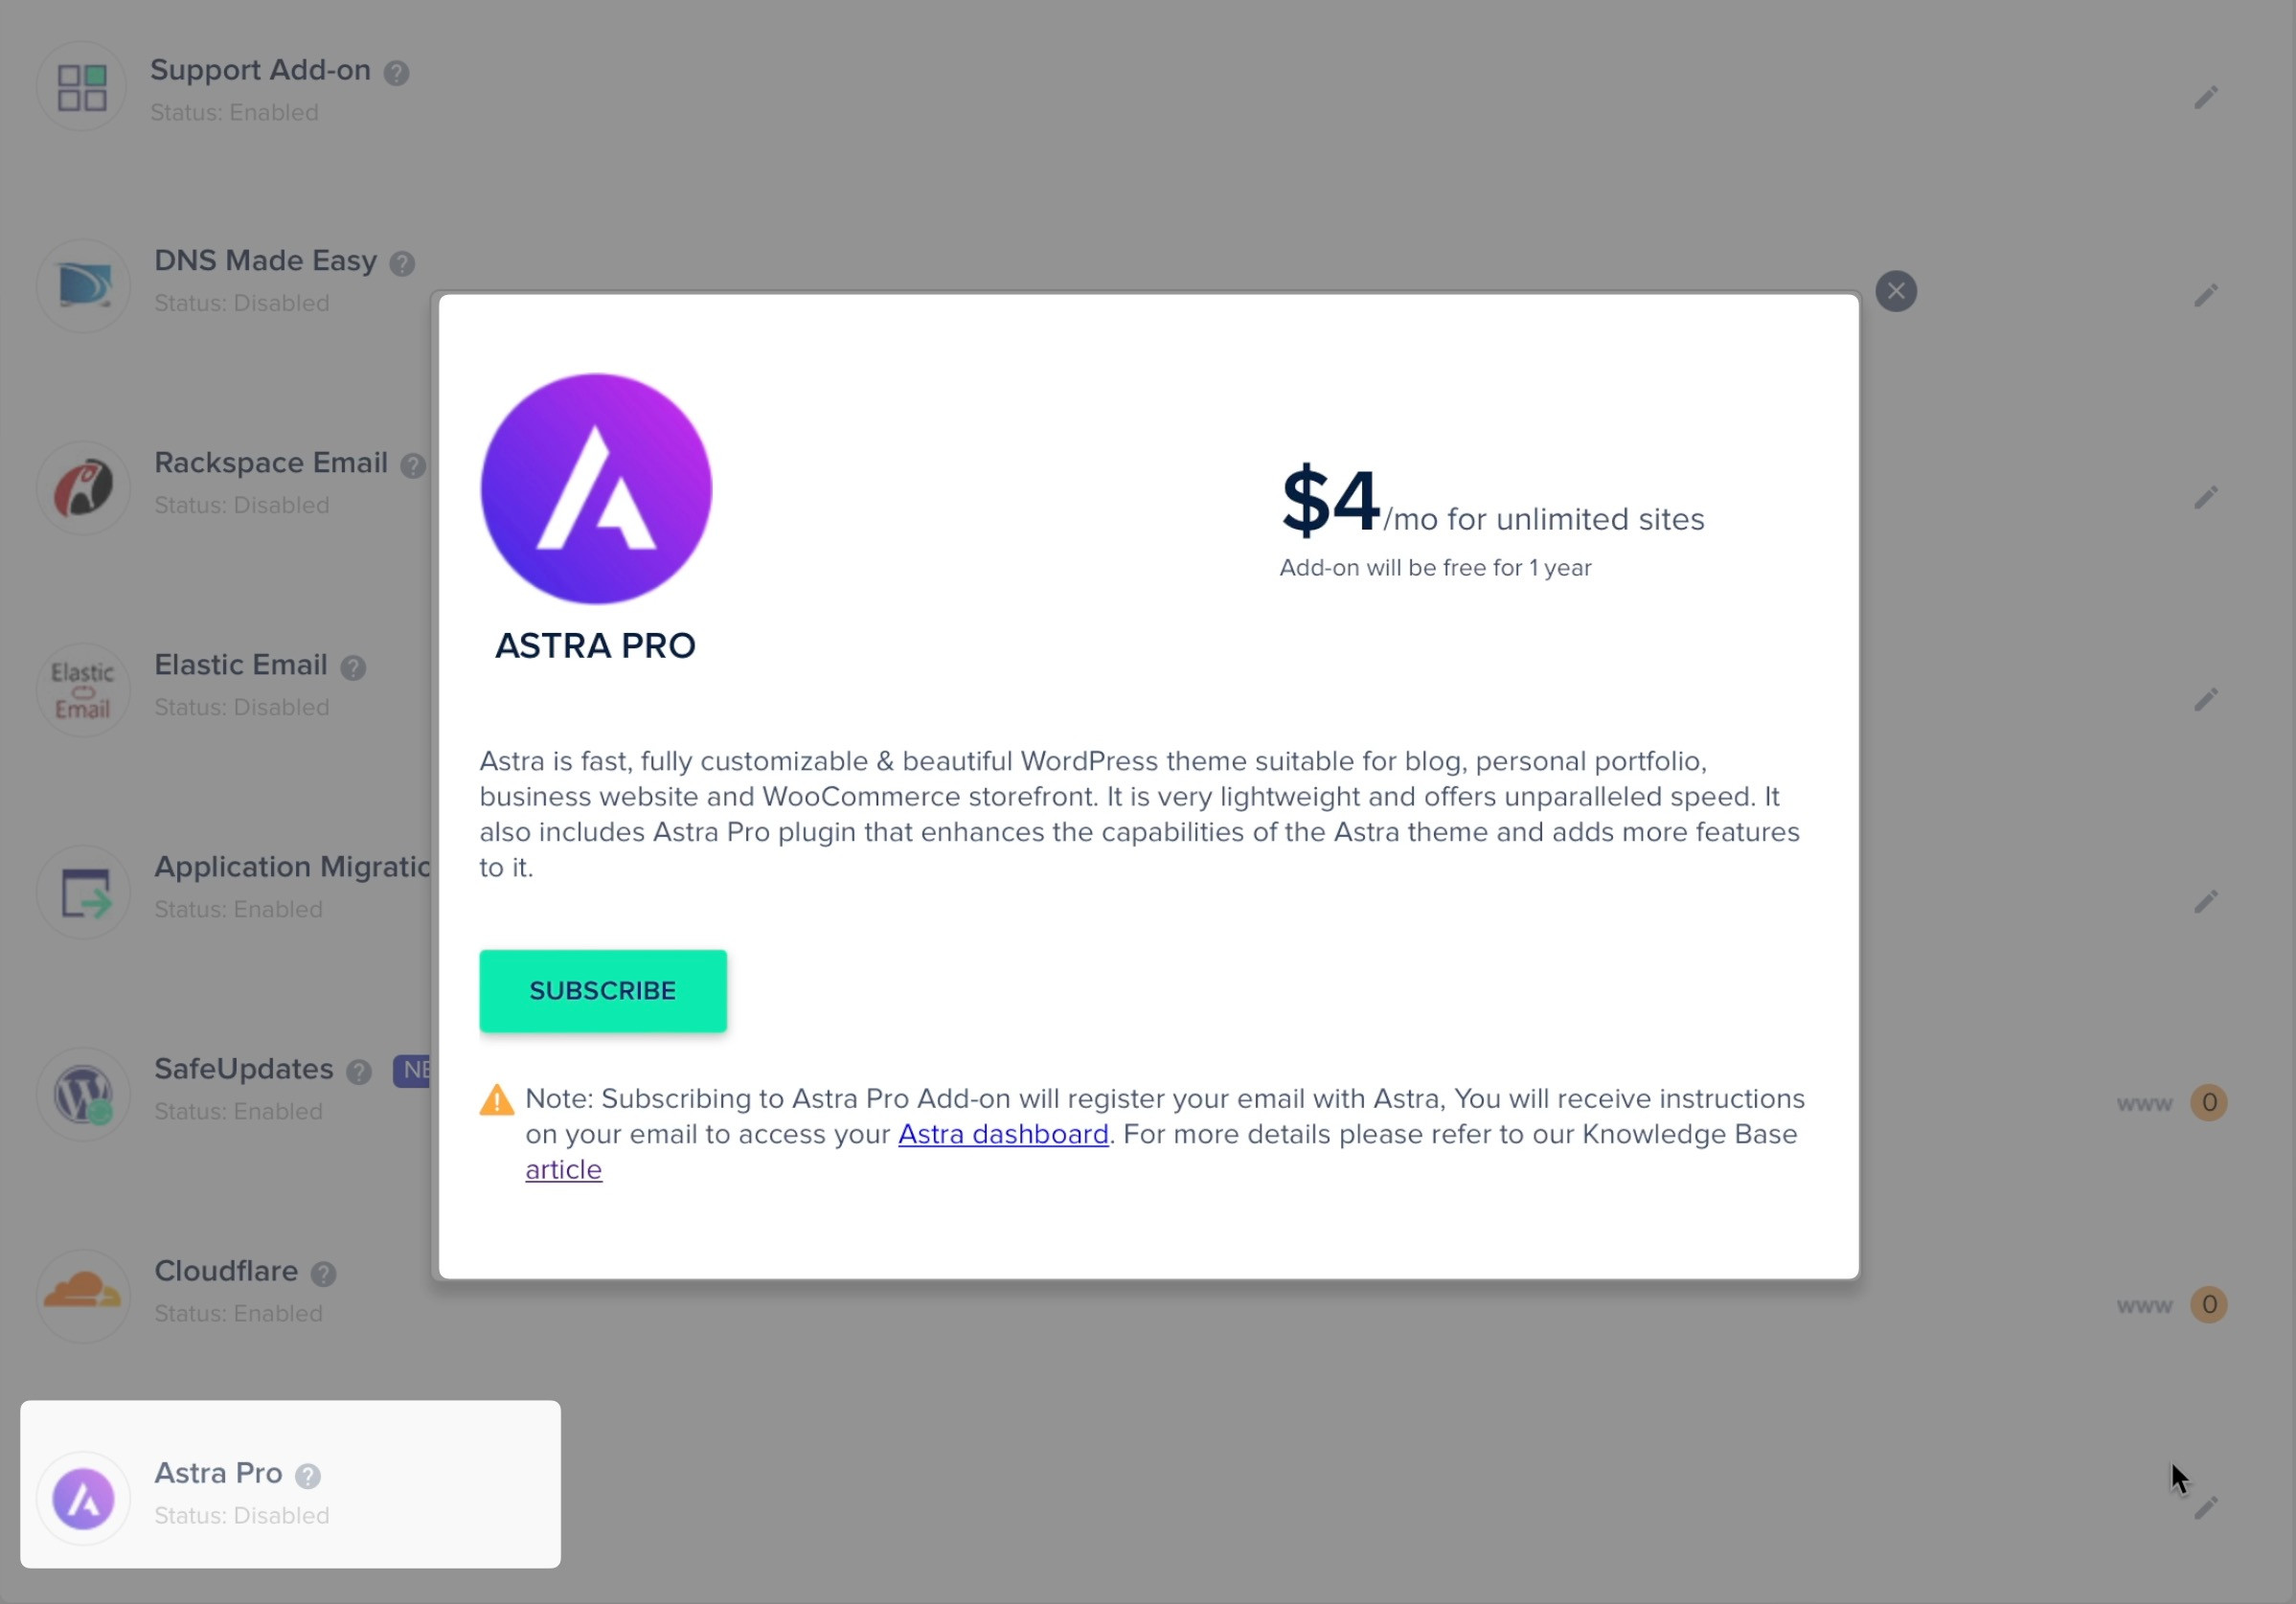
Installing the Astra Pro Plug-in
The
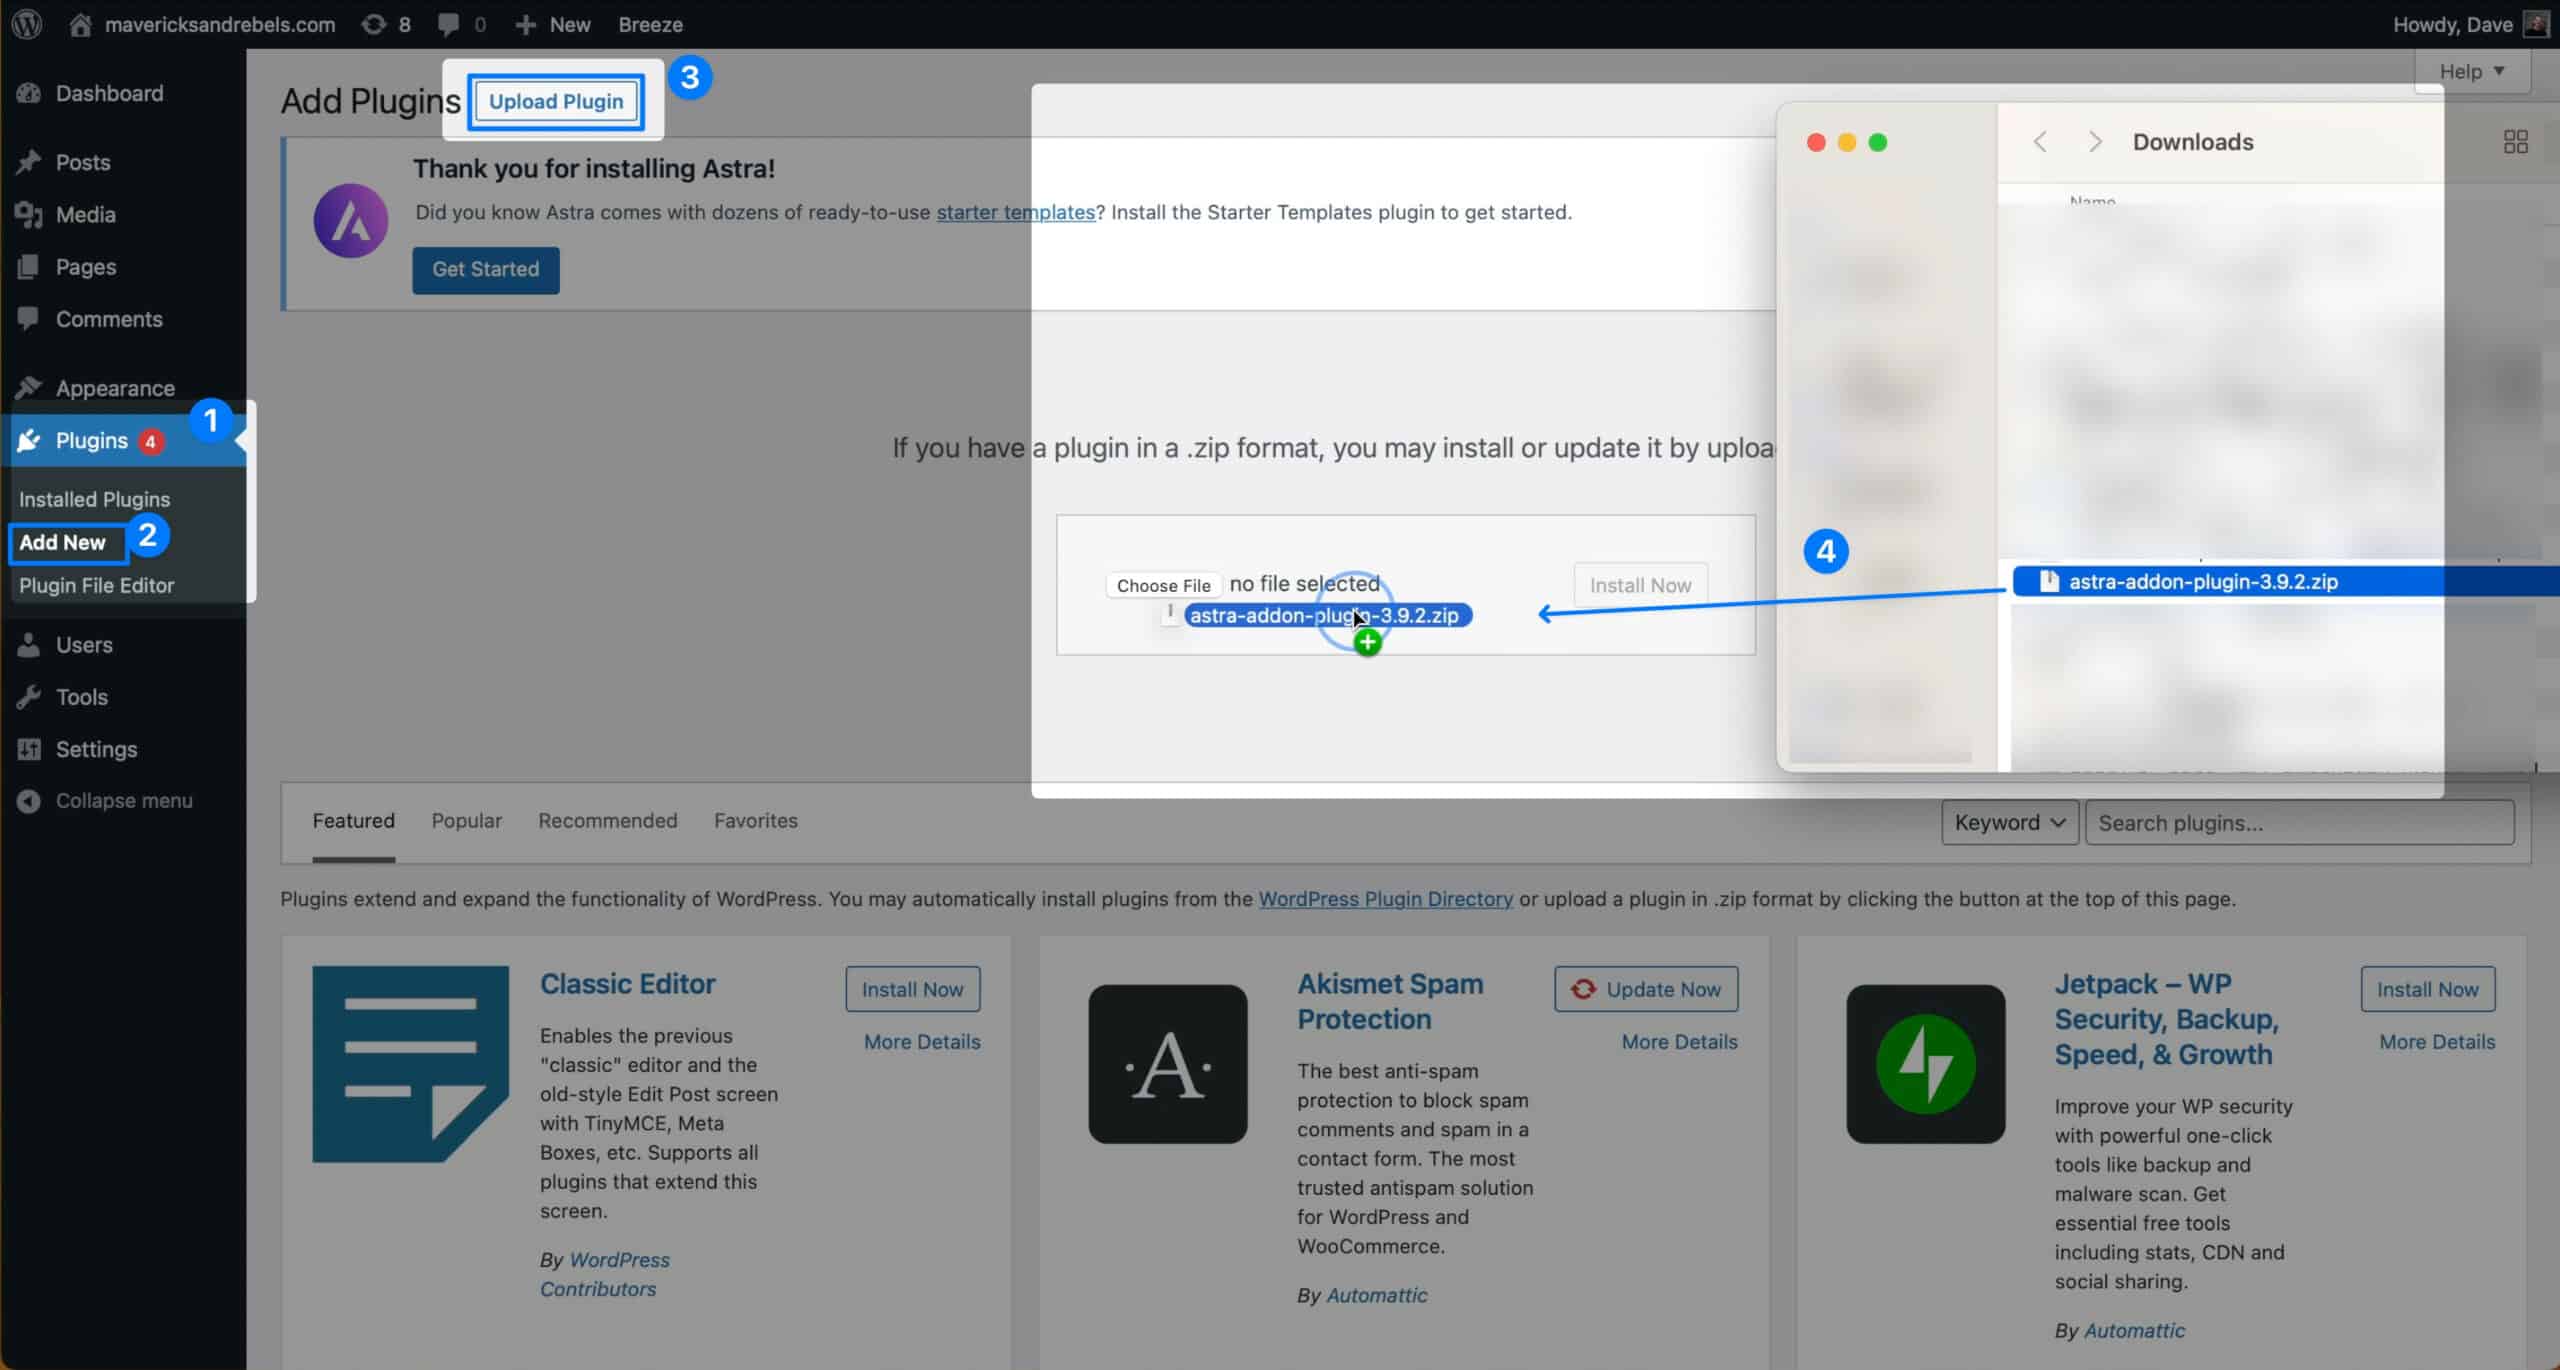
This time we’ll go to Plug-ins > Add-new, then click Upload plugin. Drag and drop your newly downloaded
Configuring Astra Options

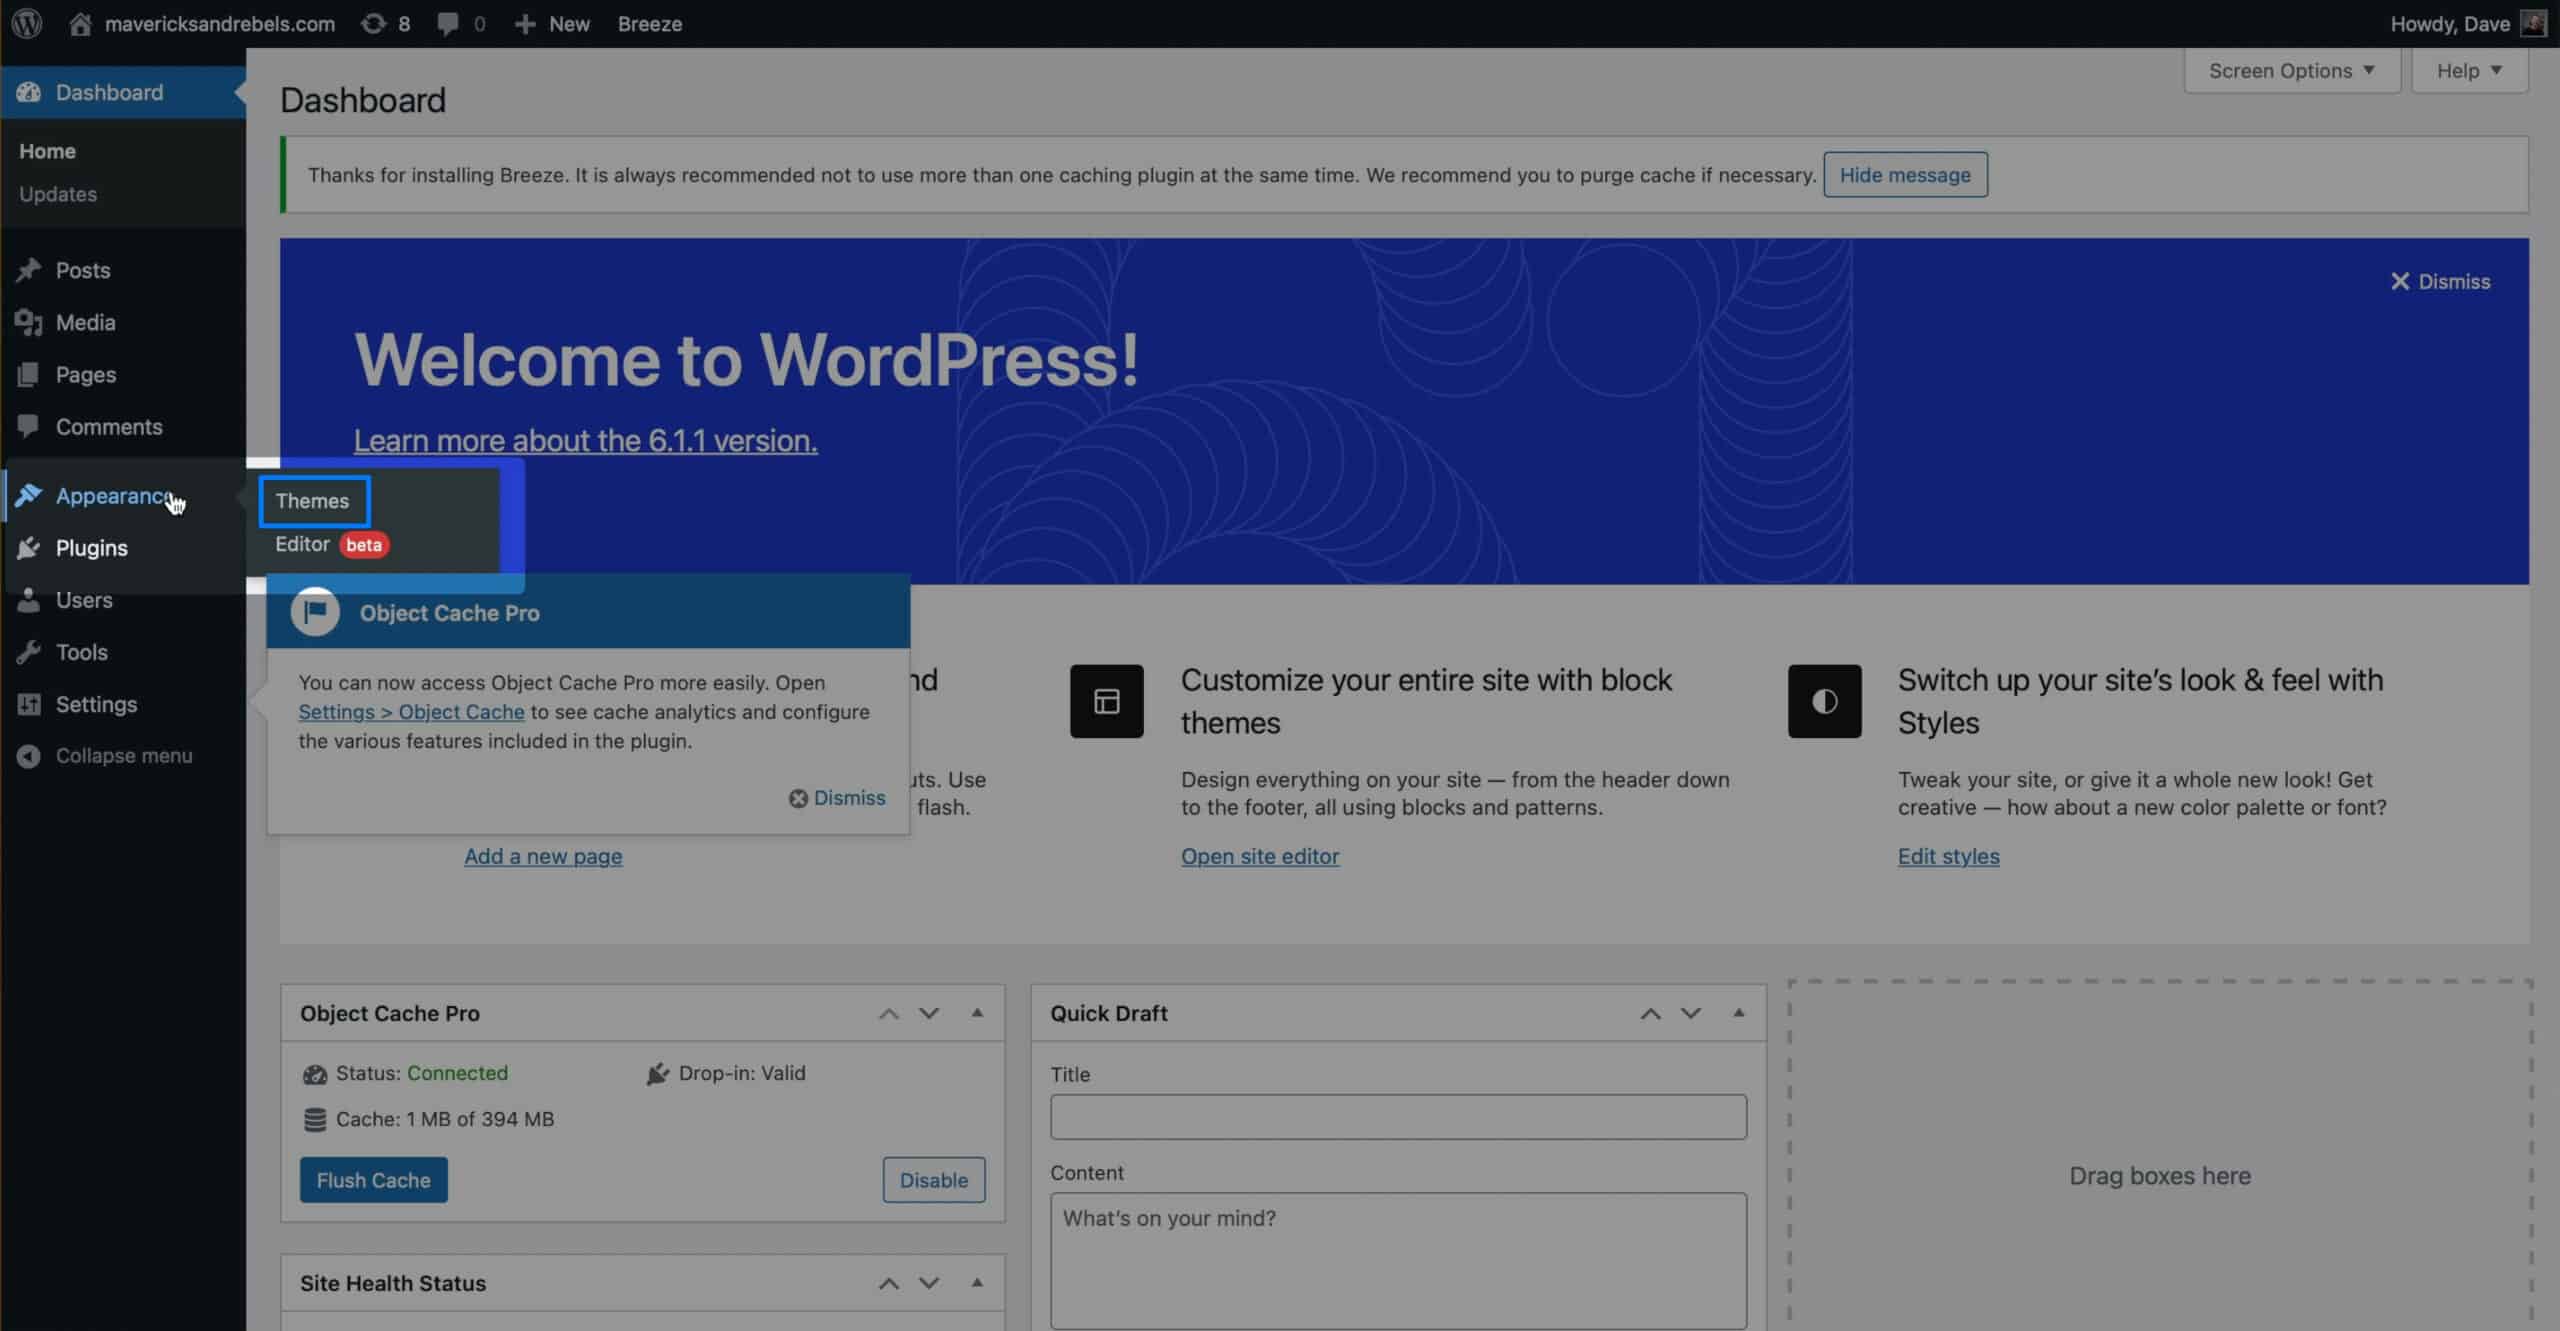
Now, if we click on Appearance, we have a new choice, Astra Options.
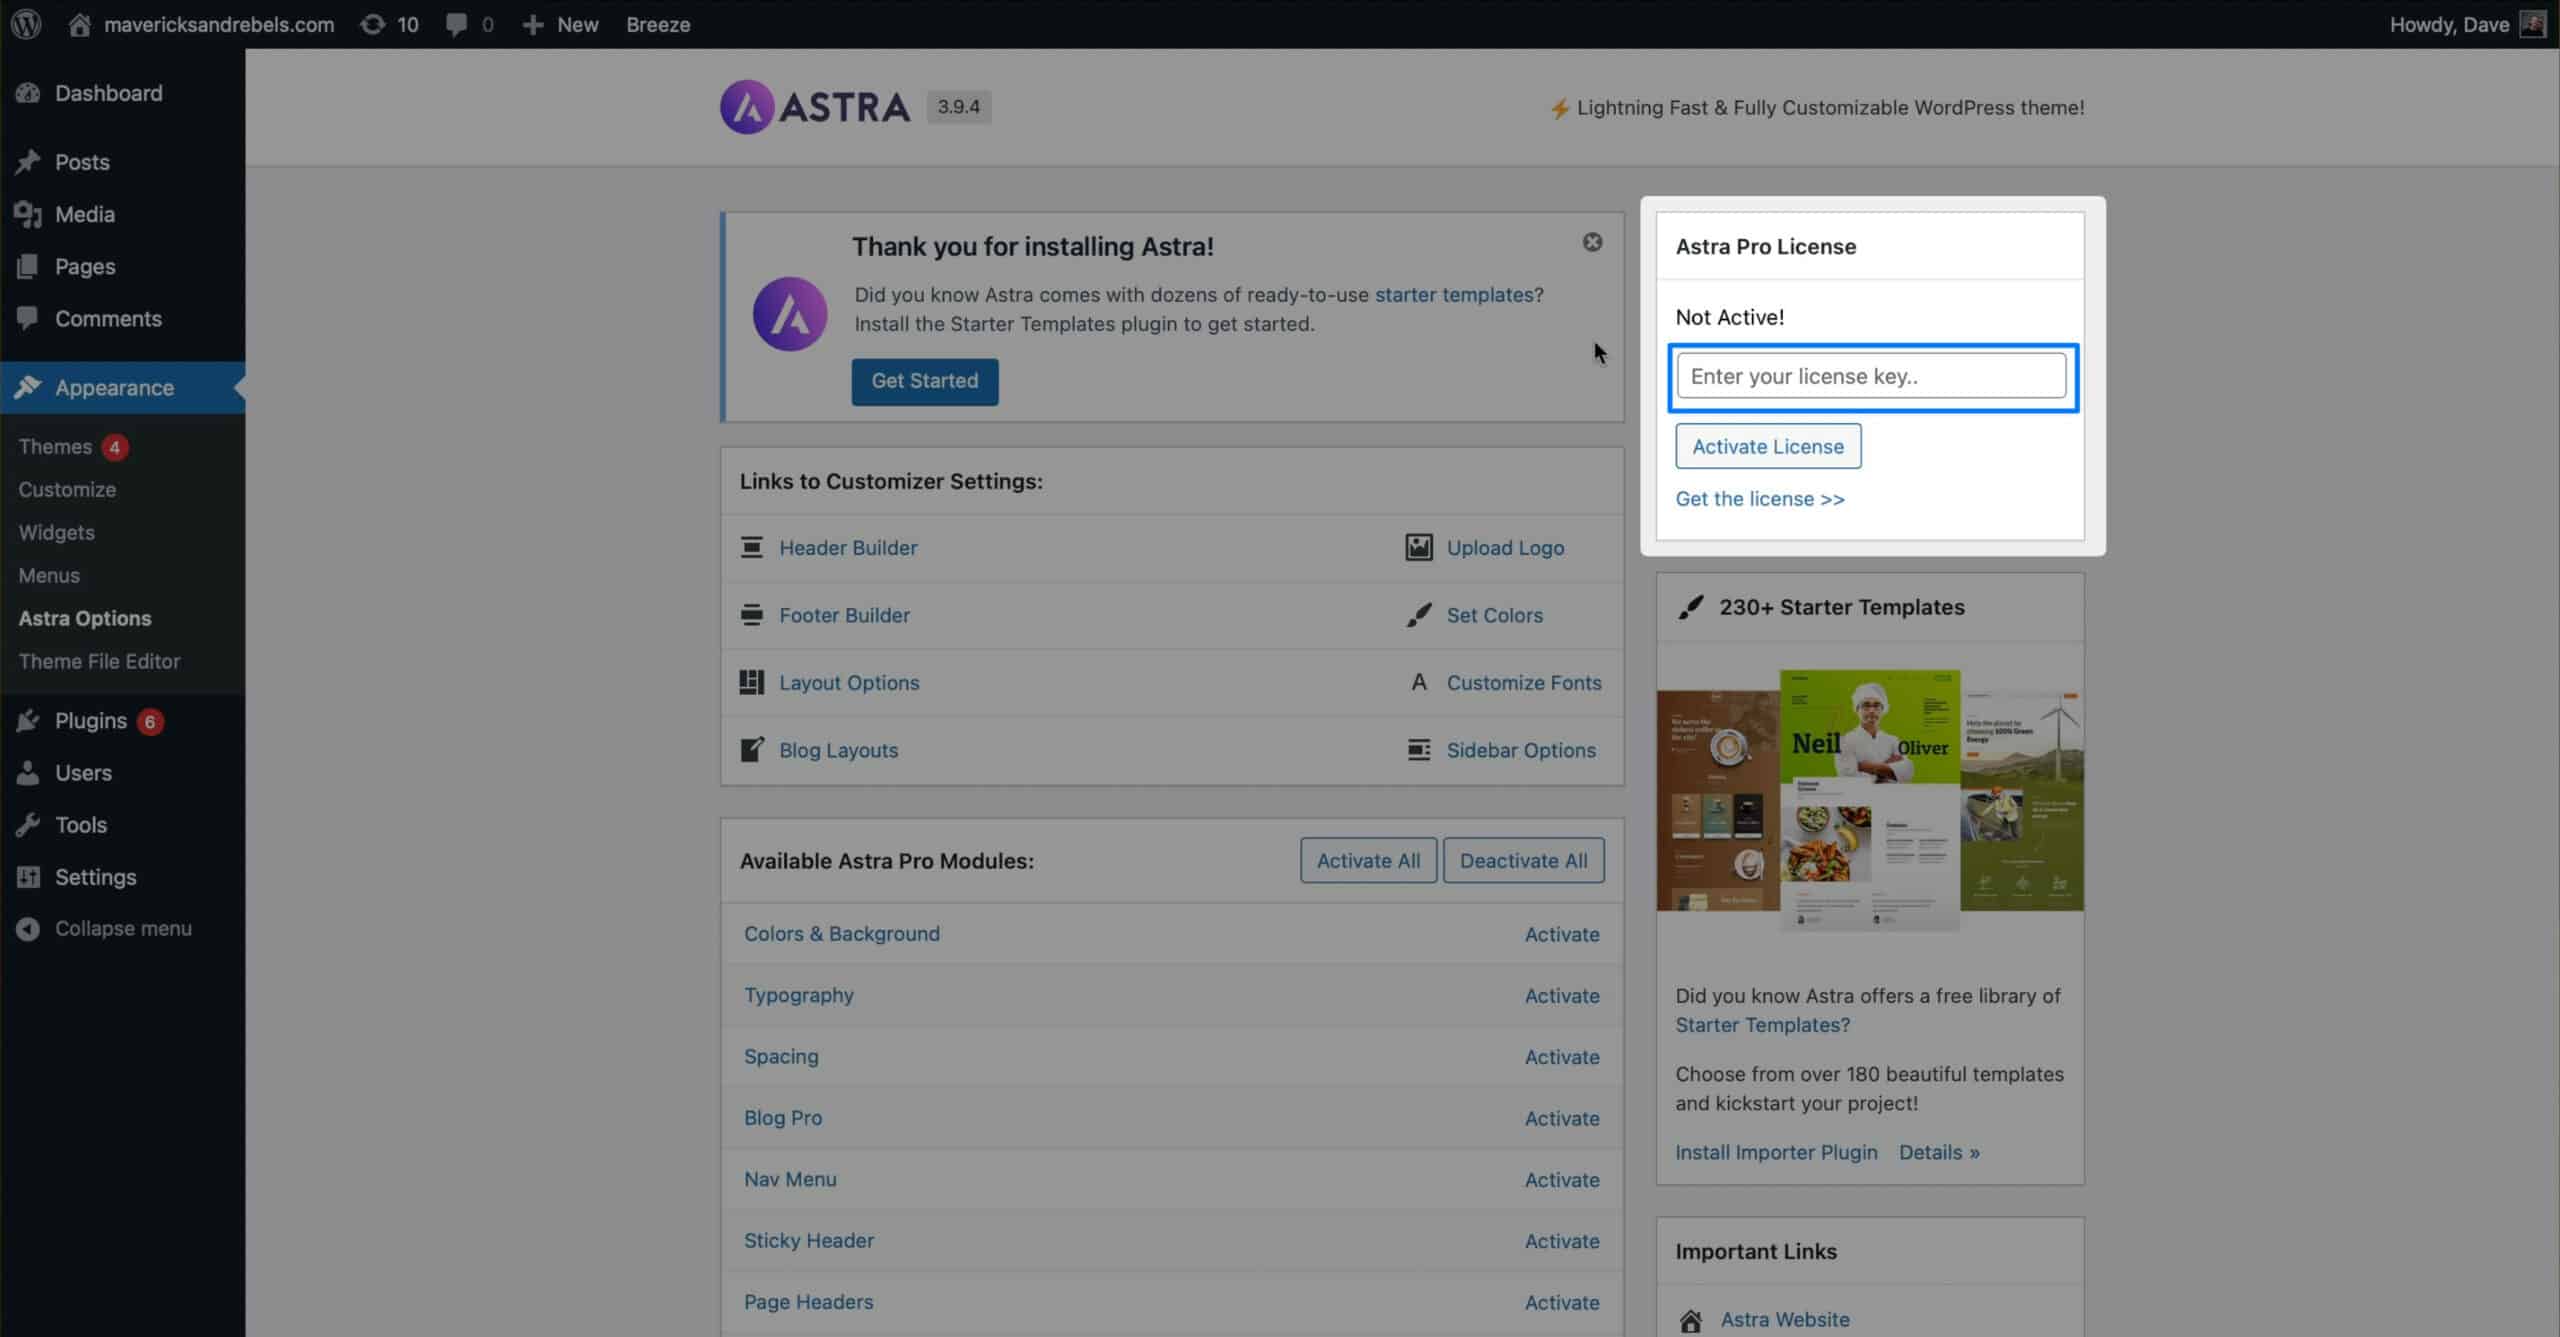
The first thing you’ll want to do is enter your License key in the upper right-hand corner. Activating your license lets you stay updated with the latest version of
Next, I recommend turning most of these features on.
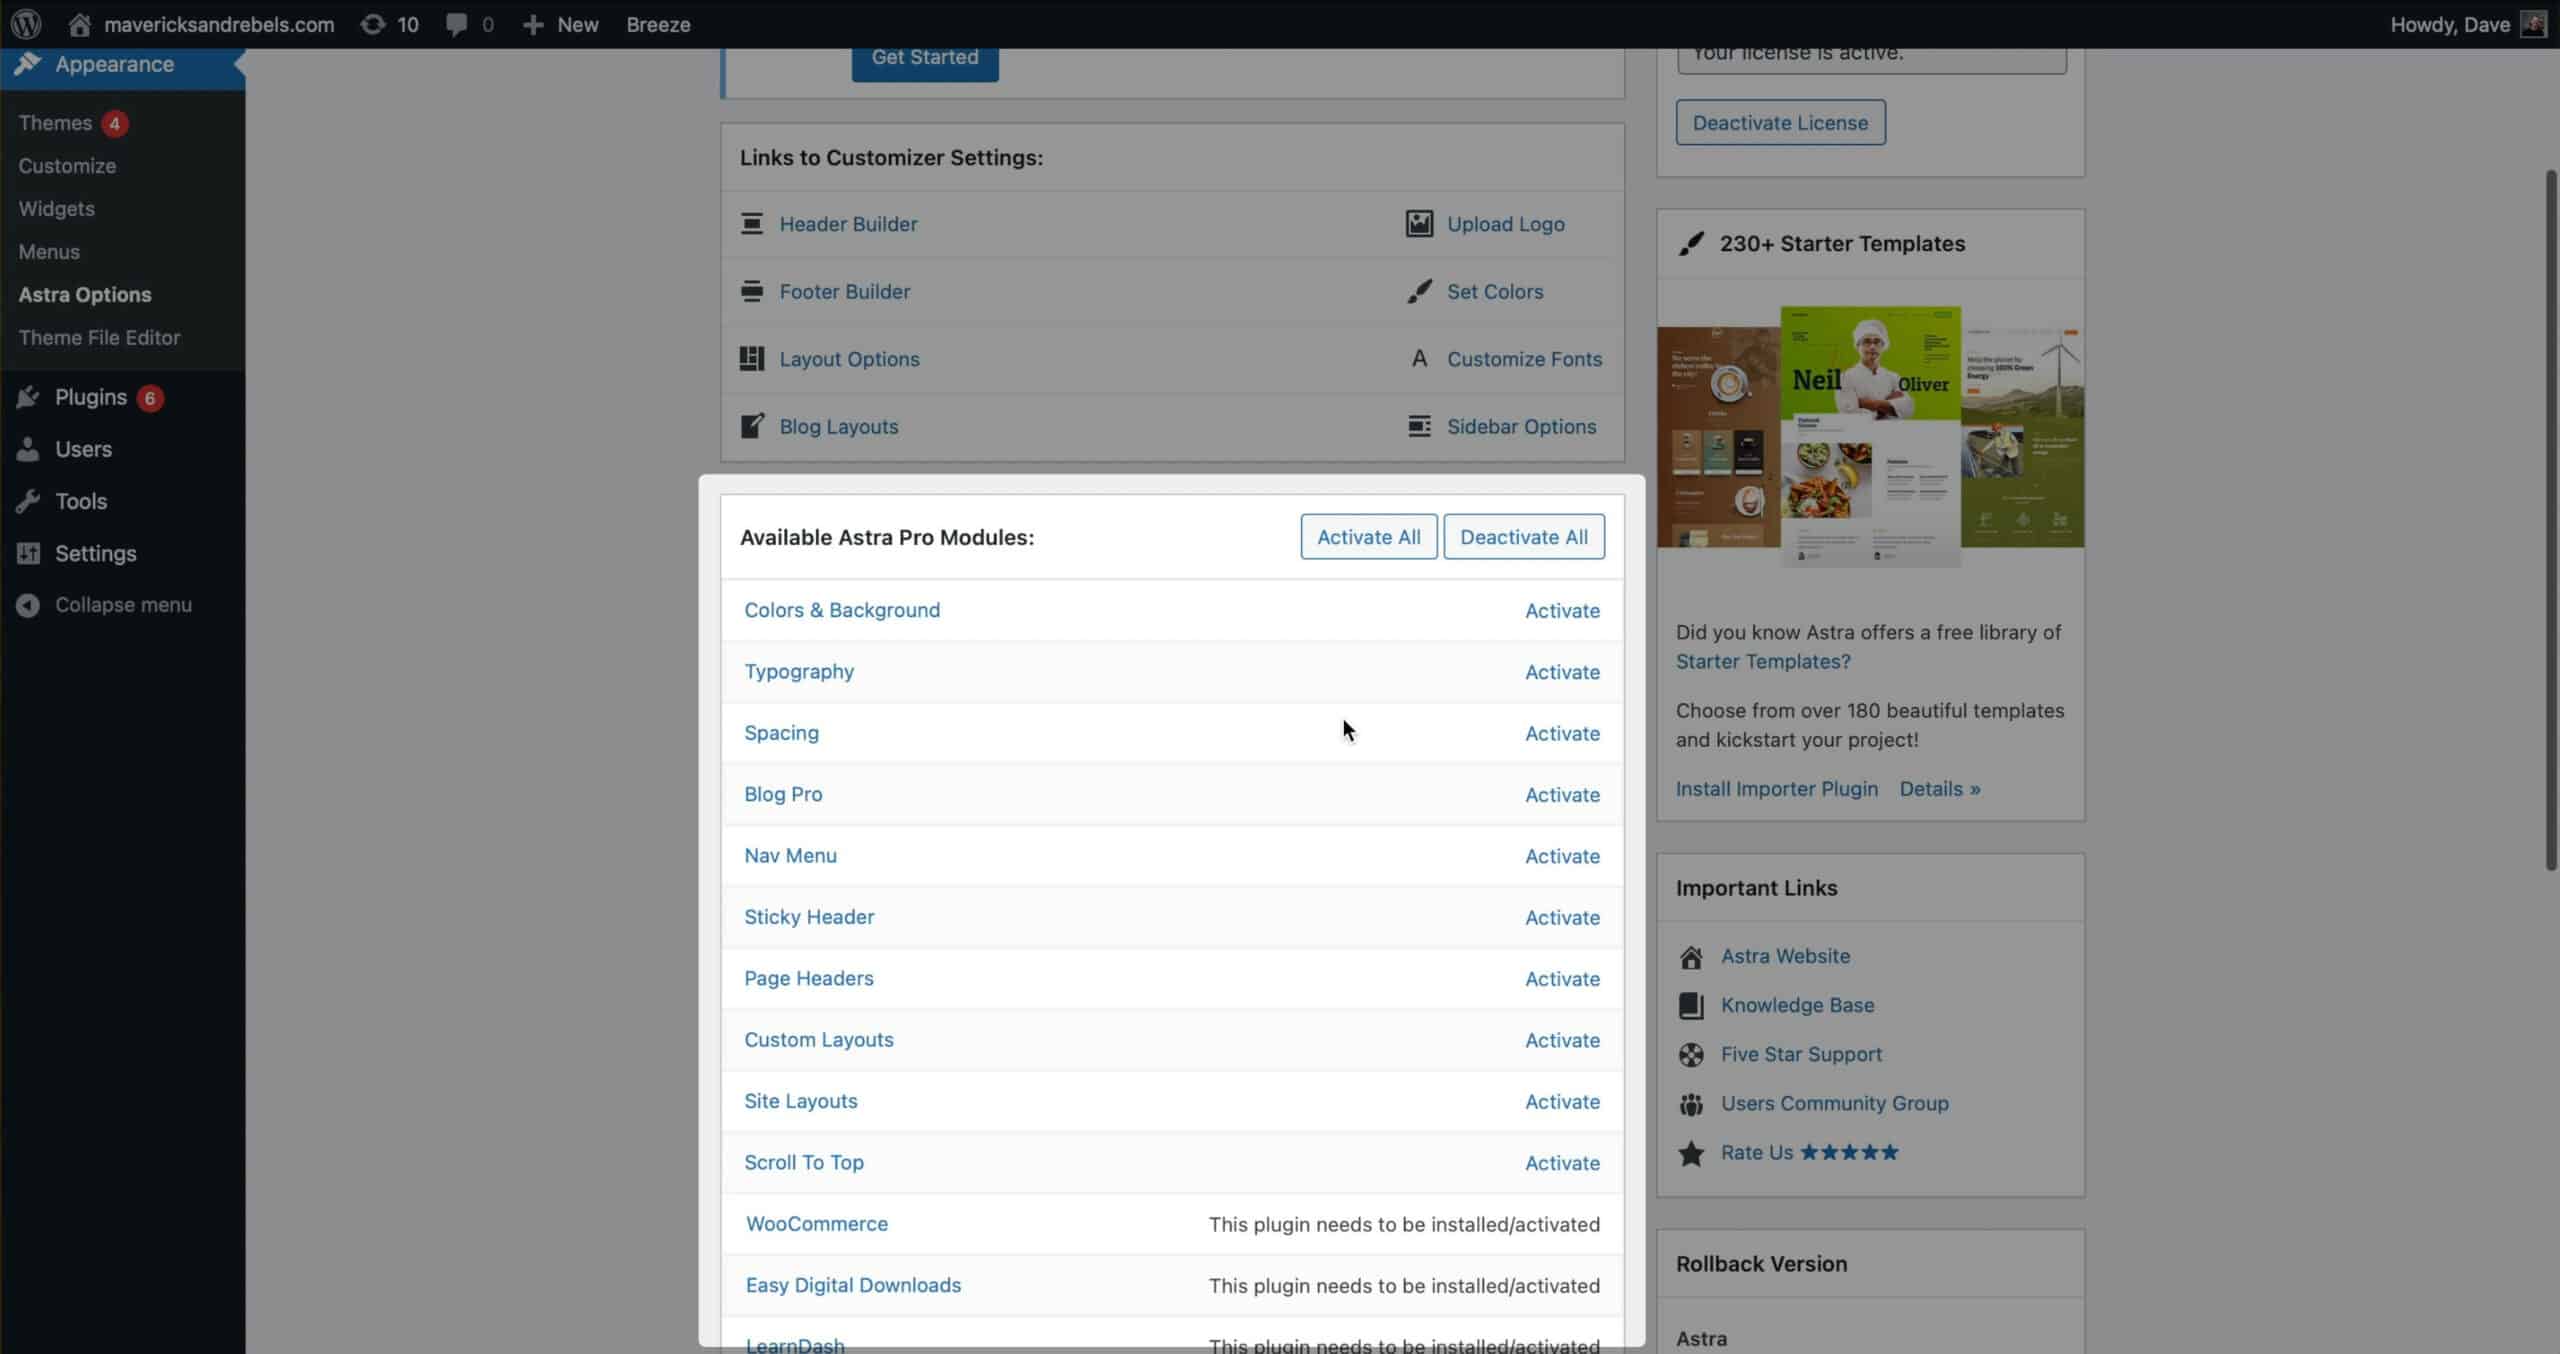
I’ll choose:
Colors & Background
Typography
Spacing
Blog Pro
Sticky Header
Site Layouts
Woocommerce.
Curious about these options? Clicking on them takes you to a help doc to explain the functionality.
Now everything is installed and activated. We’ll explore these options and begin styling the site soon, but first, let’s set up WooCommerce and add a few products. That way, we’ll have some content to view while we change the look of our store.
Configuring WooCommerce.
If you click on WooCommerce in the left-hand sidebar, you should see a banner asking you to run their setup wizard. This wizard is optional, but they like to nag you, so let’s go through it now.
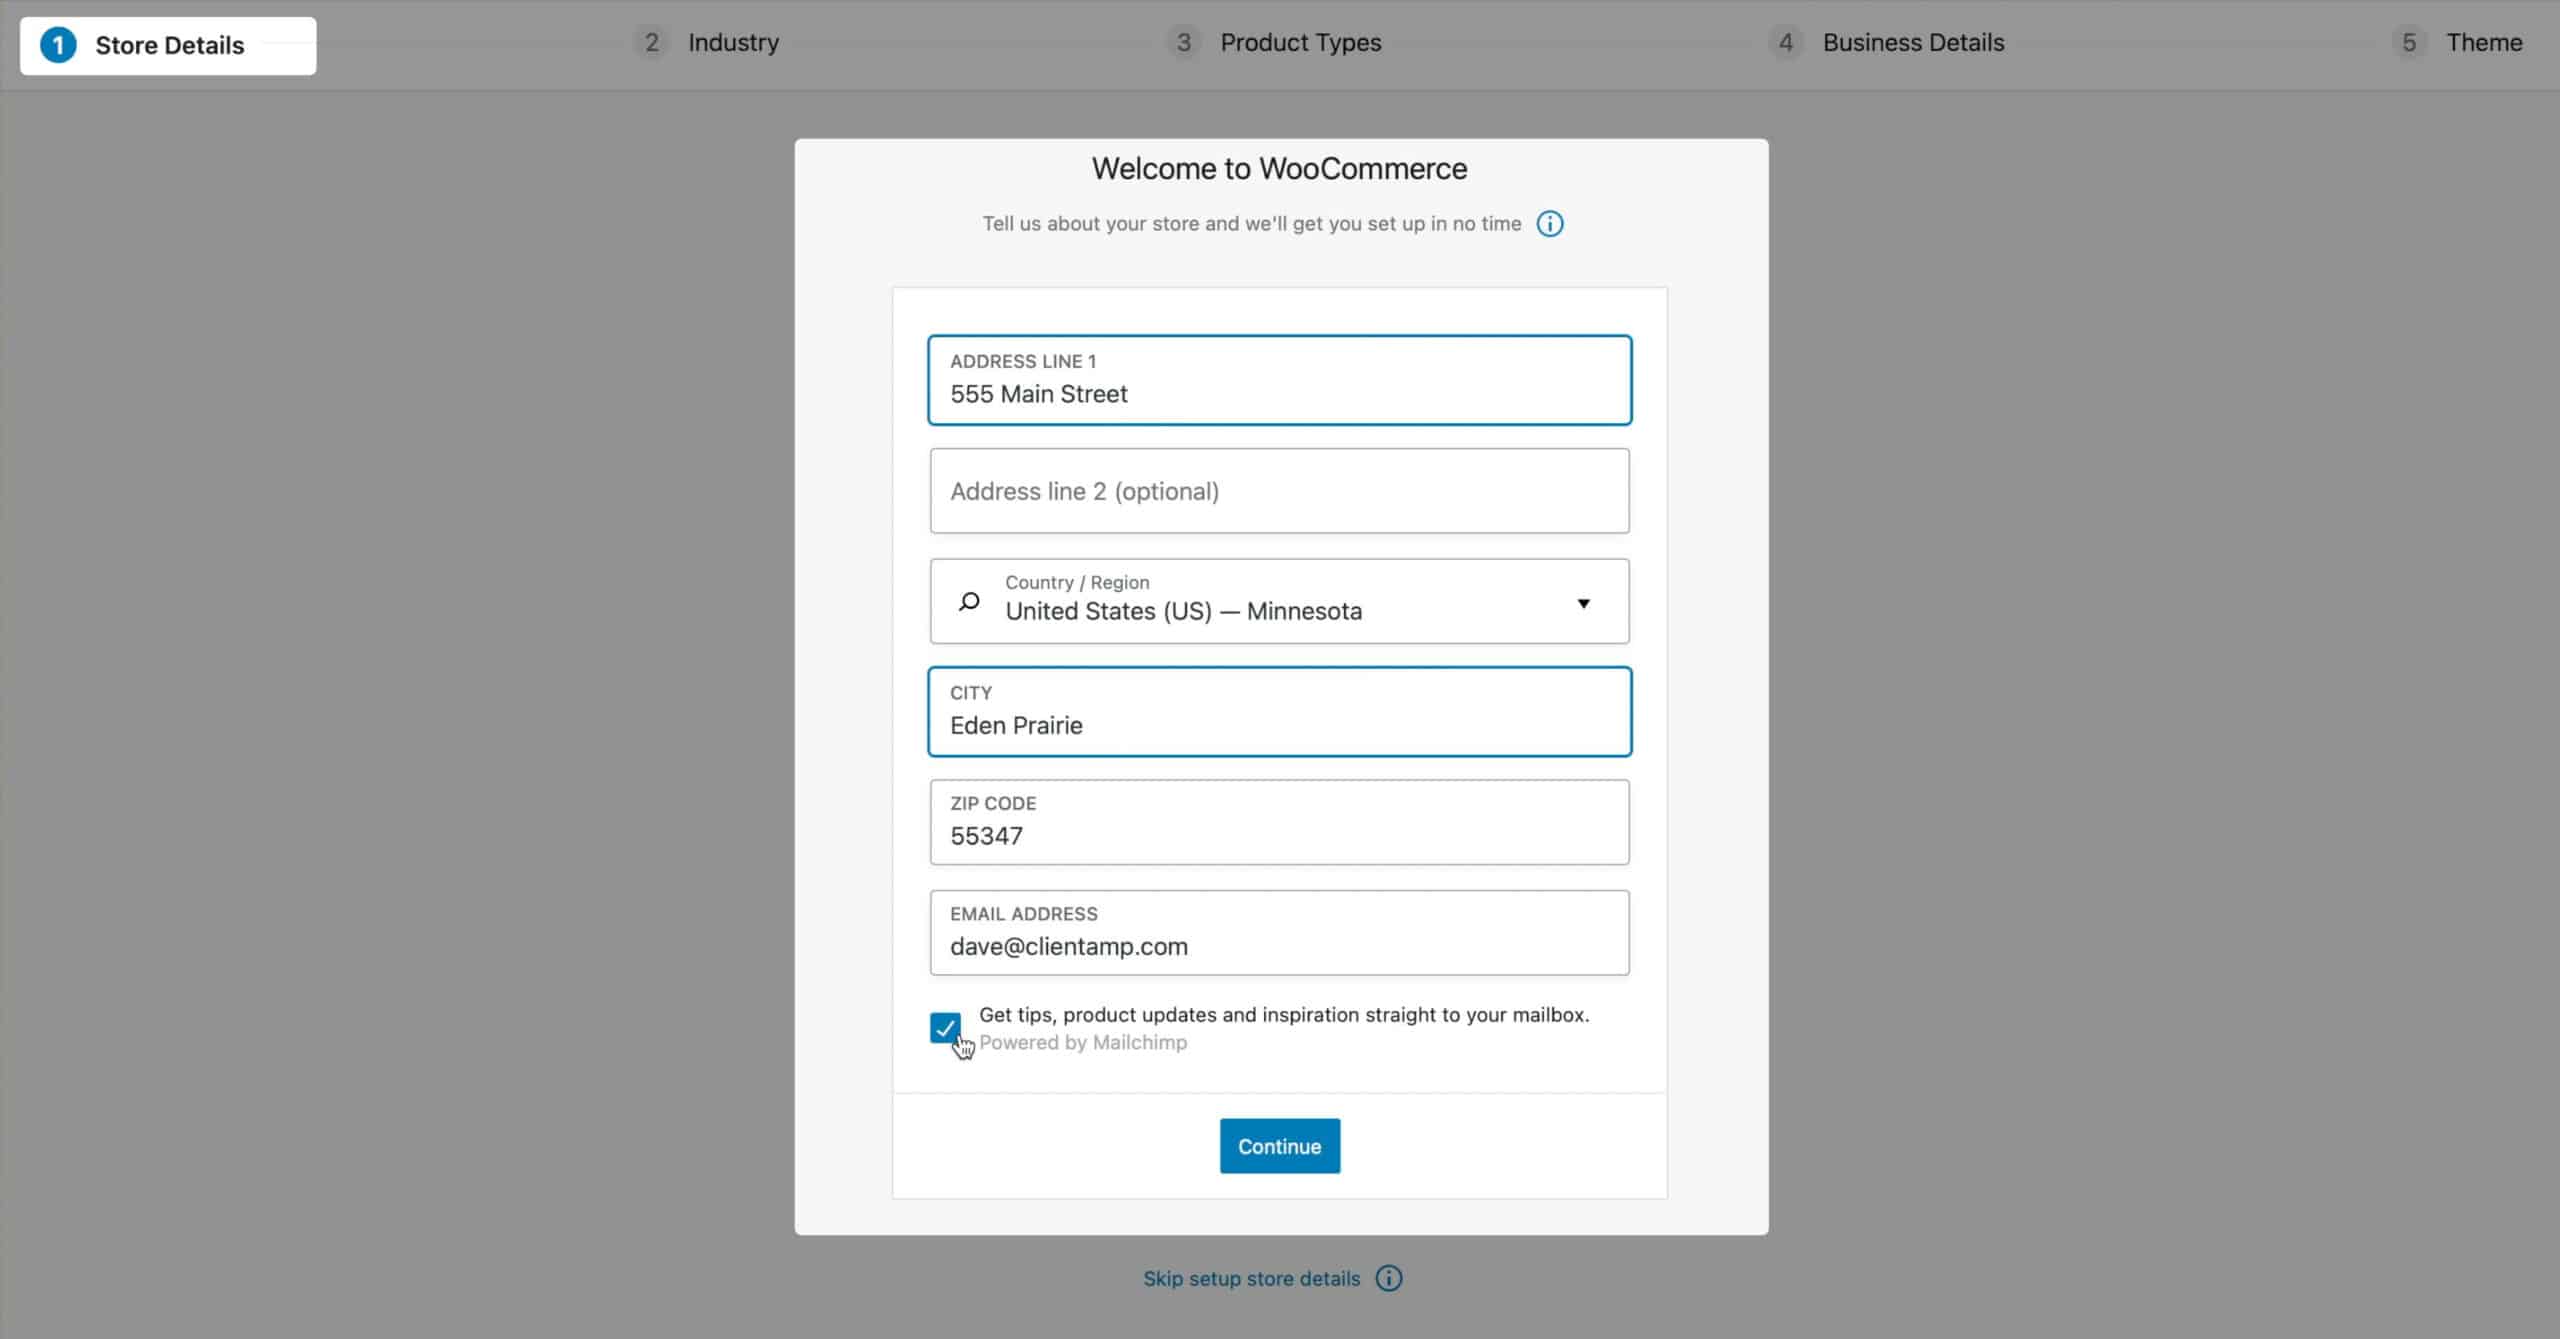
The first step is to enter your store details. Go ahead and do that. Feel free to opt-out of the email newsletter if you’re not interested. It won’t affect your site negatively.
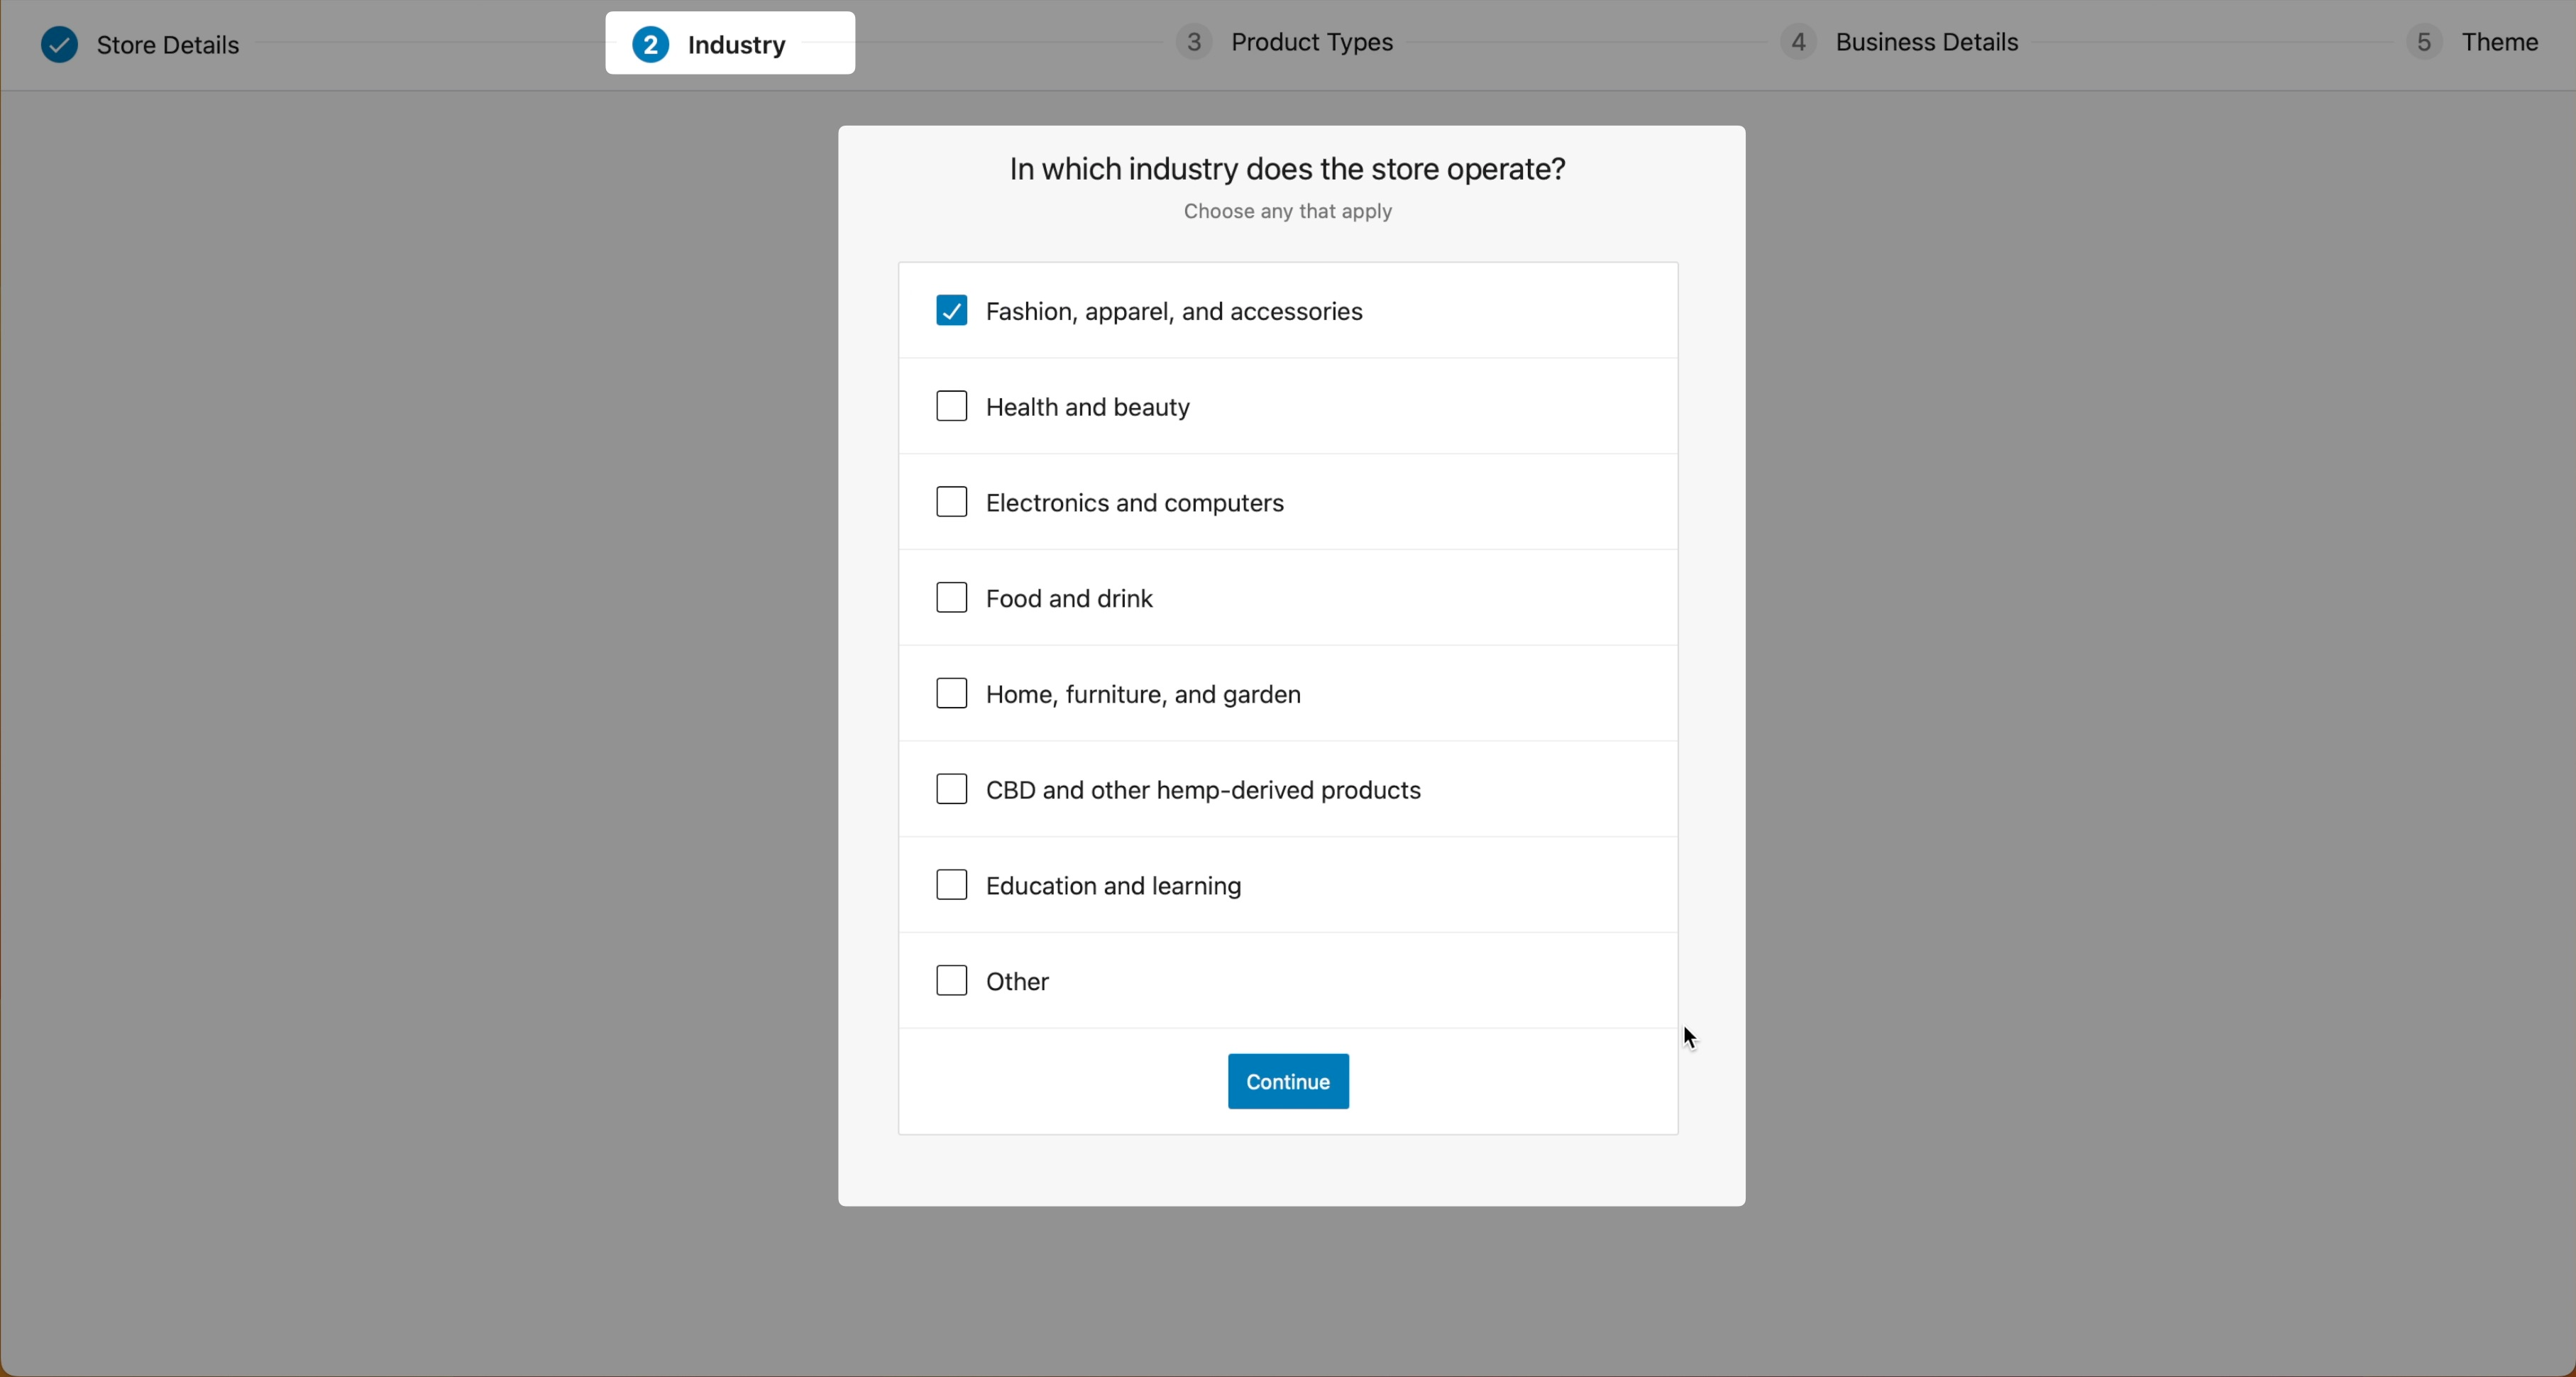
Step two is your store’s industry. I’ll choose Fashion and apparel.
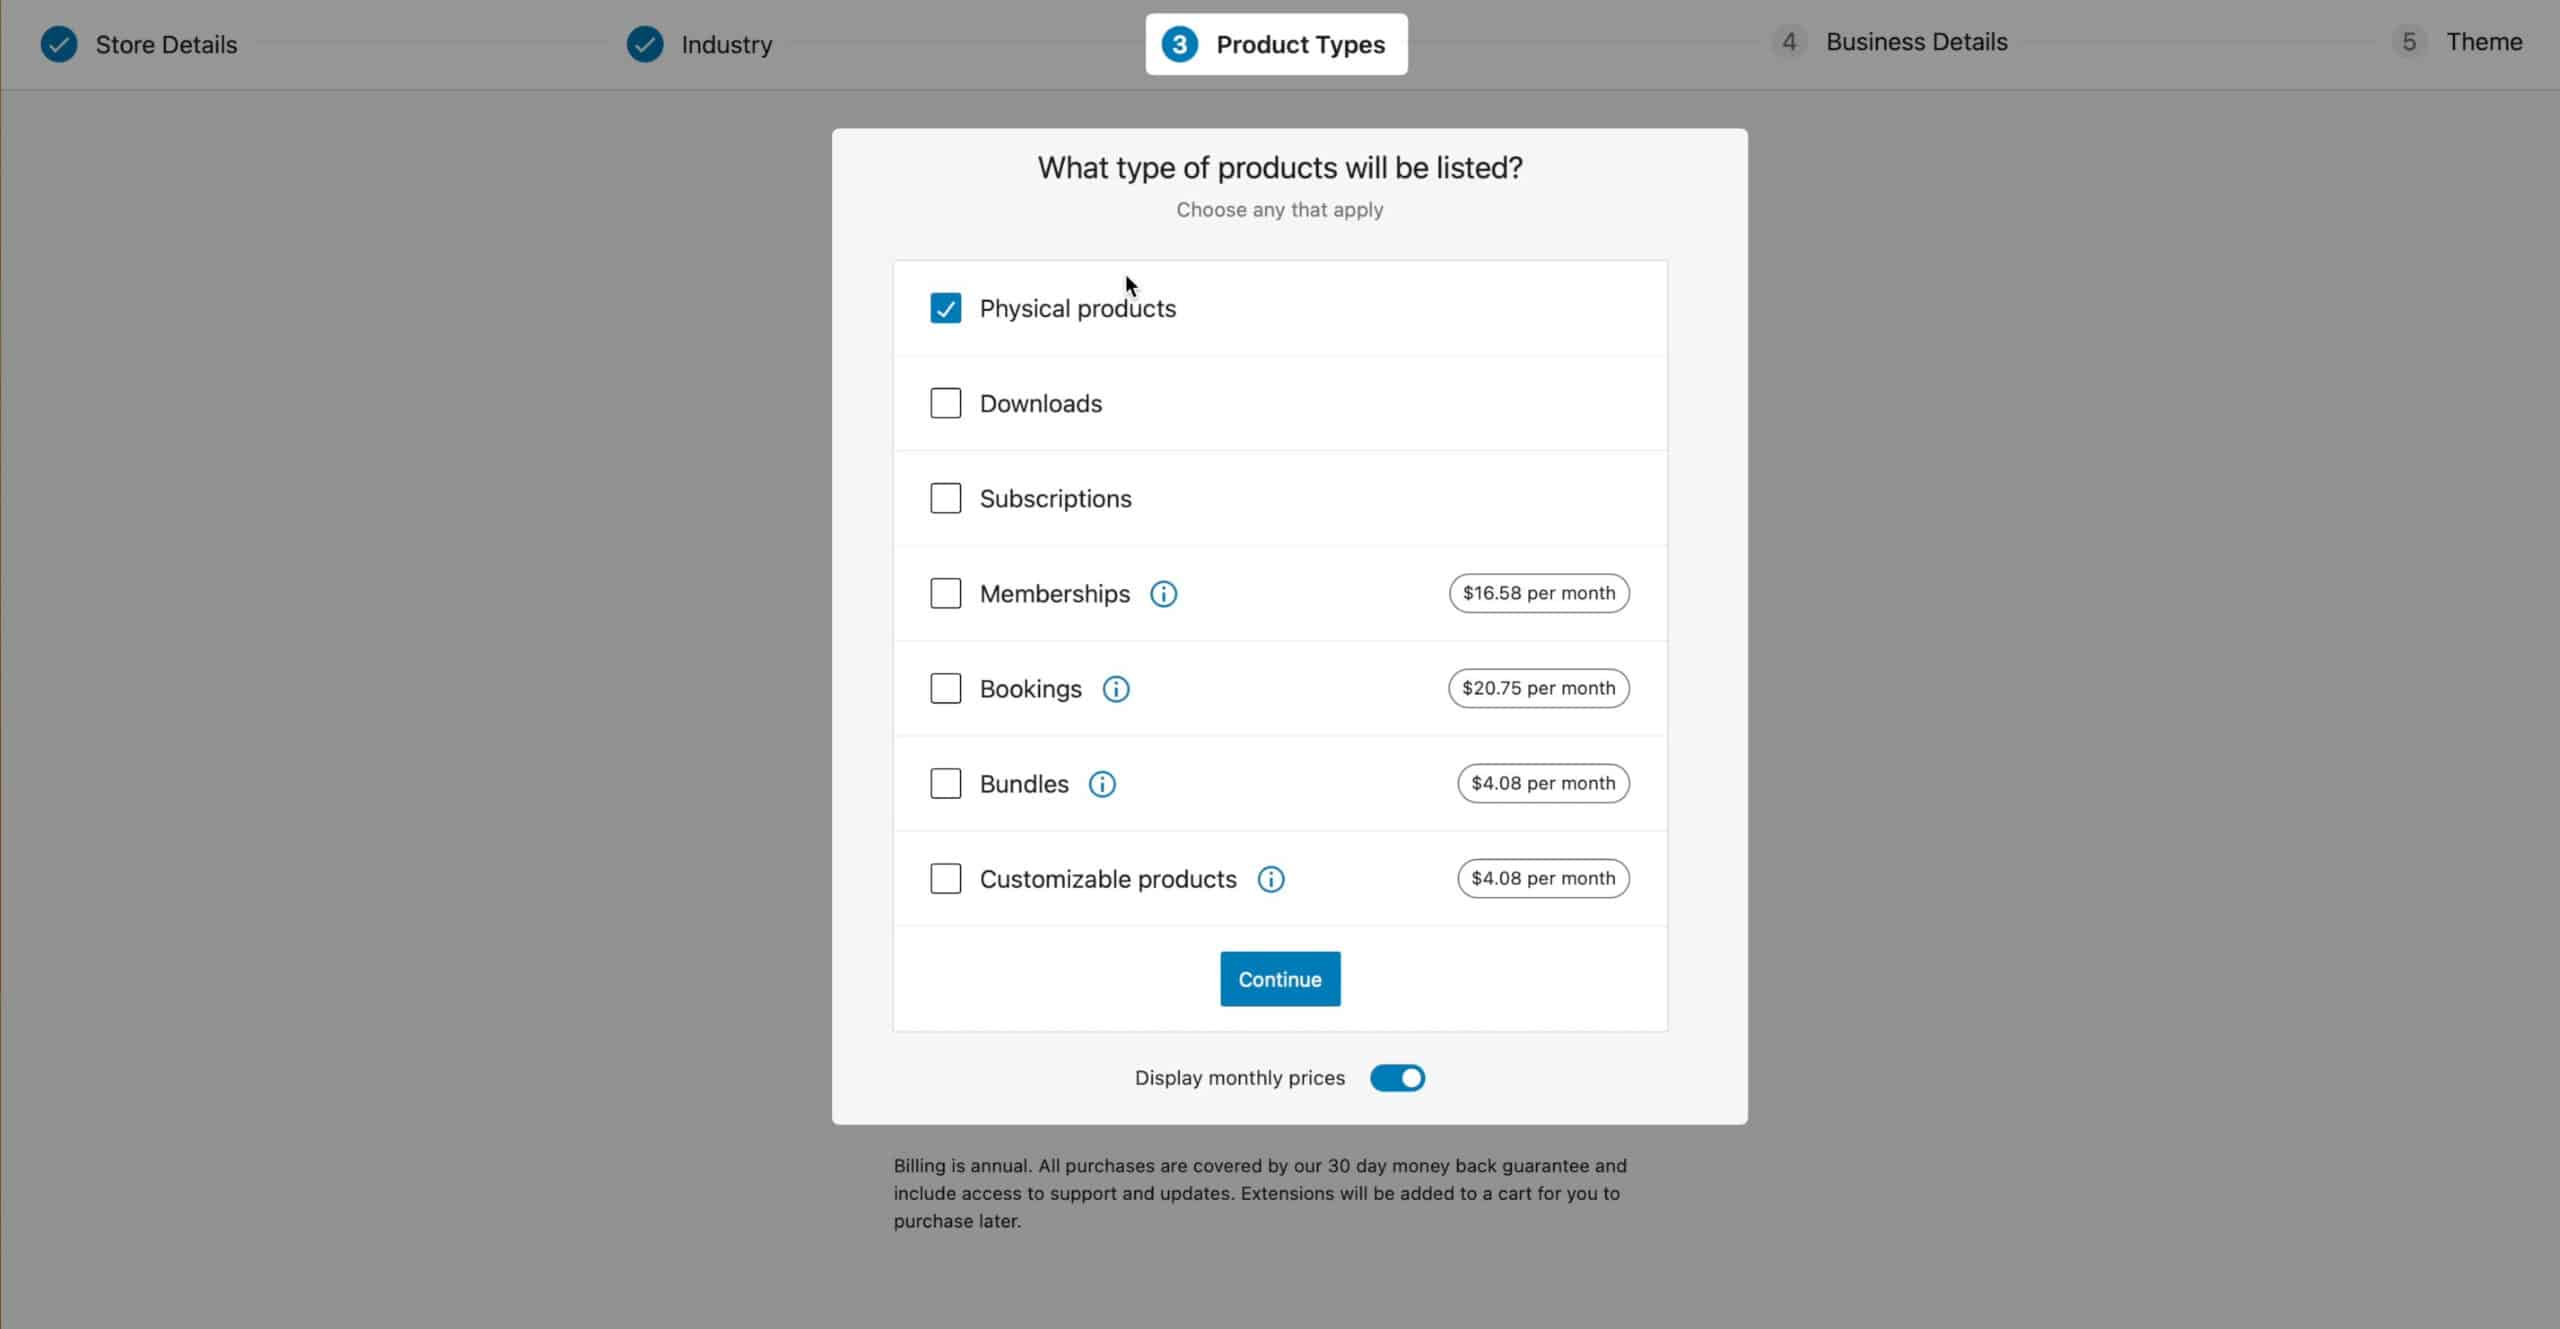
Next, WooCommerce is going to try and sell you some add-ons. We don’t need any of these, so I will check physical products and hit continue. You can always add these upsells later on if you’d like.
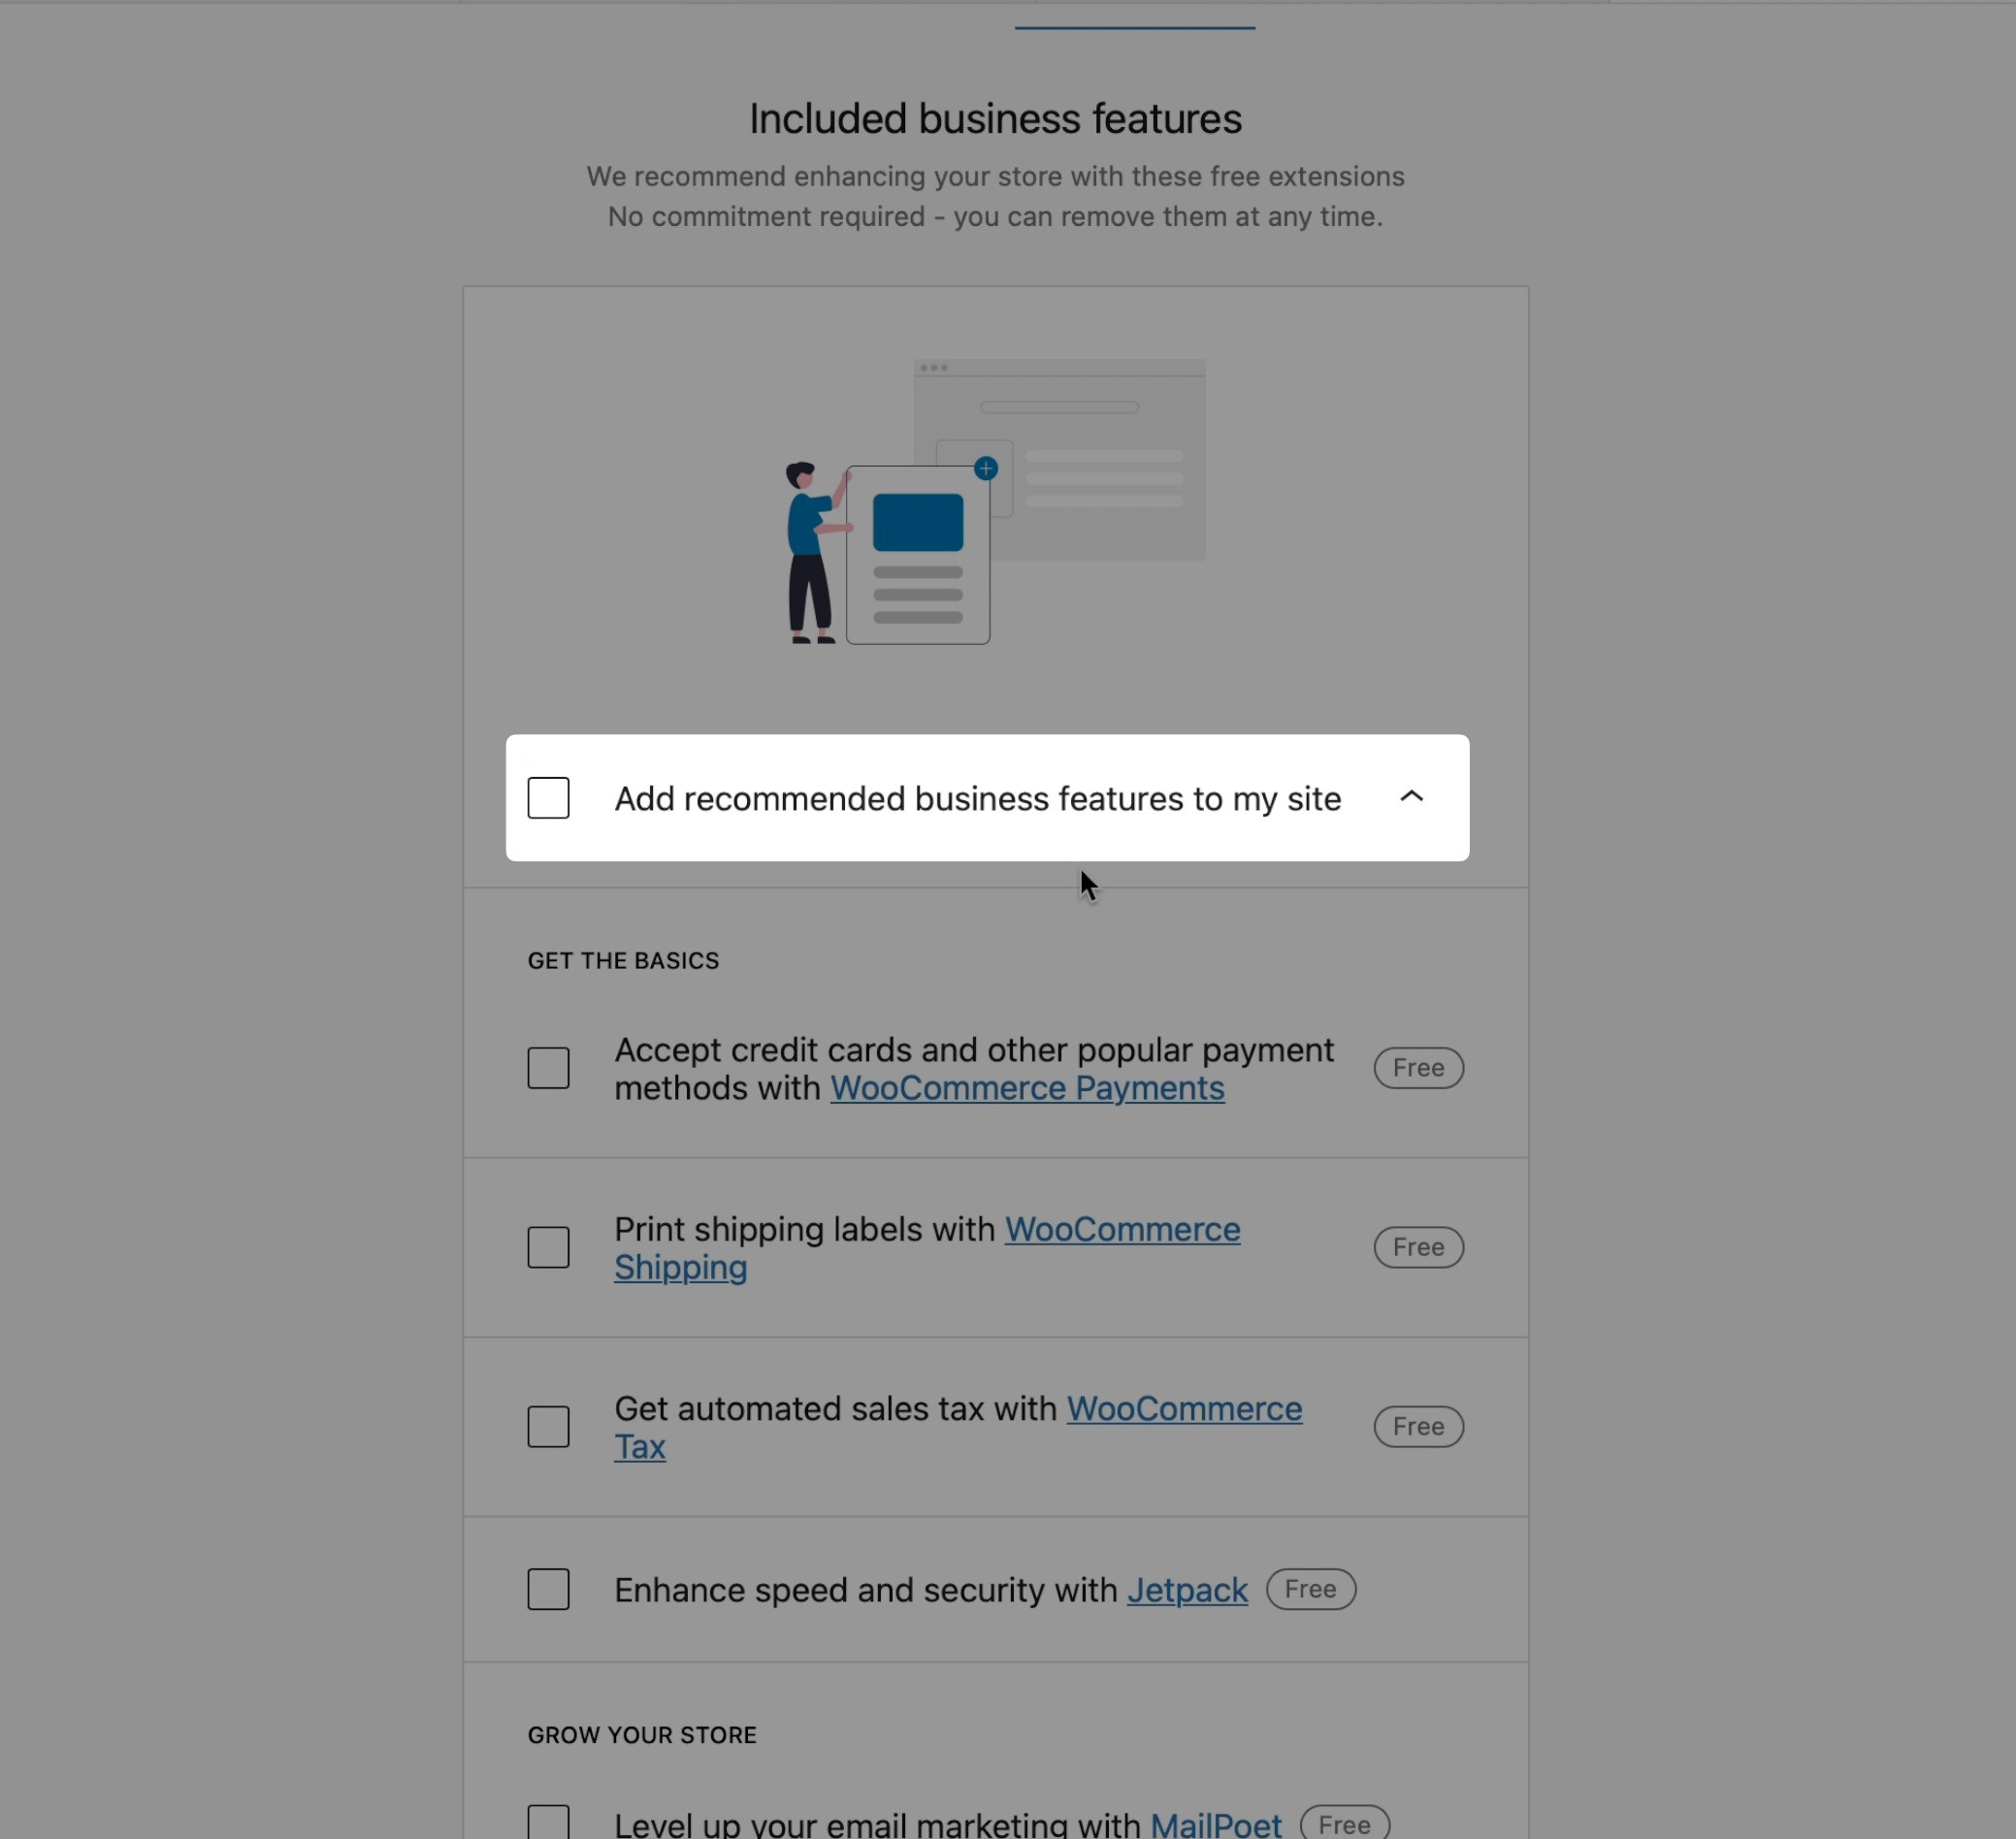
Enter your business details on the next screen, but be sure to turn off all of the free features. Uncheck the box that says, “Add recommended business features to my site.” Again, you can always add these later if you want.
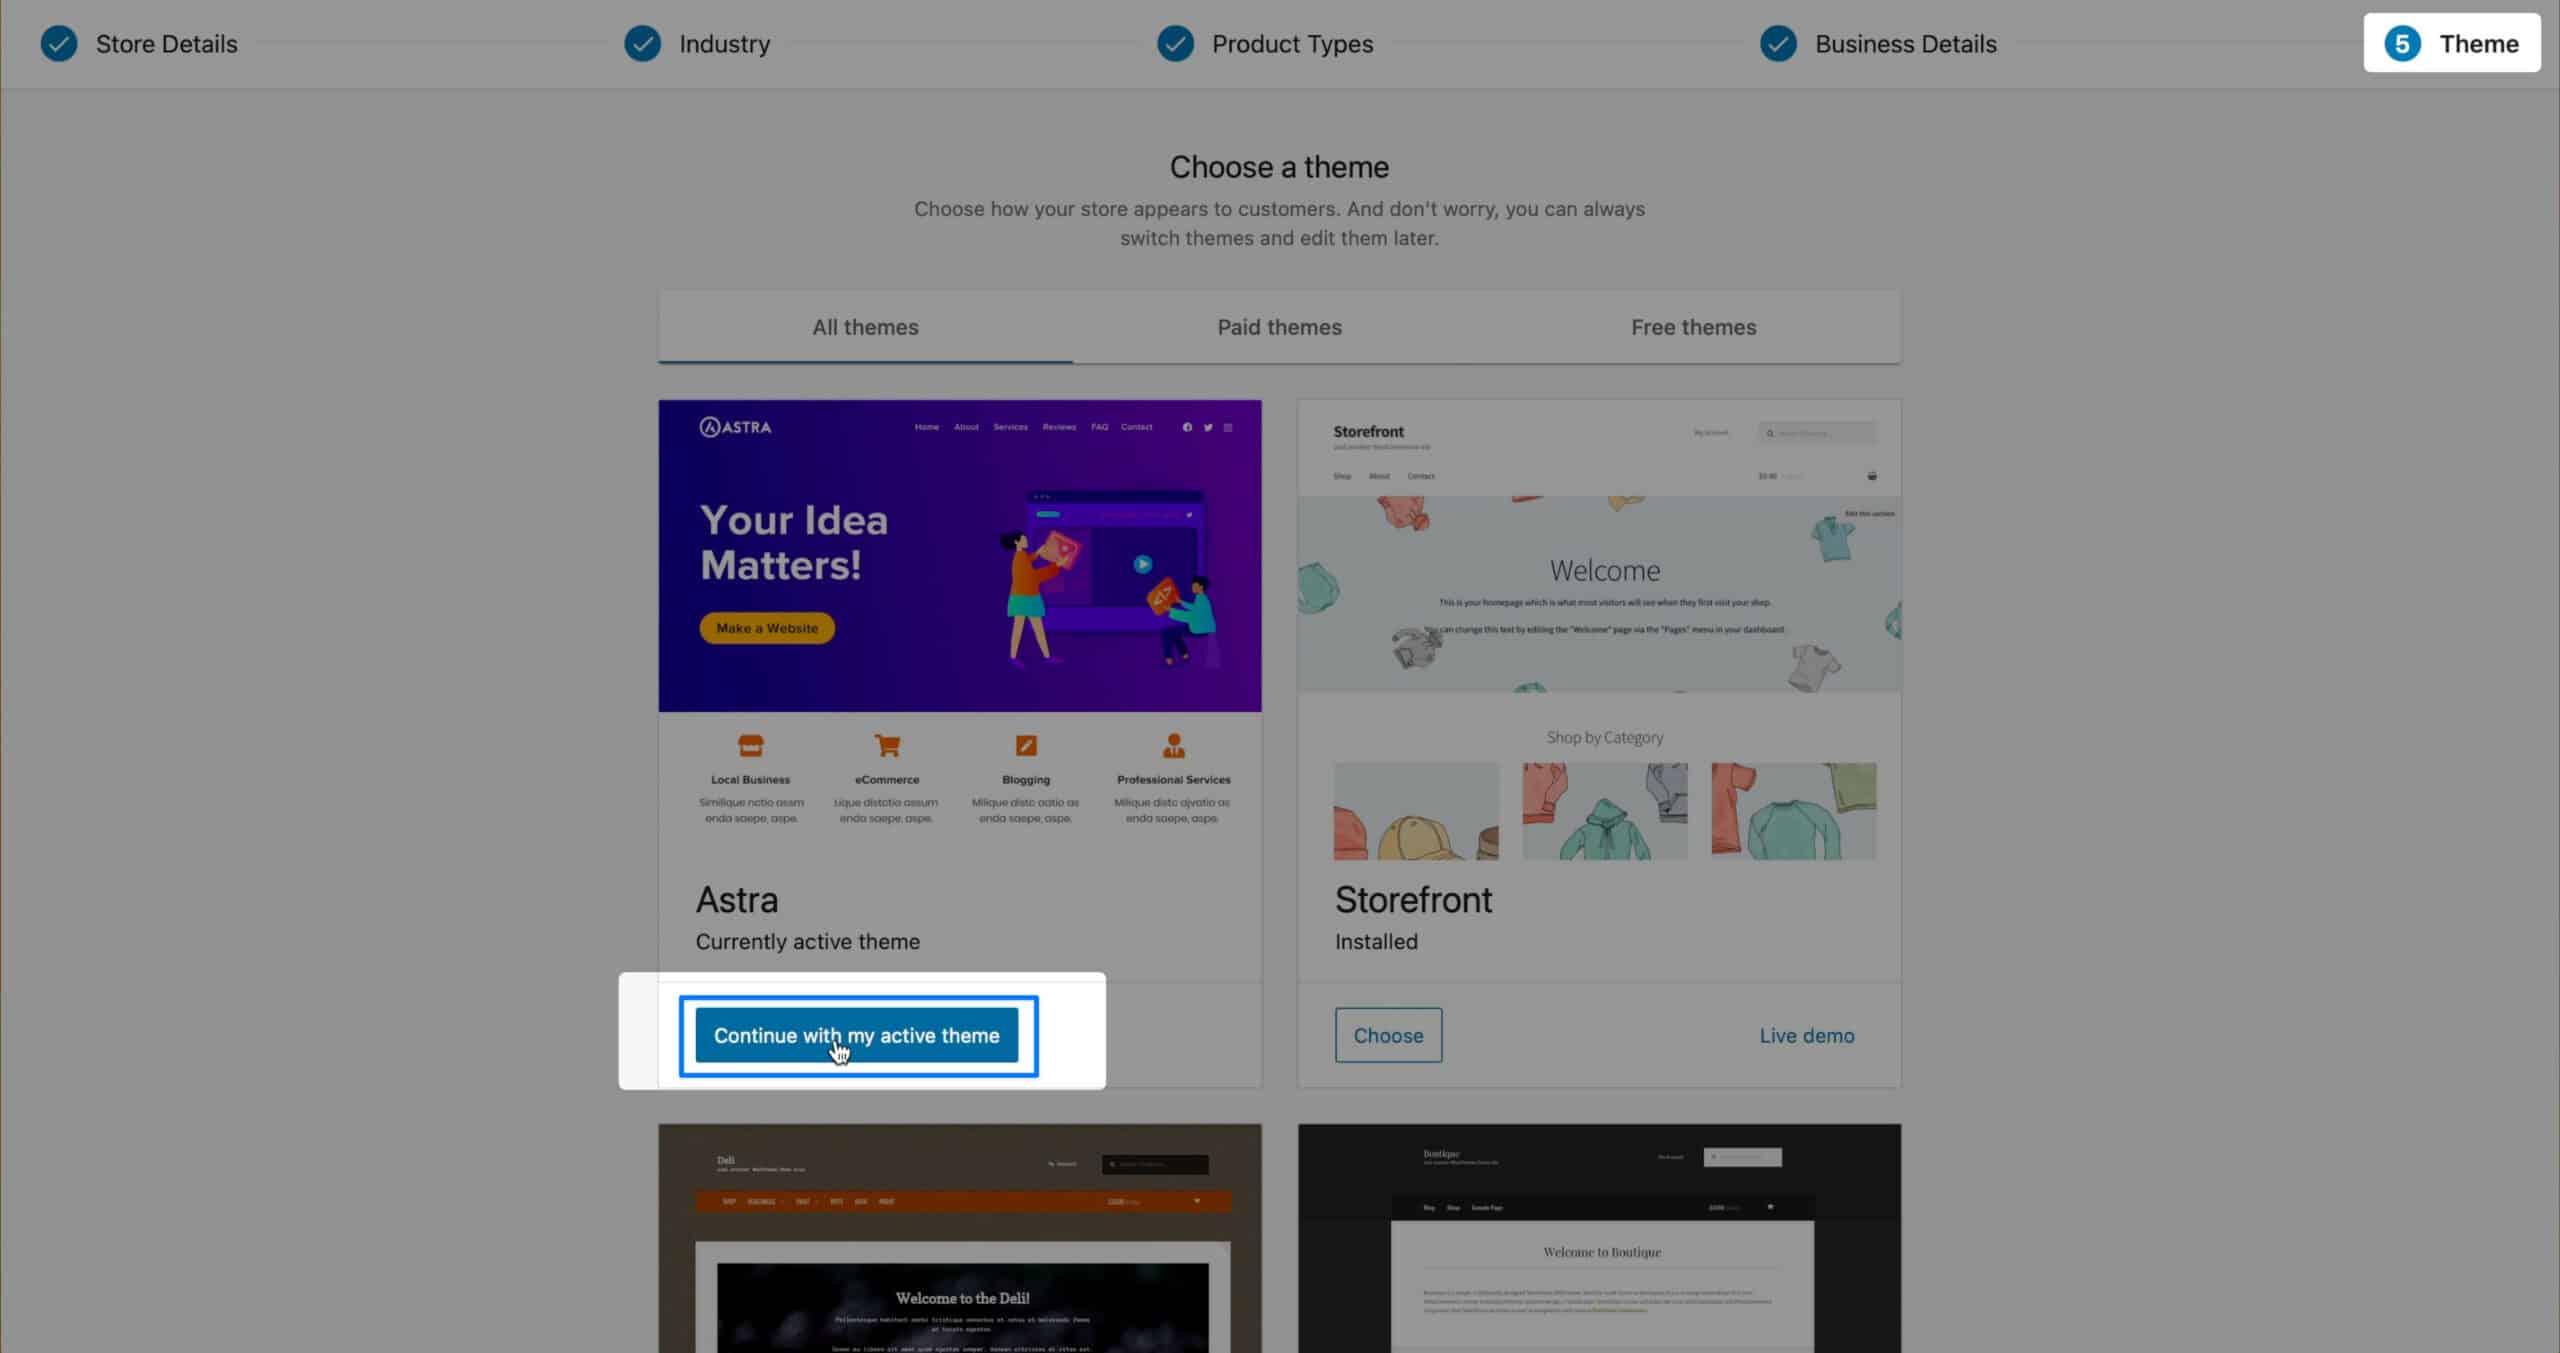
In the final step, they’re asking us to choose a theme, which we have already done. So scroll to the very bottom and click “skip this step.”
Add Your Products
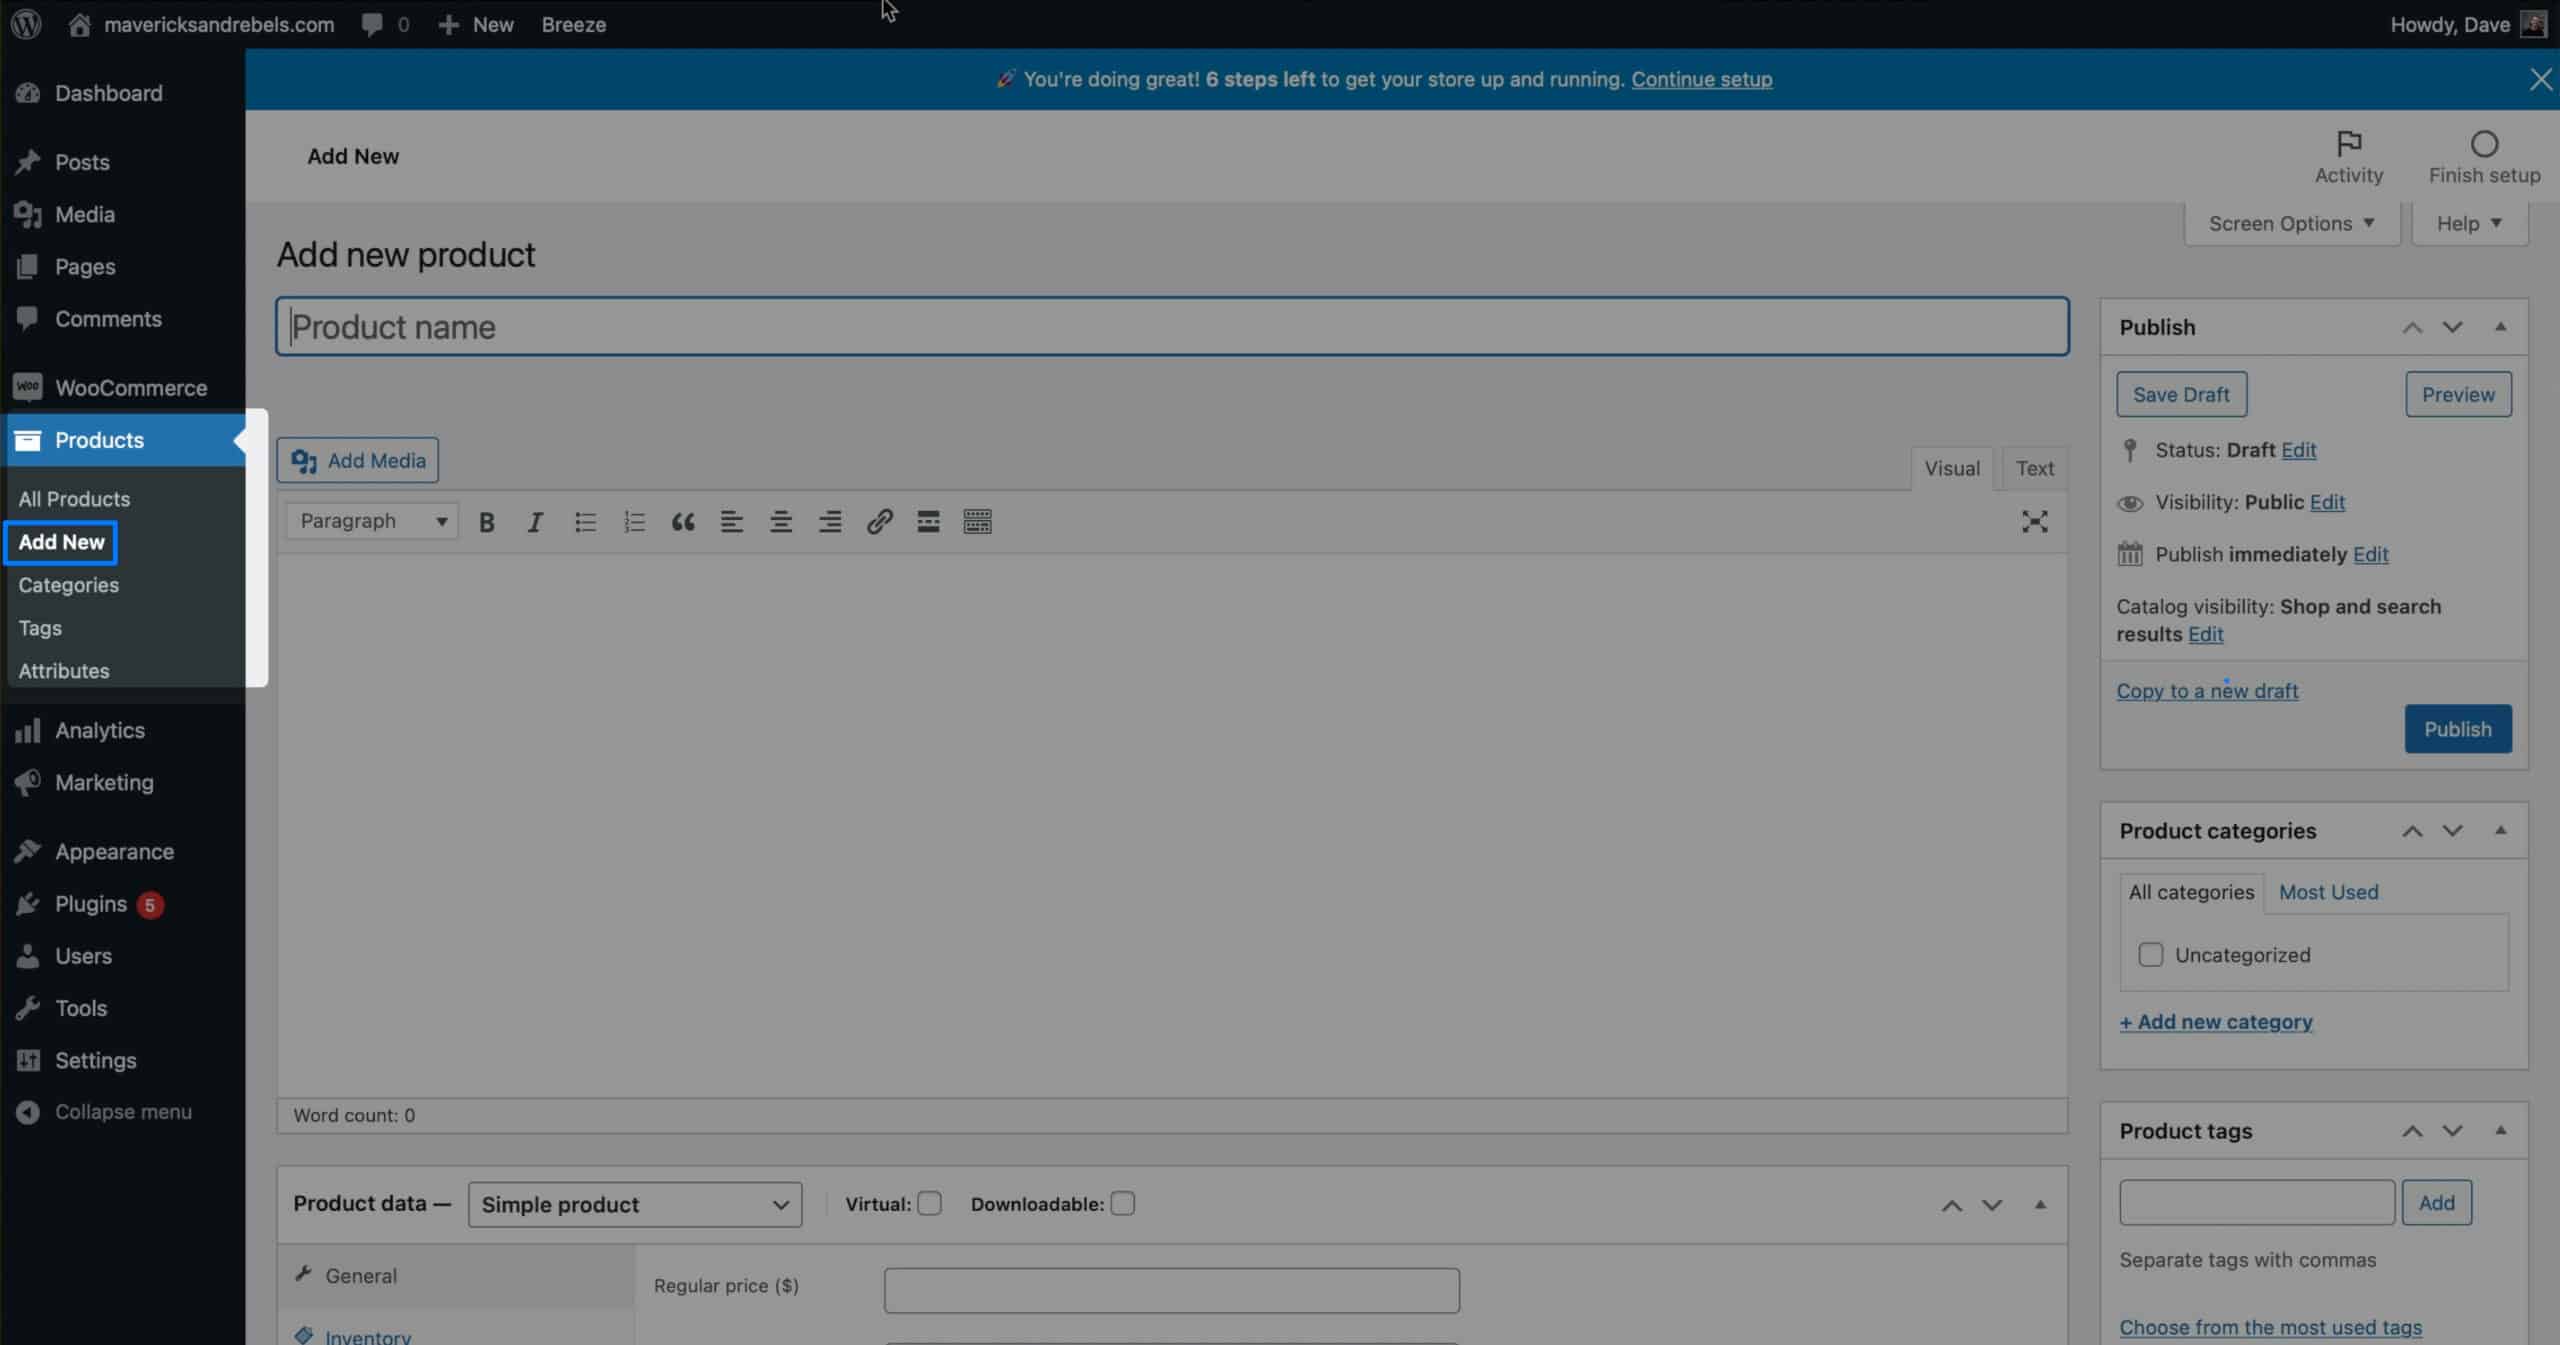
To start adding your first product, click on Products in the left-hand menu bar; it’s right underneath WooCommerce.
Click Create Product and follow the guide to walk you through the steps of filling out your first product.
You don’t have to complete all the fields. I recommend a Product name, Description, Price, Product Category, and Product Image at a minimum. When you’re done, click Publish.
After you’ve published your product, check it out, and you’ll see that ou r store is coming together.
You can repeat the process above to add as many products as you’d like. I’m going to add a few more.
There are more options for setup and, of course, endless features you can add to your store. I don’t have time for a deep dive into every topic today. Leave me a comment if you want a specific WooCommerce tutorial in the future.
Styling Our Site In The Customizer
Now that our first products are loaded let’s go ahead and style our site.
Of course, we could work with a template.
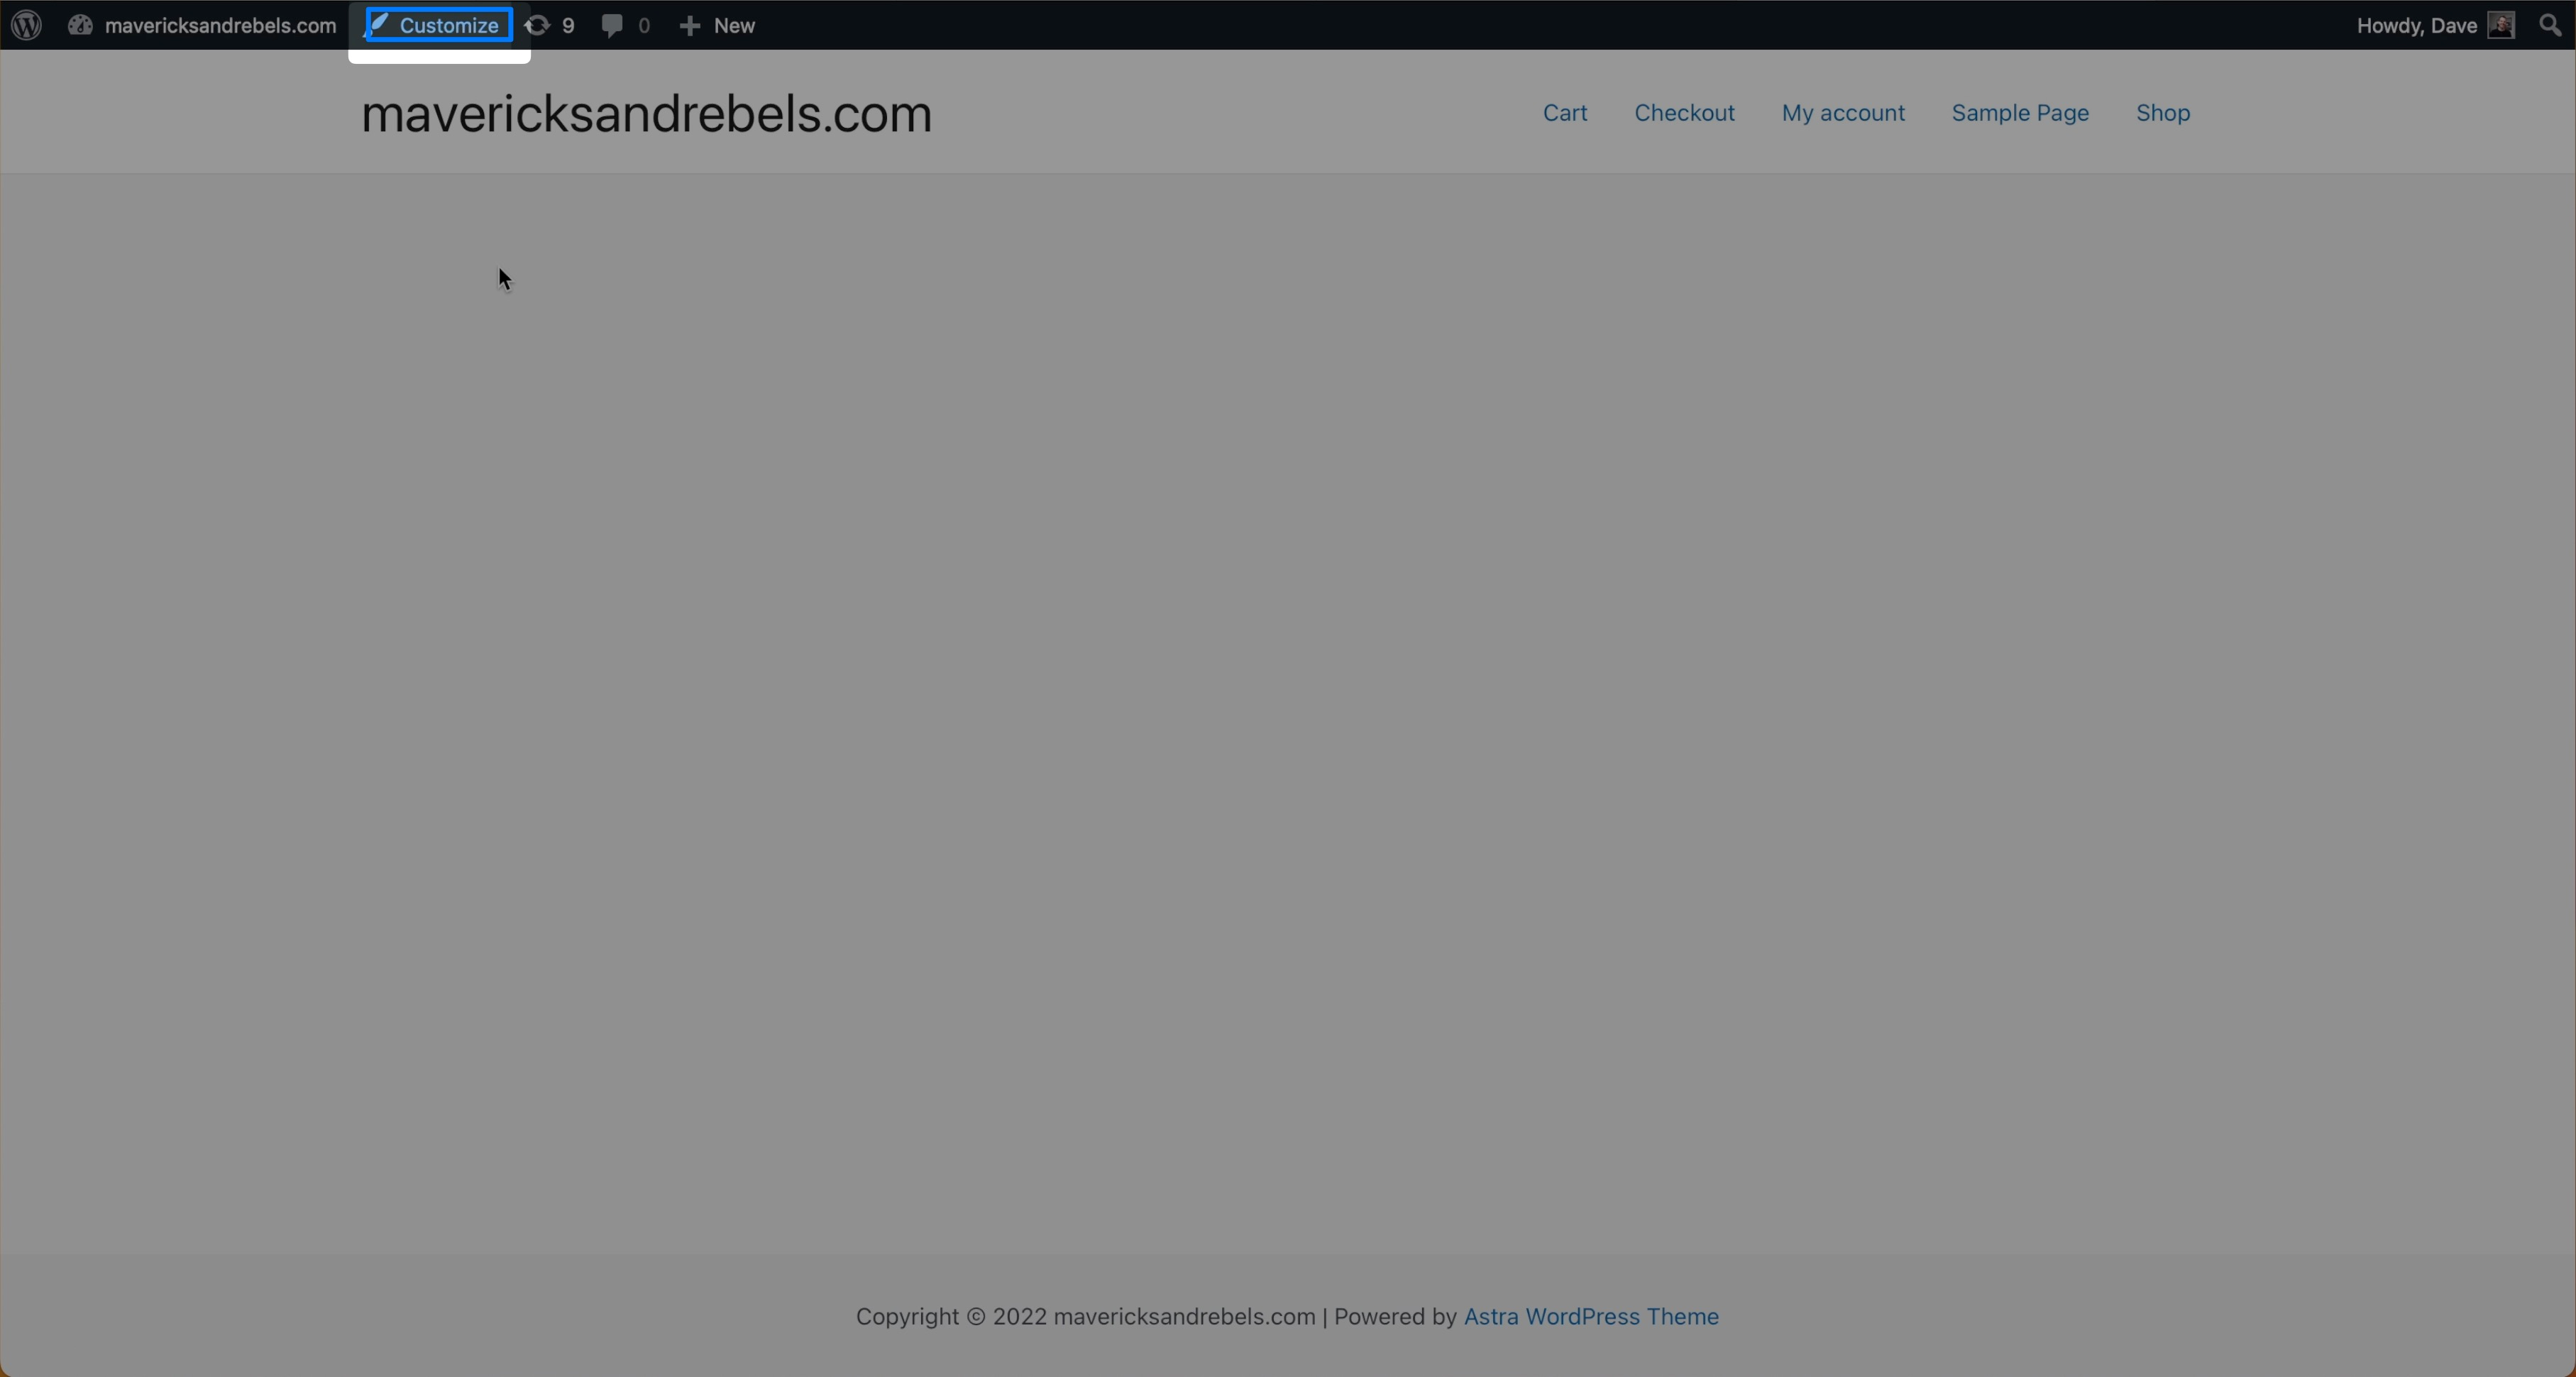
I’ll click on Appearance, then Customize. The Customizer shows you options to change the overall look of the website. We’ll modify the header, the footer, and the WooCommerce templates.
Setting The Home Page
The first thing I’ll do is set the Shop page as the homepage. This way, when people visit the website, they’ll see a list of all the products.
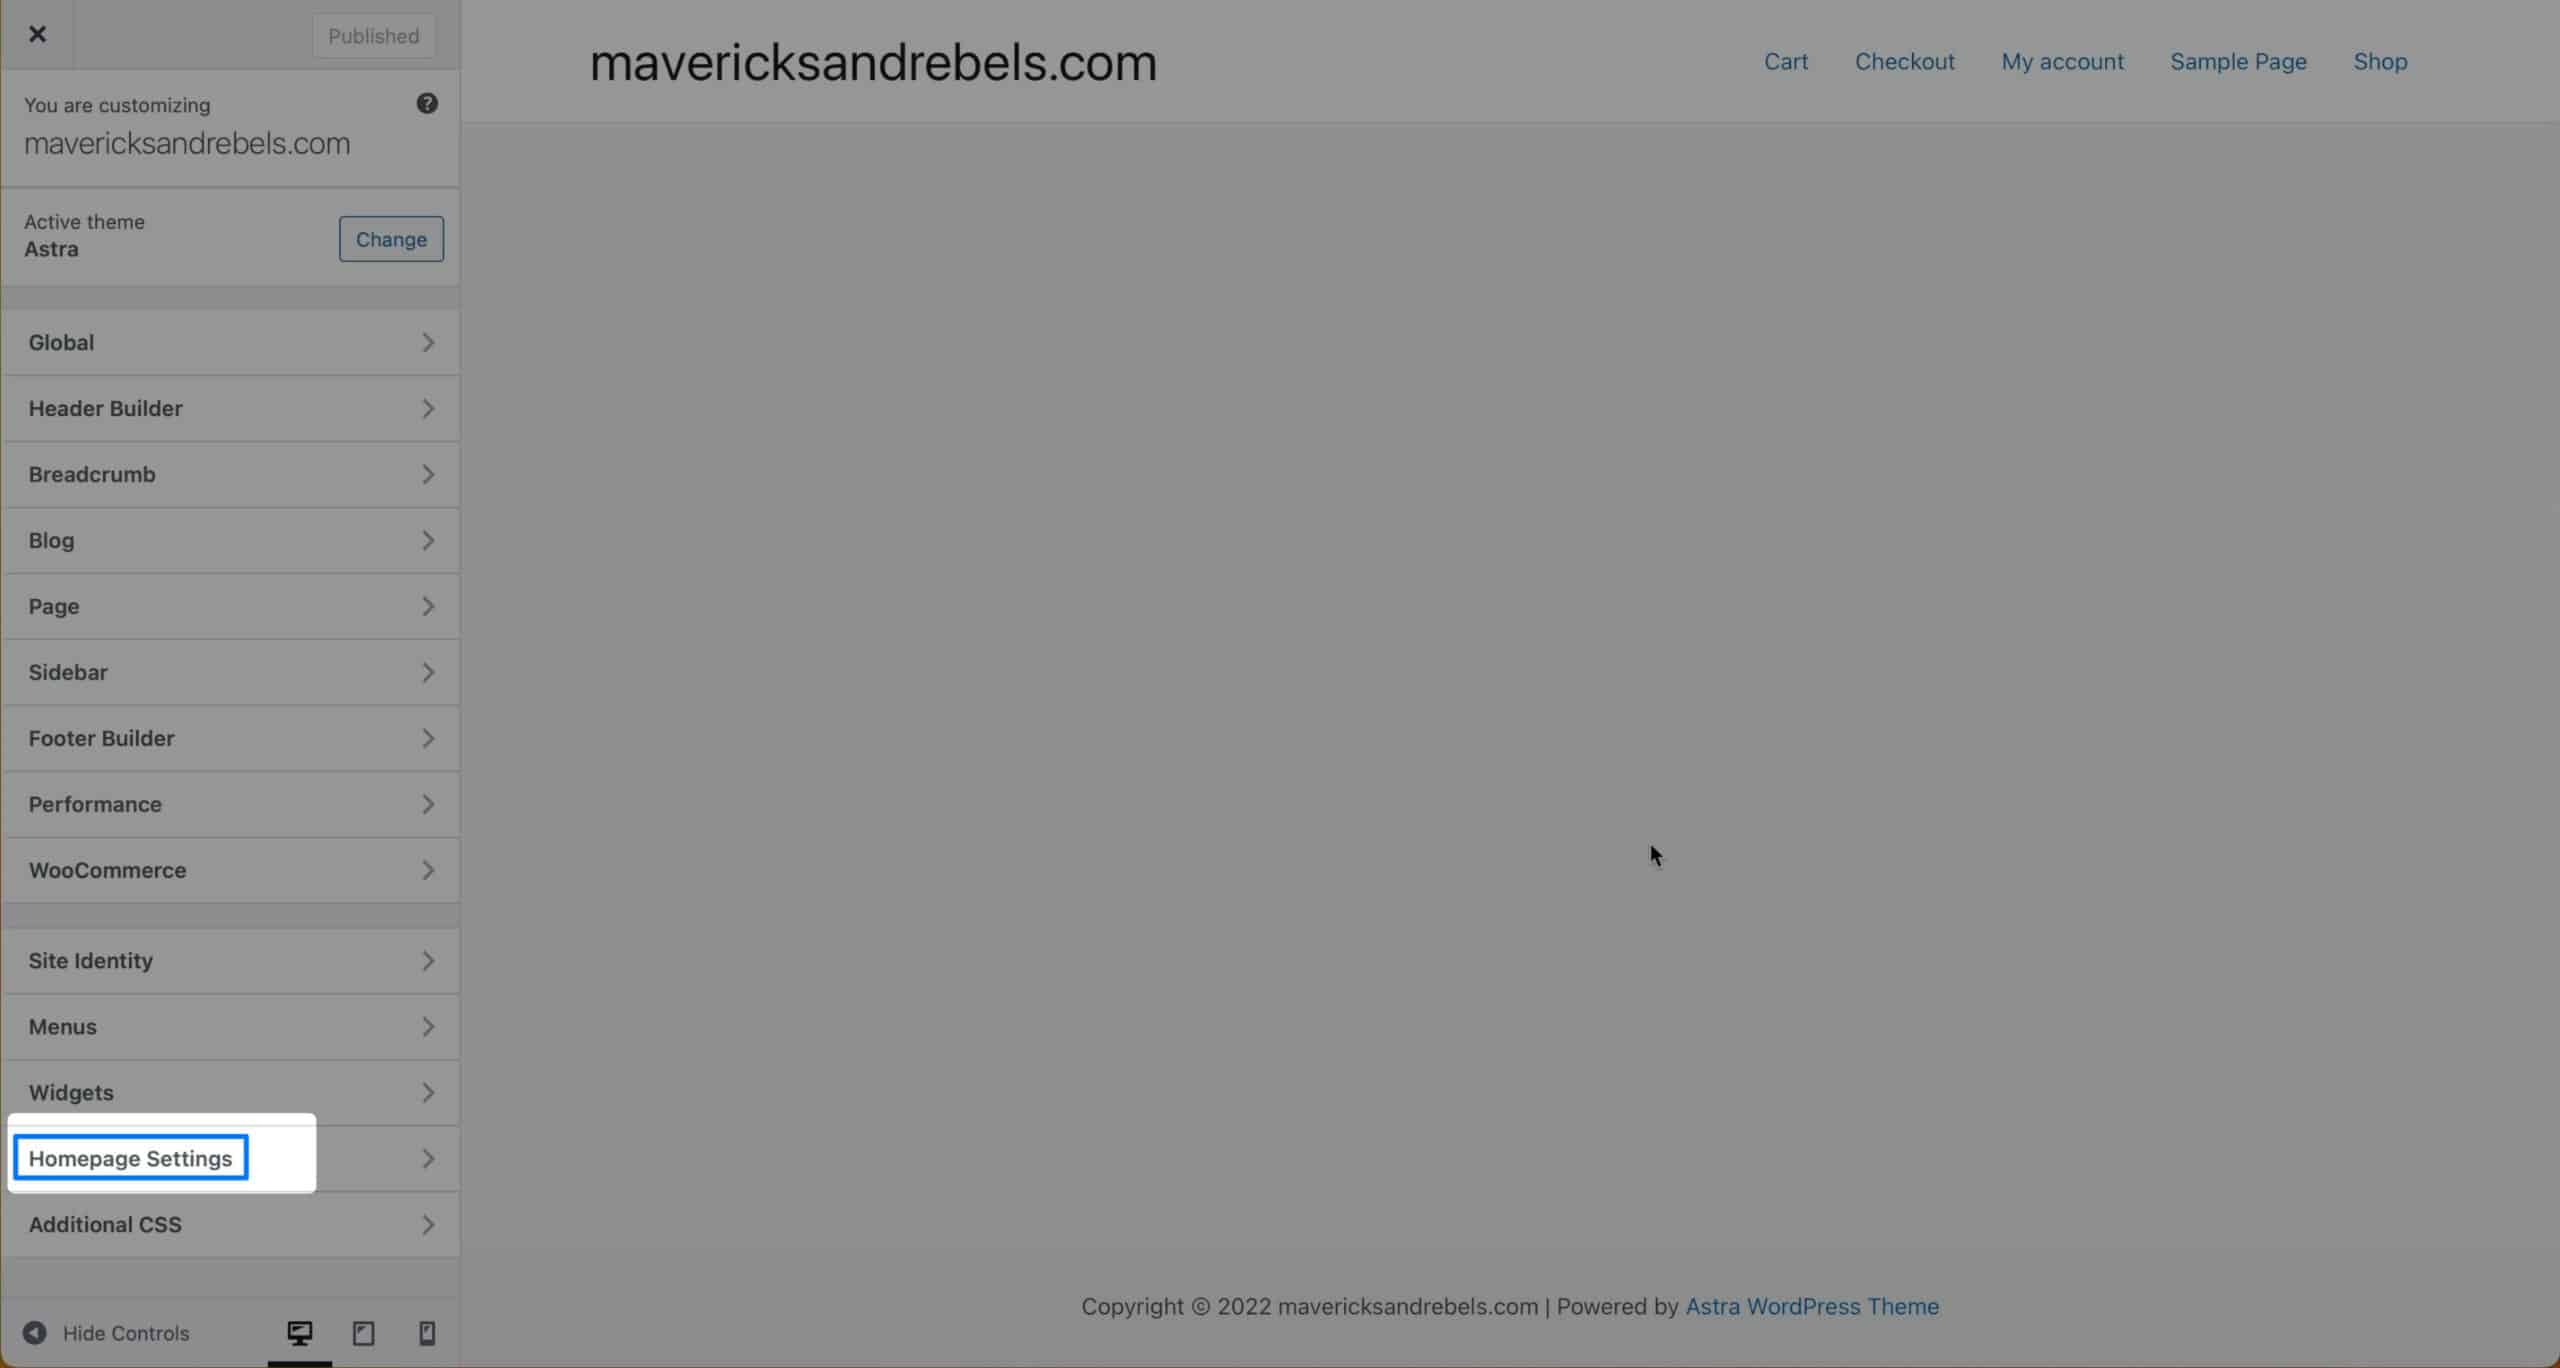
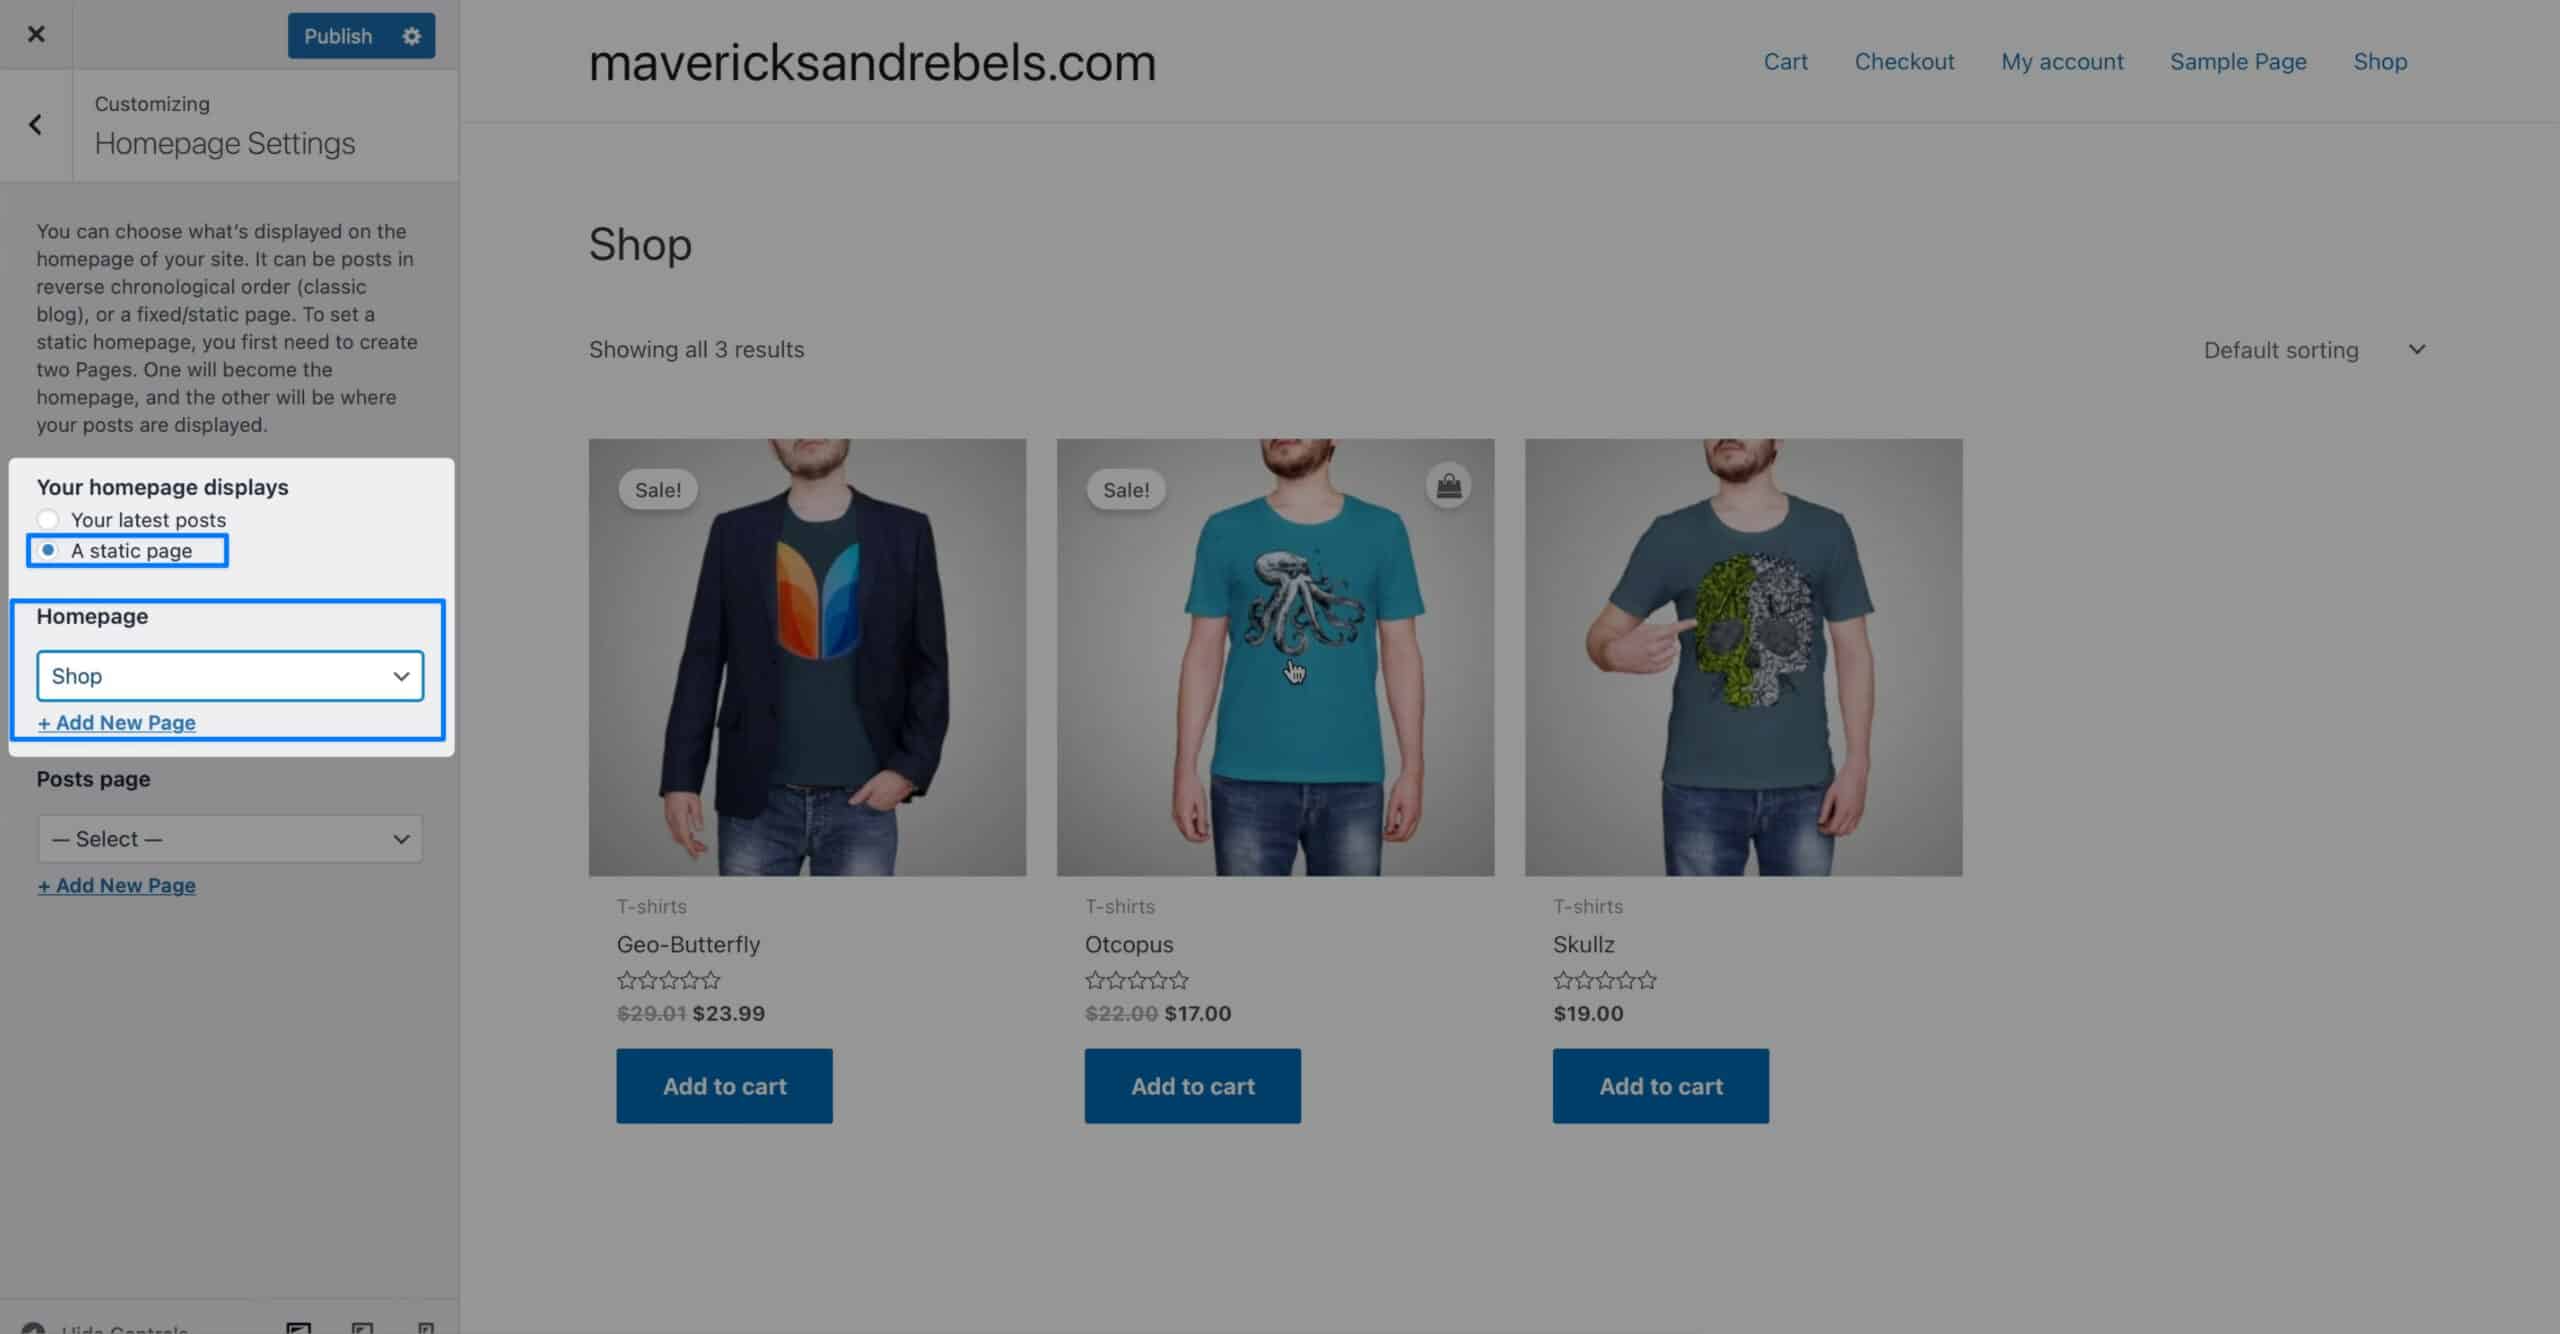
Click Homepage Settings, choose “A static page,” and select Shop from the dropdown menu. Now, if I click Publish and visit my site, it’s starting to look a lot more like an eCommerce site, but it’s still pretty ugly.
Back into the Customizer, this time, I’ll click Customize from the top menu bar.
styling the header
Let’s work on making the header look a little better.
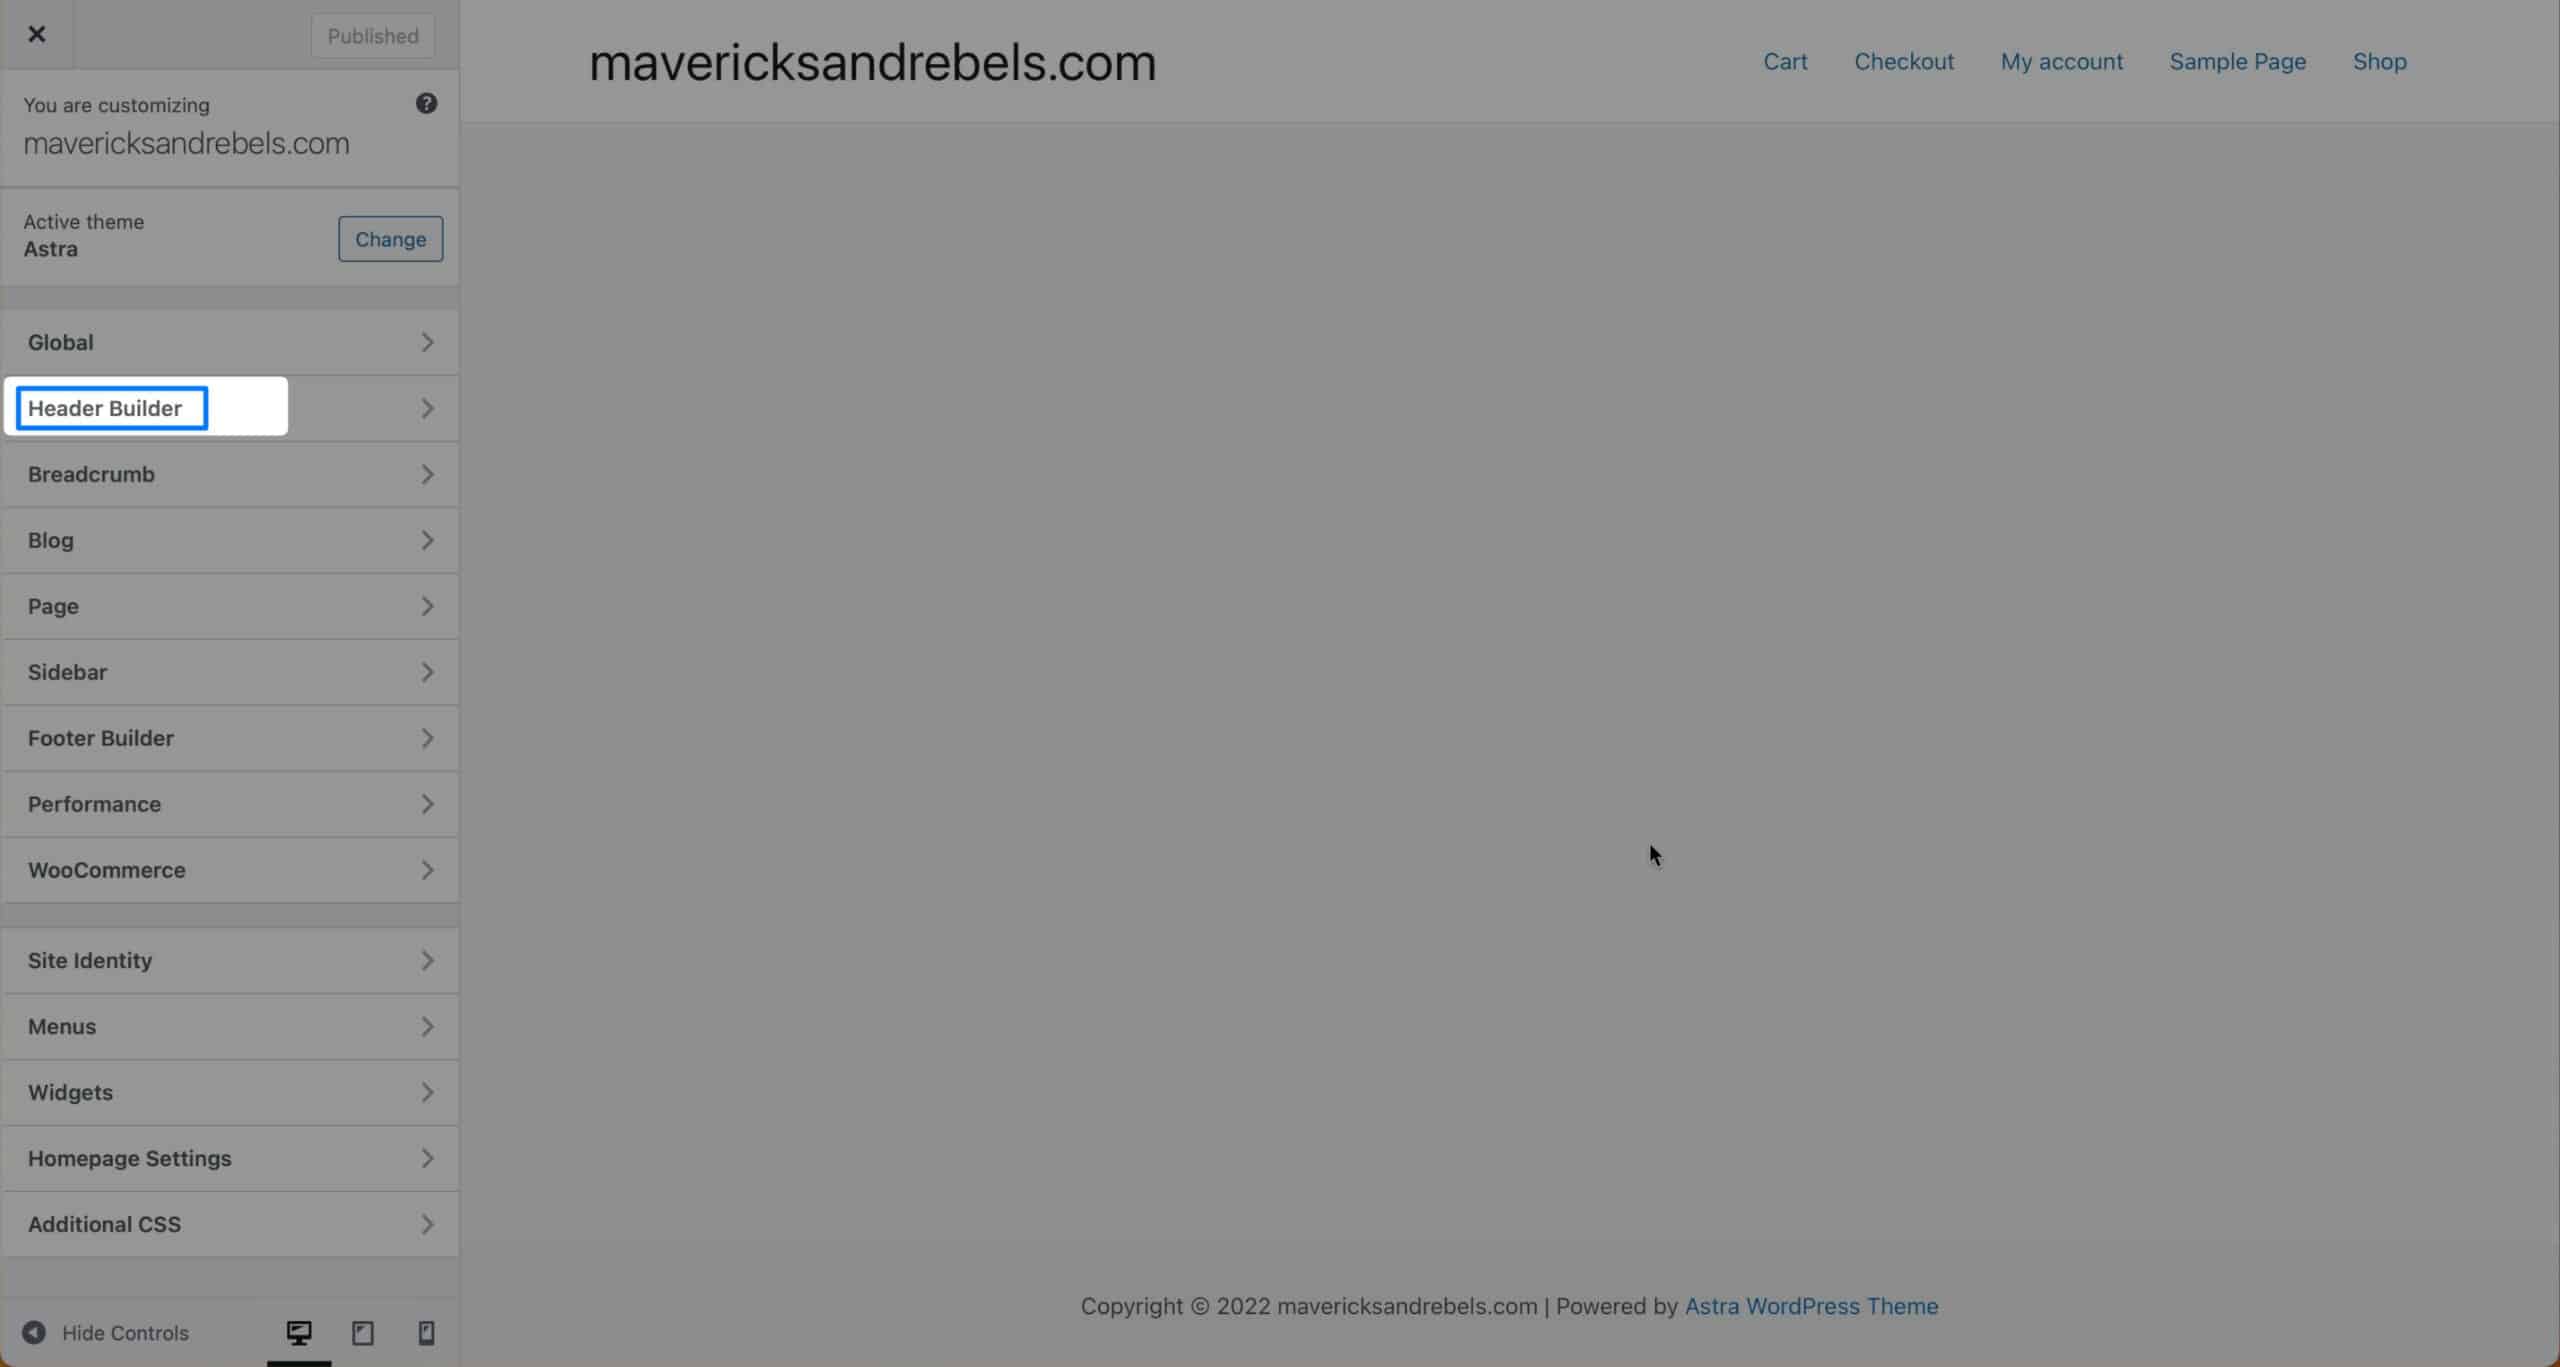
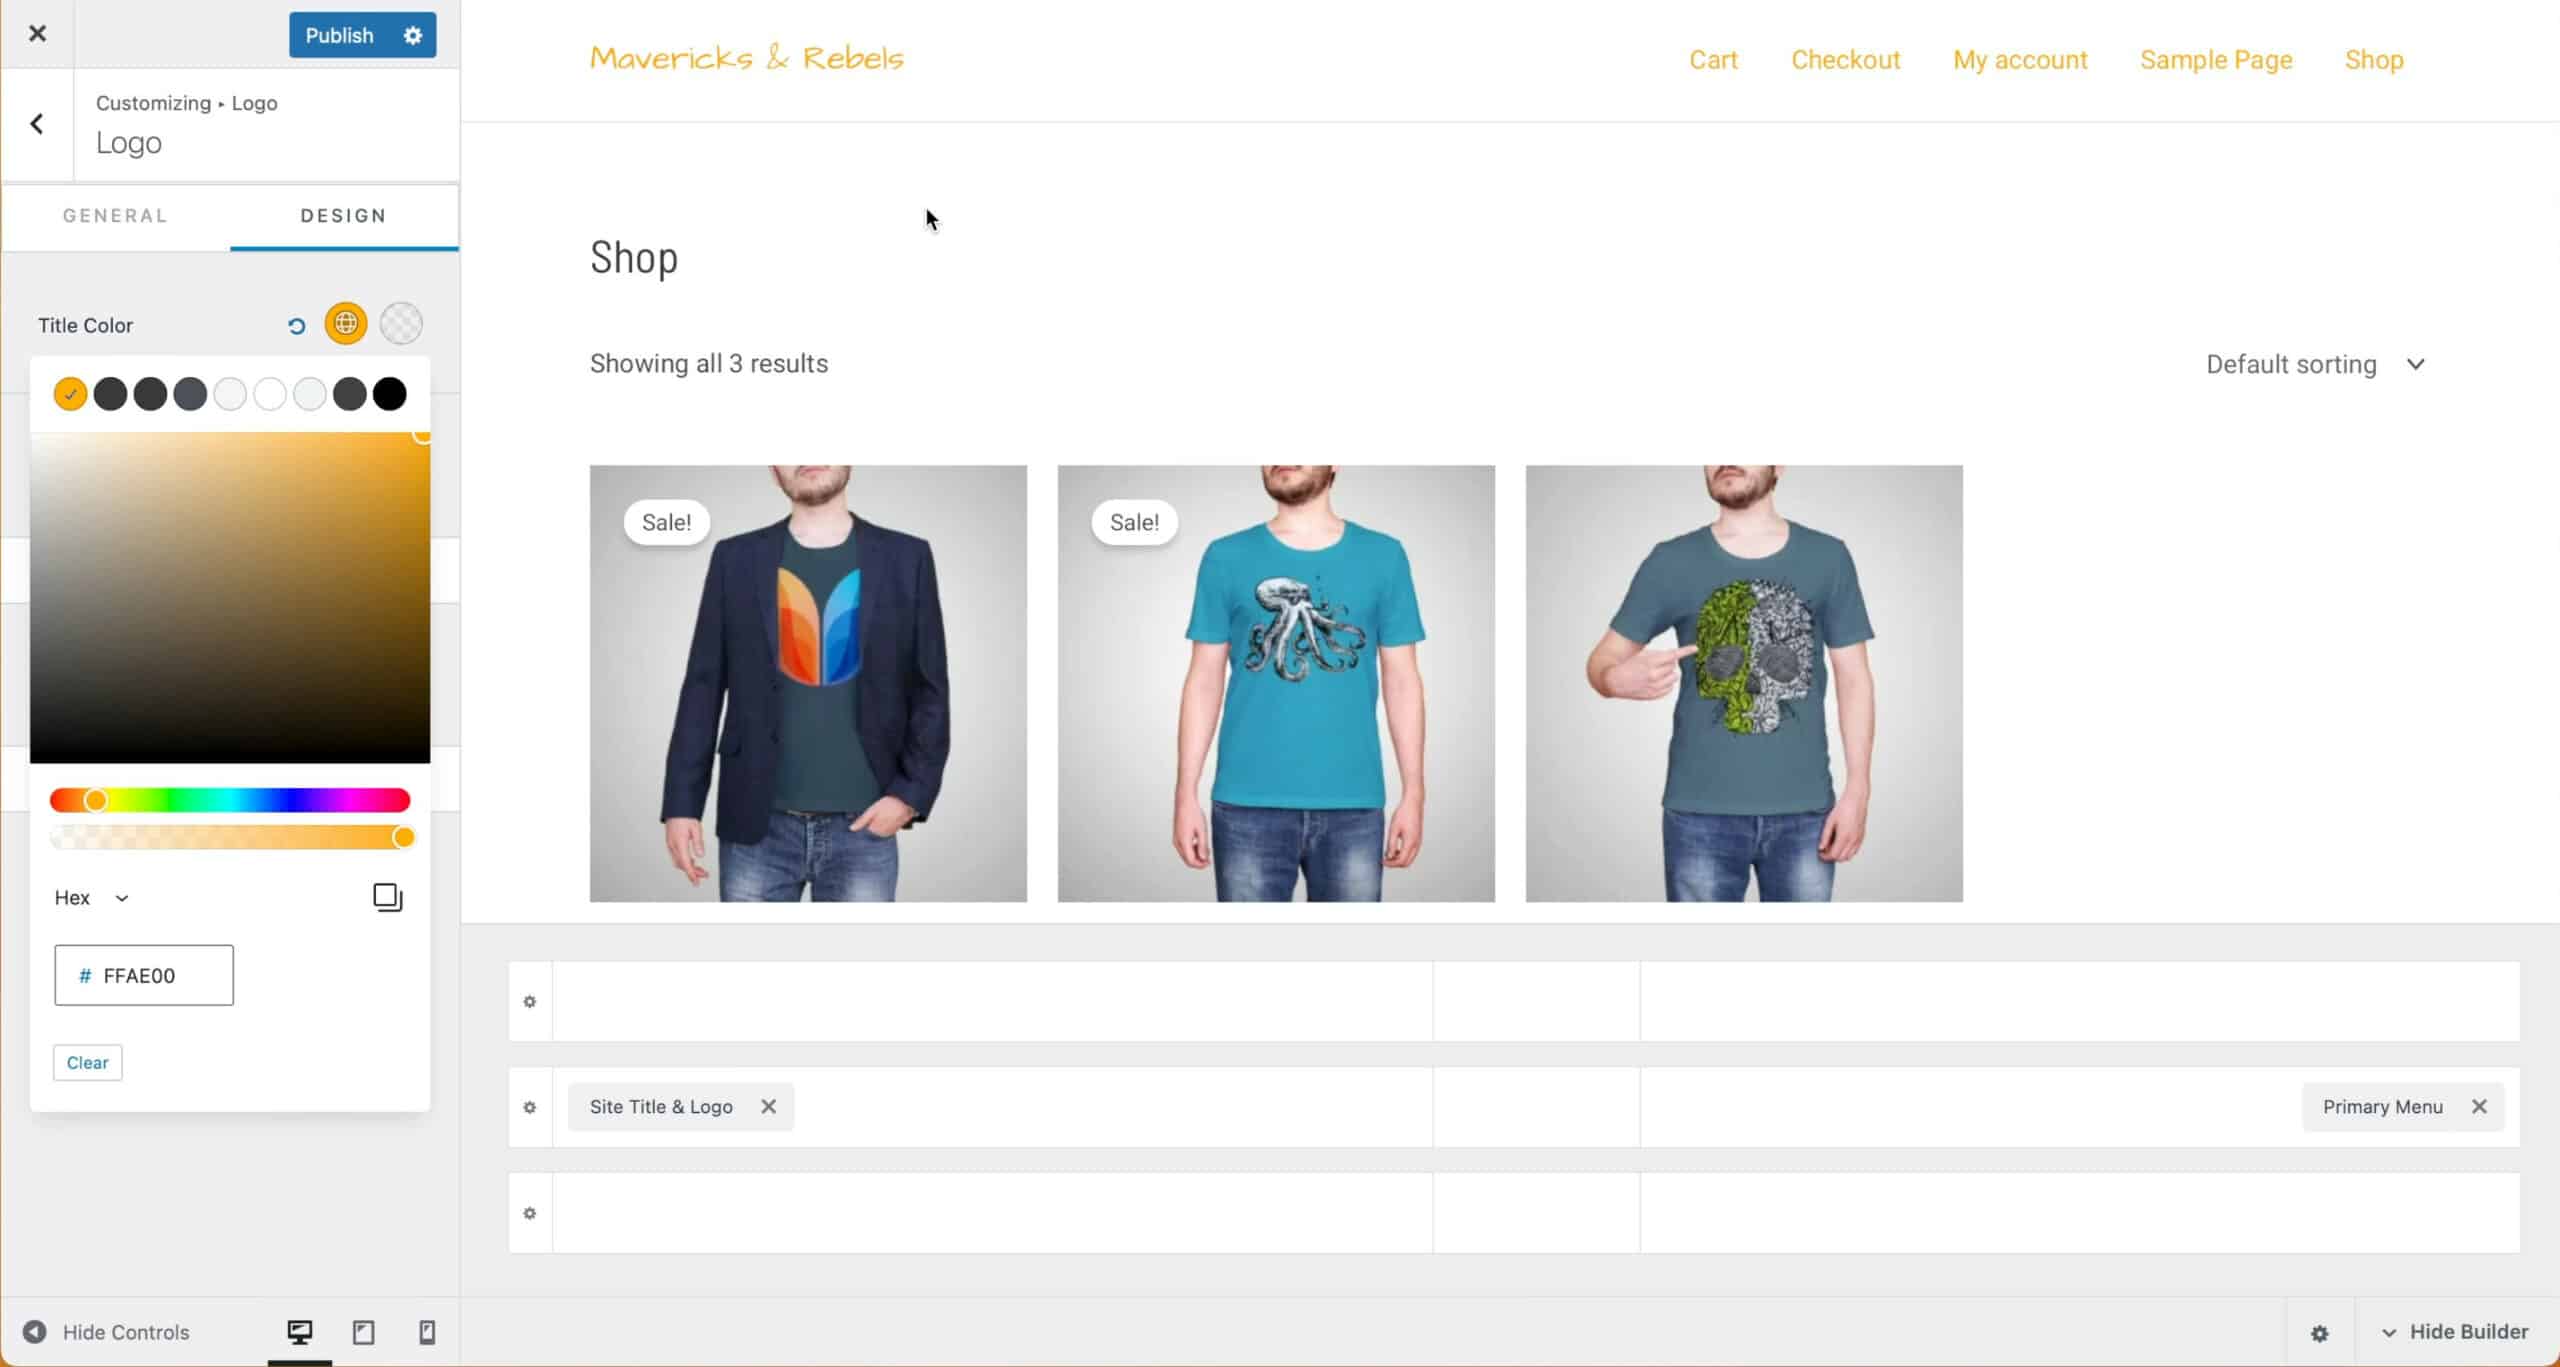
Click on Header Builder and choose Site Title & Logo.
If you have a logo, you can upload one. I’m just going to use my site title, so I’ll update this to look how I want it.
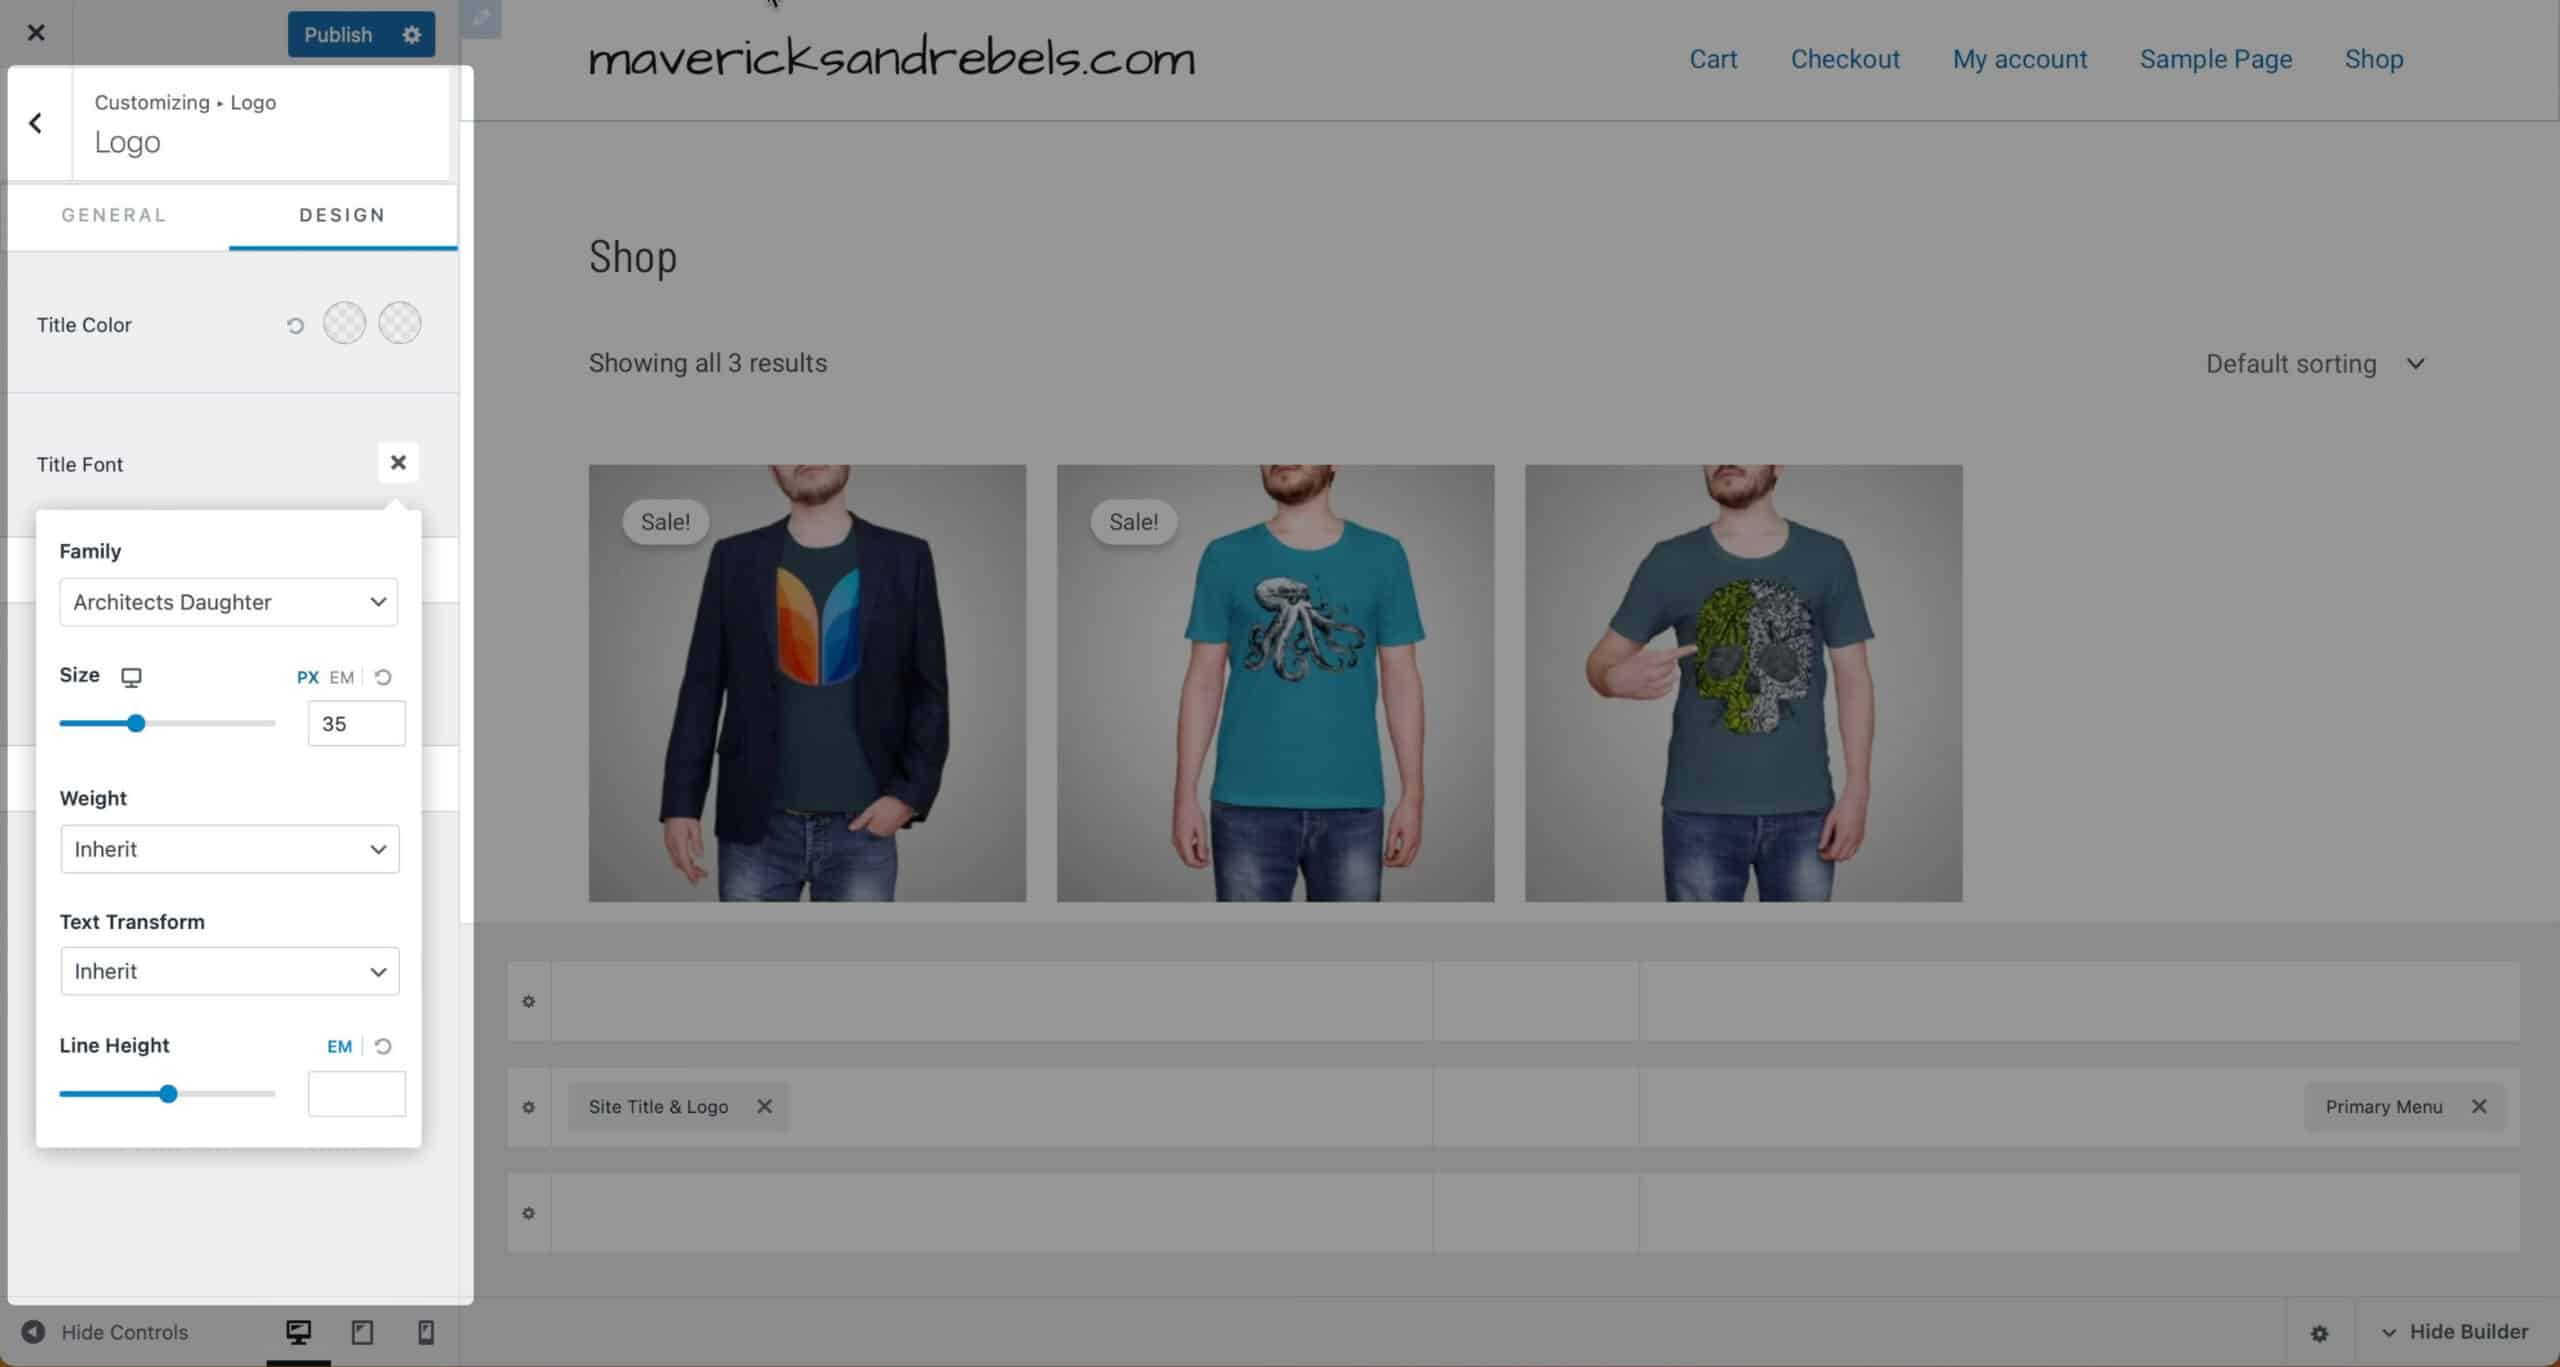
I want to choose a different typeface for my brand, so I’ll click on the design tab where I can change the font and color.
Let’s go with orange for the color and Architect’s Daughter for the font.
Setting up the primary navigation menu
Next, I’m going to configure my primary menu. I’ll go back out to the top level of the Customizer and choose Menus. Here we’ll create a new menu. Title it Primary Menu and put it in the primary menu location. Click Next, and we’ll add items to our menu.
I’ll add the shop page, my account, checkout, and cart pages to my menu.
Next, I want to change the typography—this time, not just for the header but for the entire site.
Typography
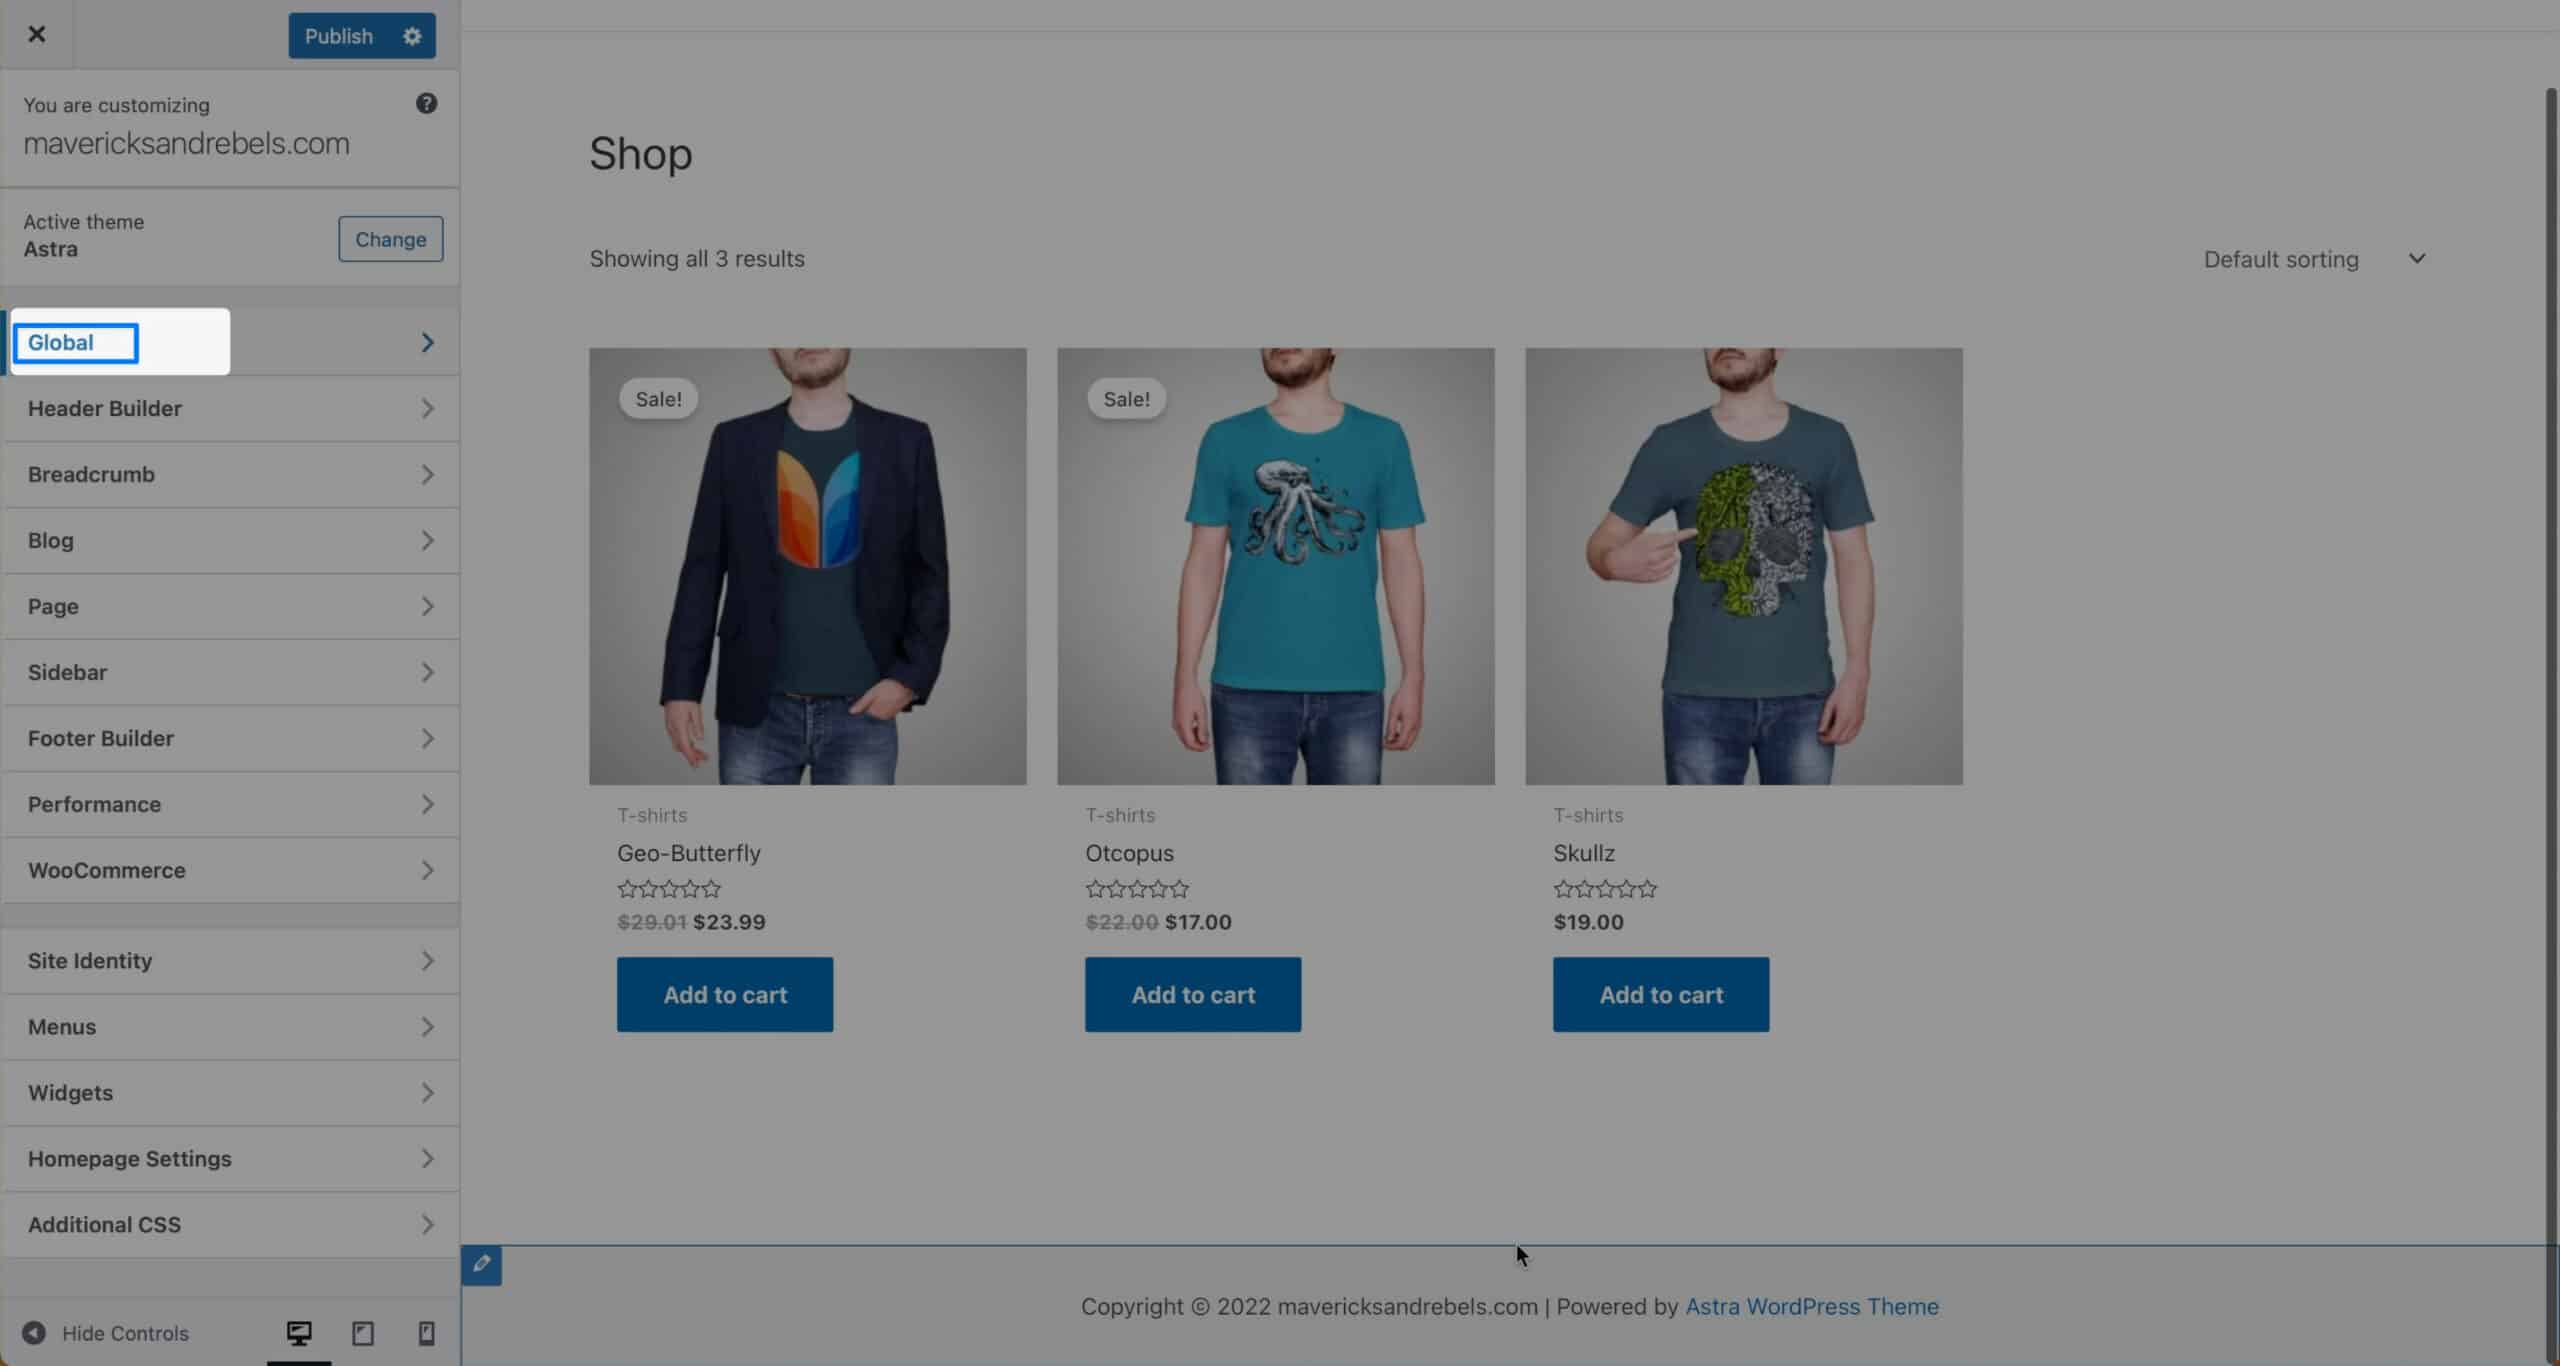
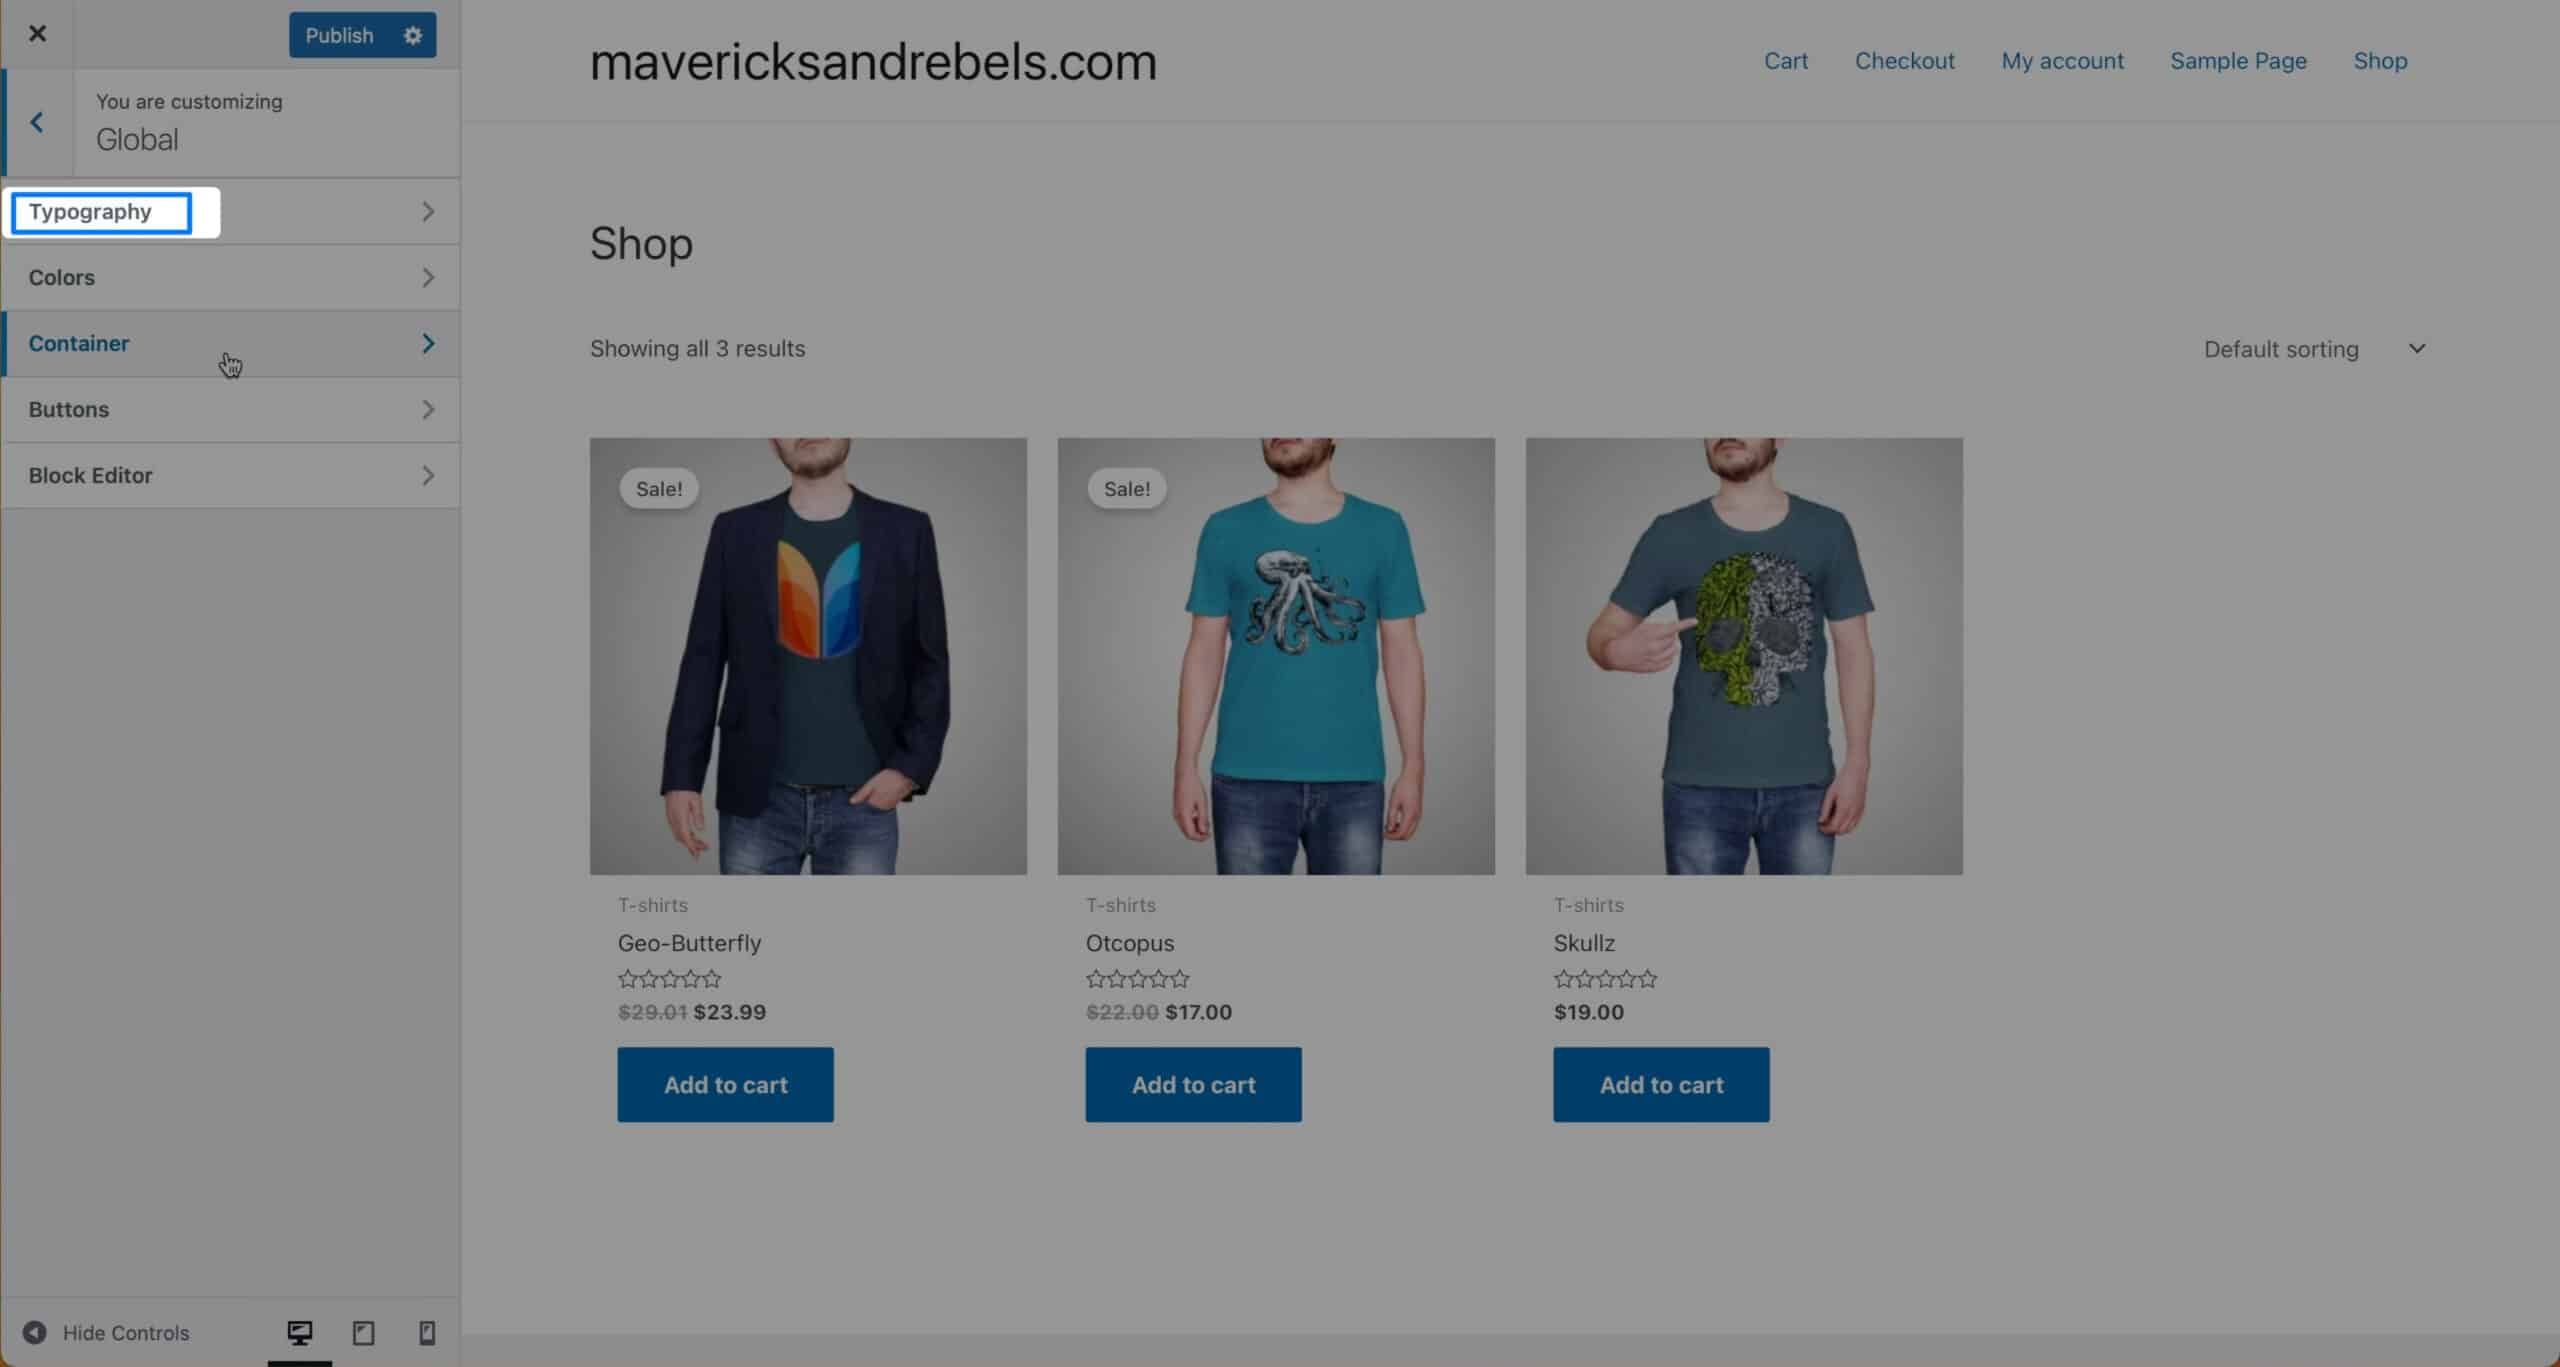
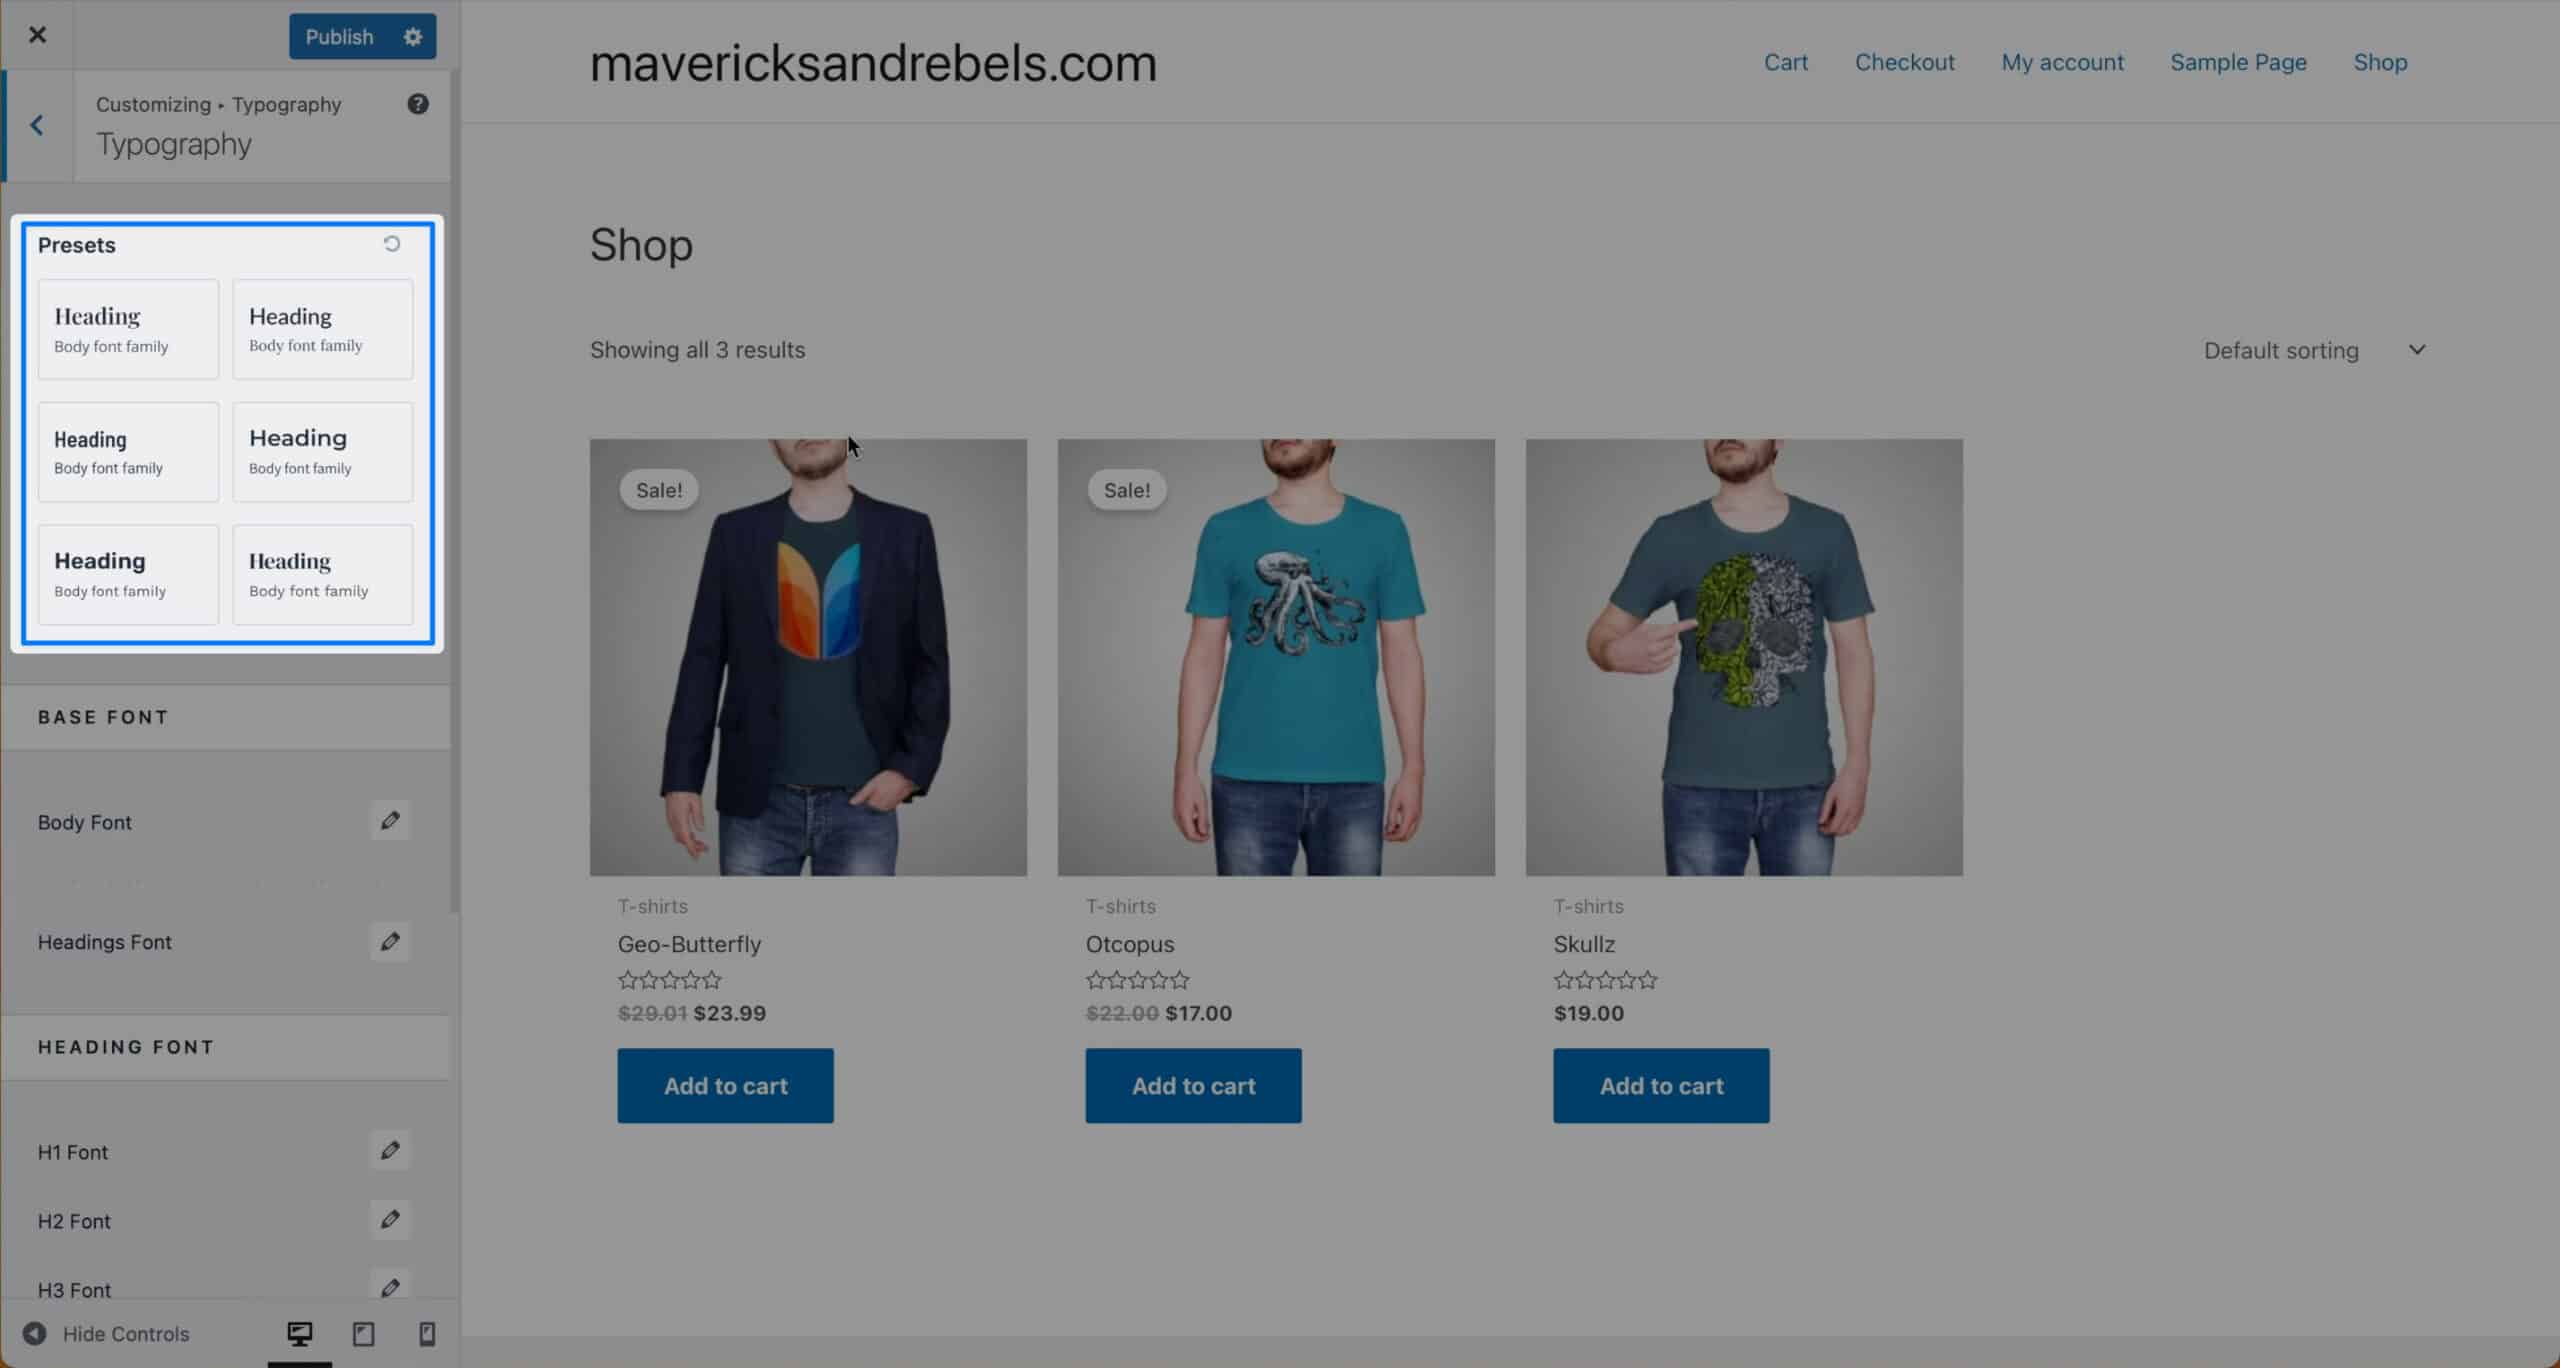
To edit the typography, click on Global, then Typography.
I love that
I encourage you to spend some time getting your typography presets looking how you want before adding a lot of content to your site. Choose default typography now, rather than changing each headline or paragraph as you add content. This speeds up site creation and makes it easier to make changes in the future.
With the type looking great, let’s move over to the colors.
Site Colors

To edit your site colors, click on Global, then Colors.
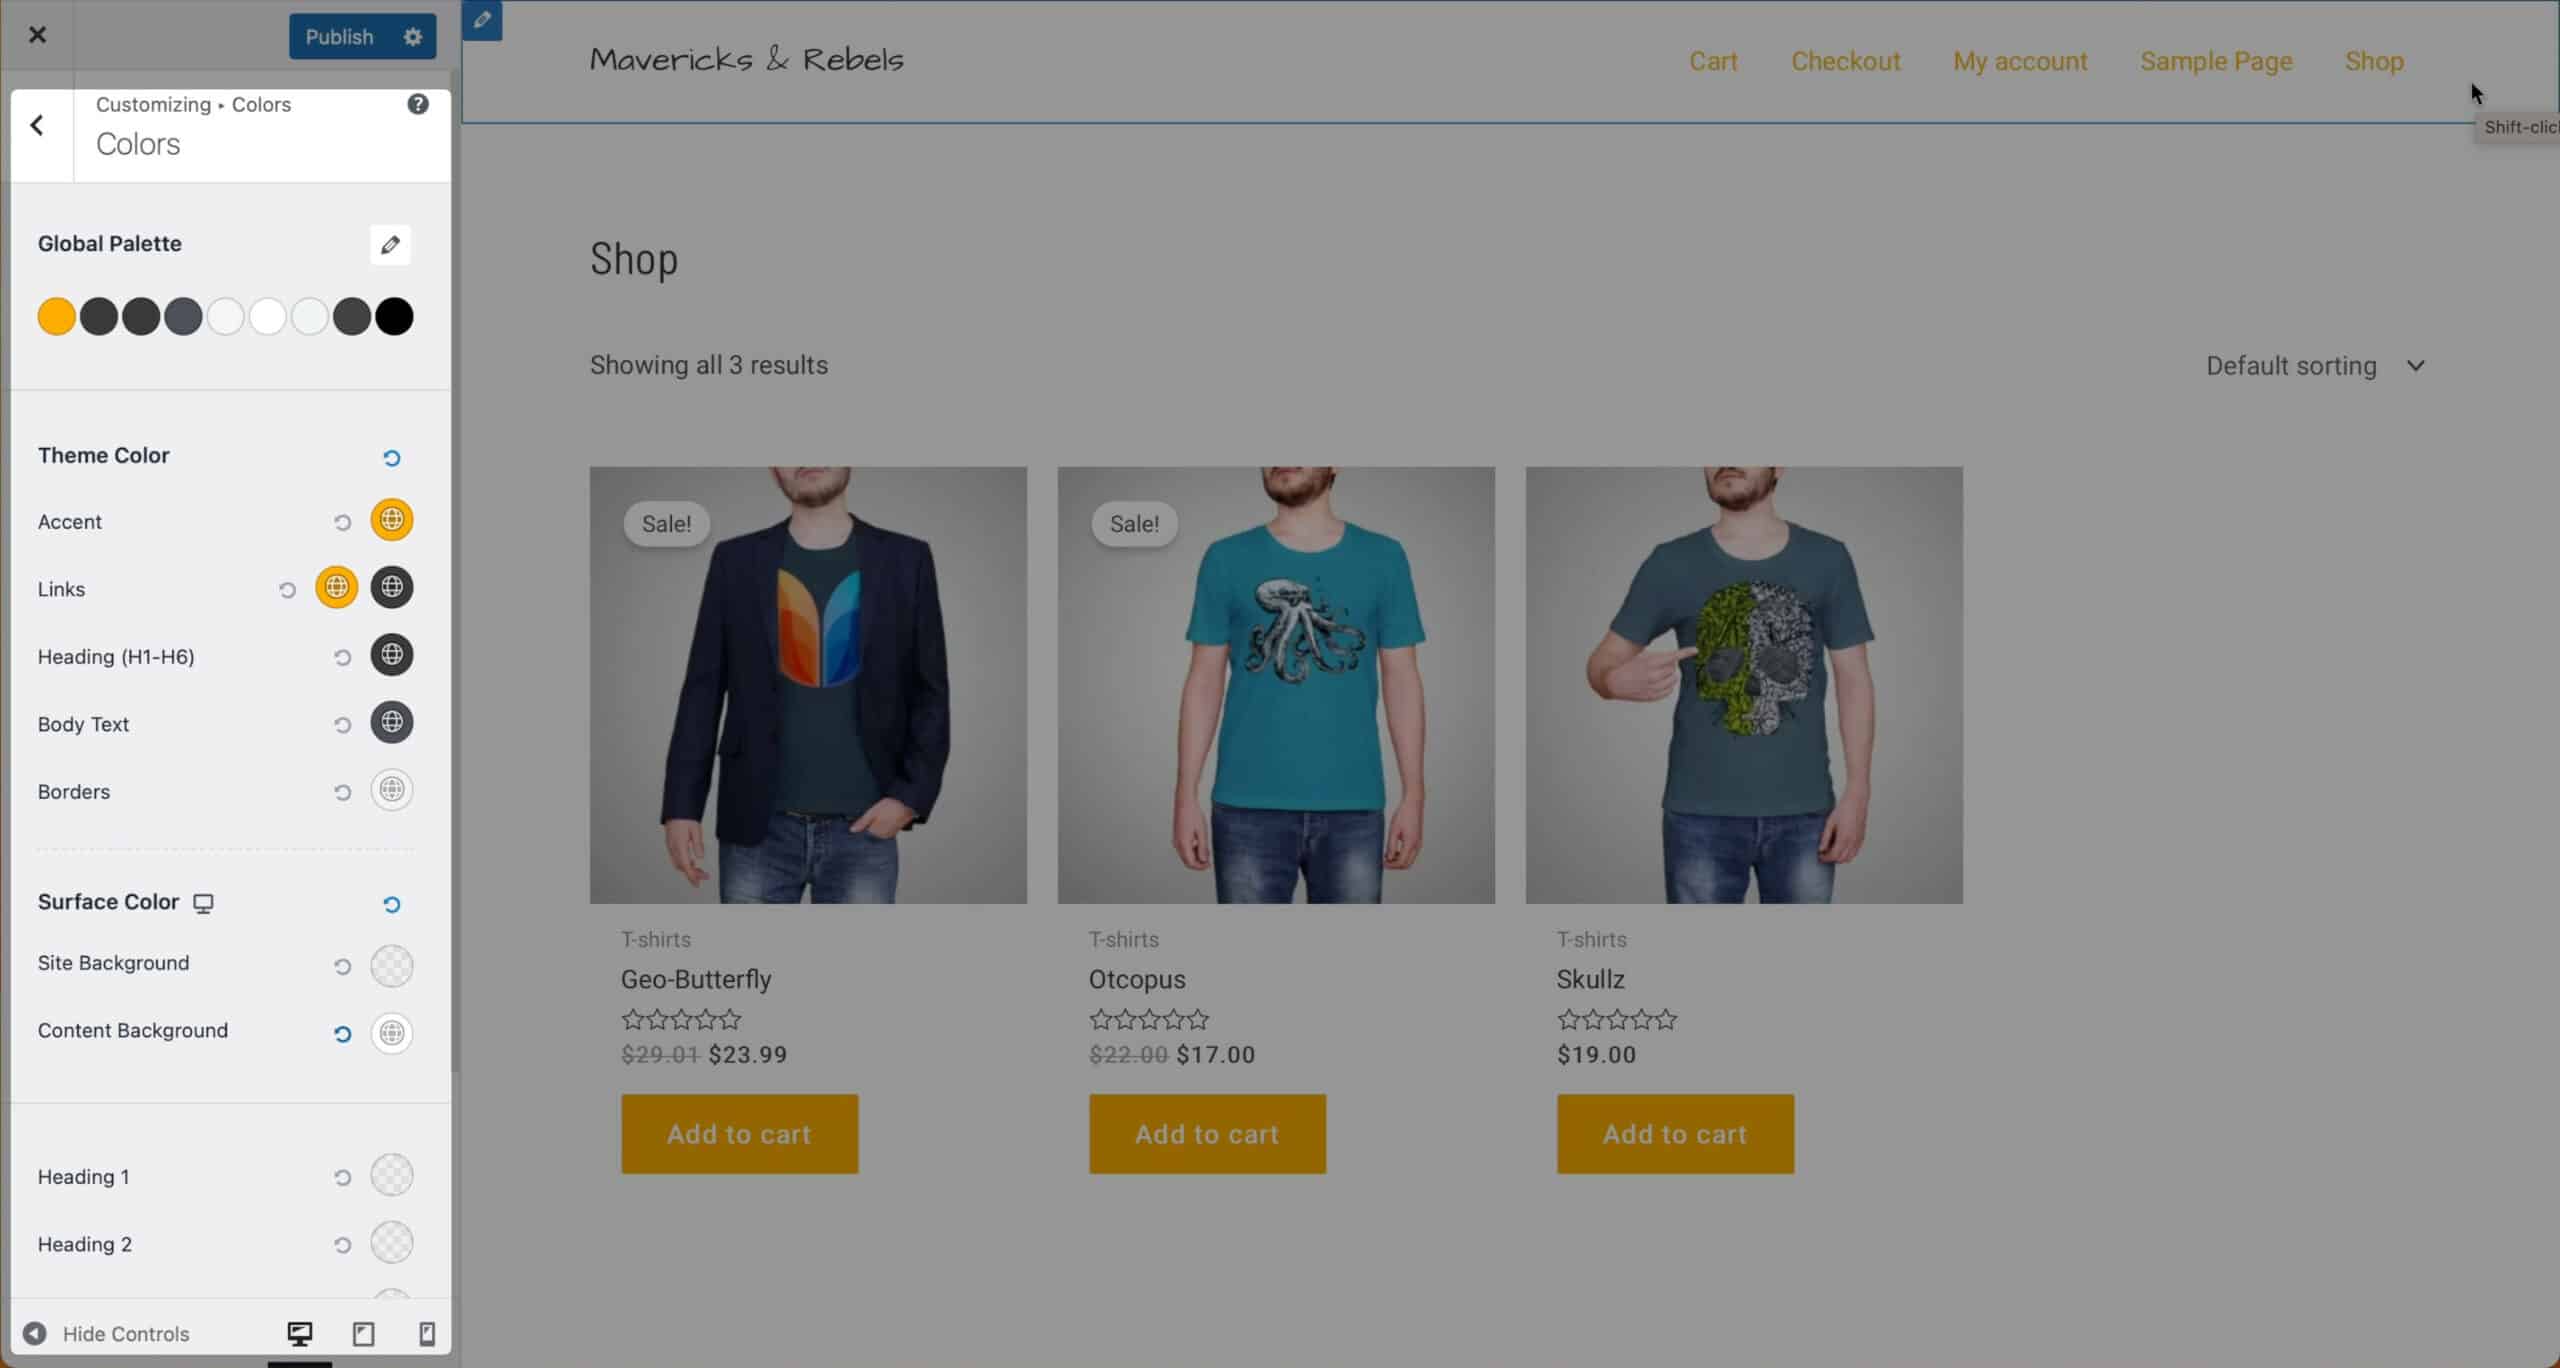
Here you can set up a global palette of reusable colors and then quickly apply them to different parts of your website.
I’ll make my accent color orange, the same one as the logo.
For me, that simple change does a lot to bring the site together.
Spend time getting your color palette together as you did for typography. It has the same benefits of allowing you to change the look of your entire site in a few clicks.
Before we style our store, let’s edit the footer.
Styling the Footer
Just like the header builder,
People commonly want to remove the “Powered by” words at the bottom of the screen. This is super easy to do with
You’re also free to put other links down, like your privacy policy, terms of service, or return policy. Just click in the builder and add the content you’d like.
Woocommerce Layout Customization
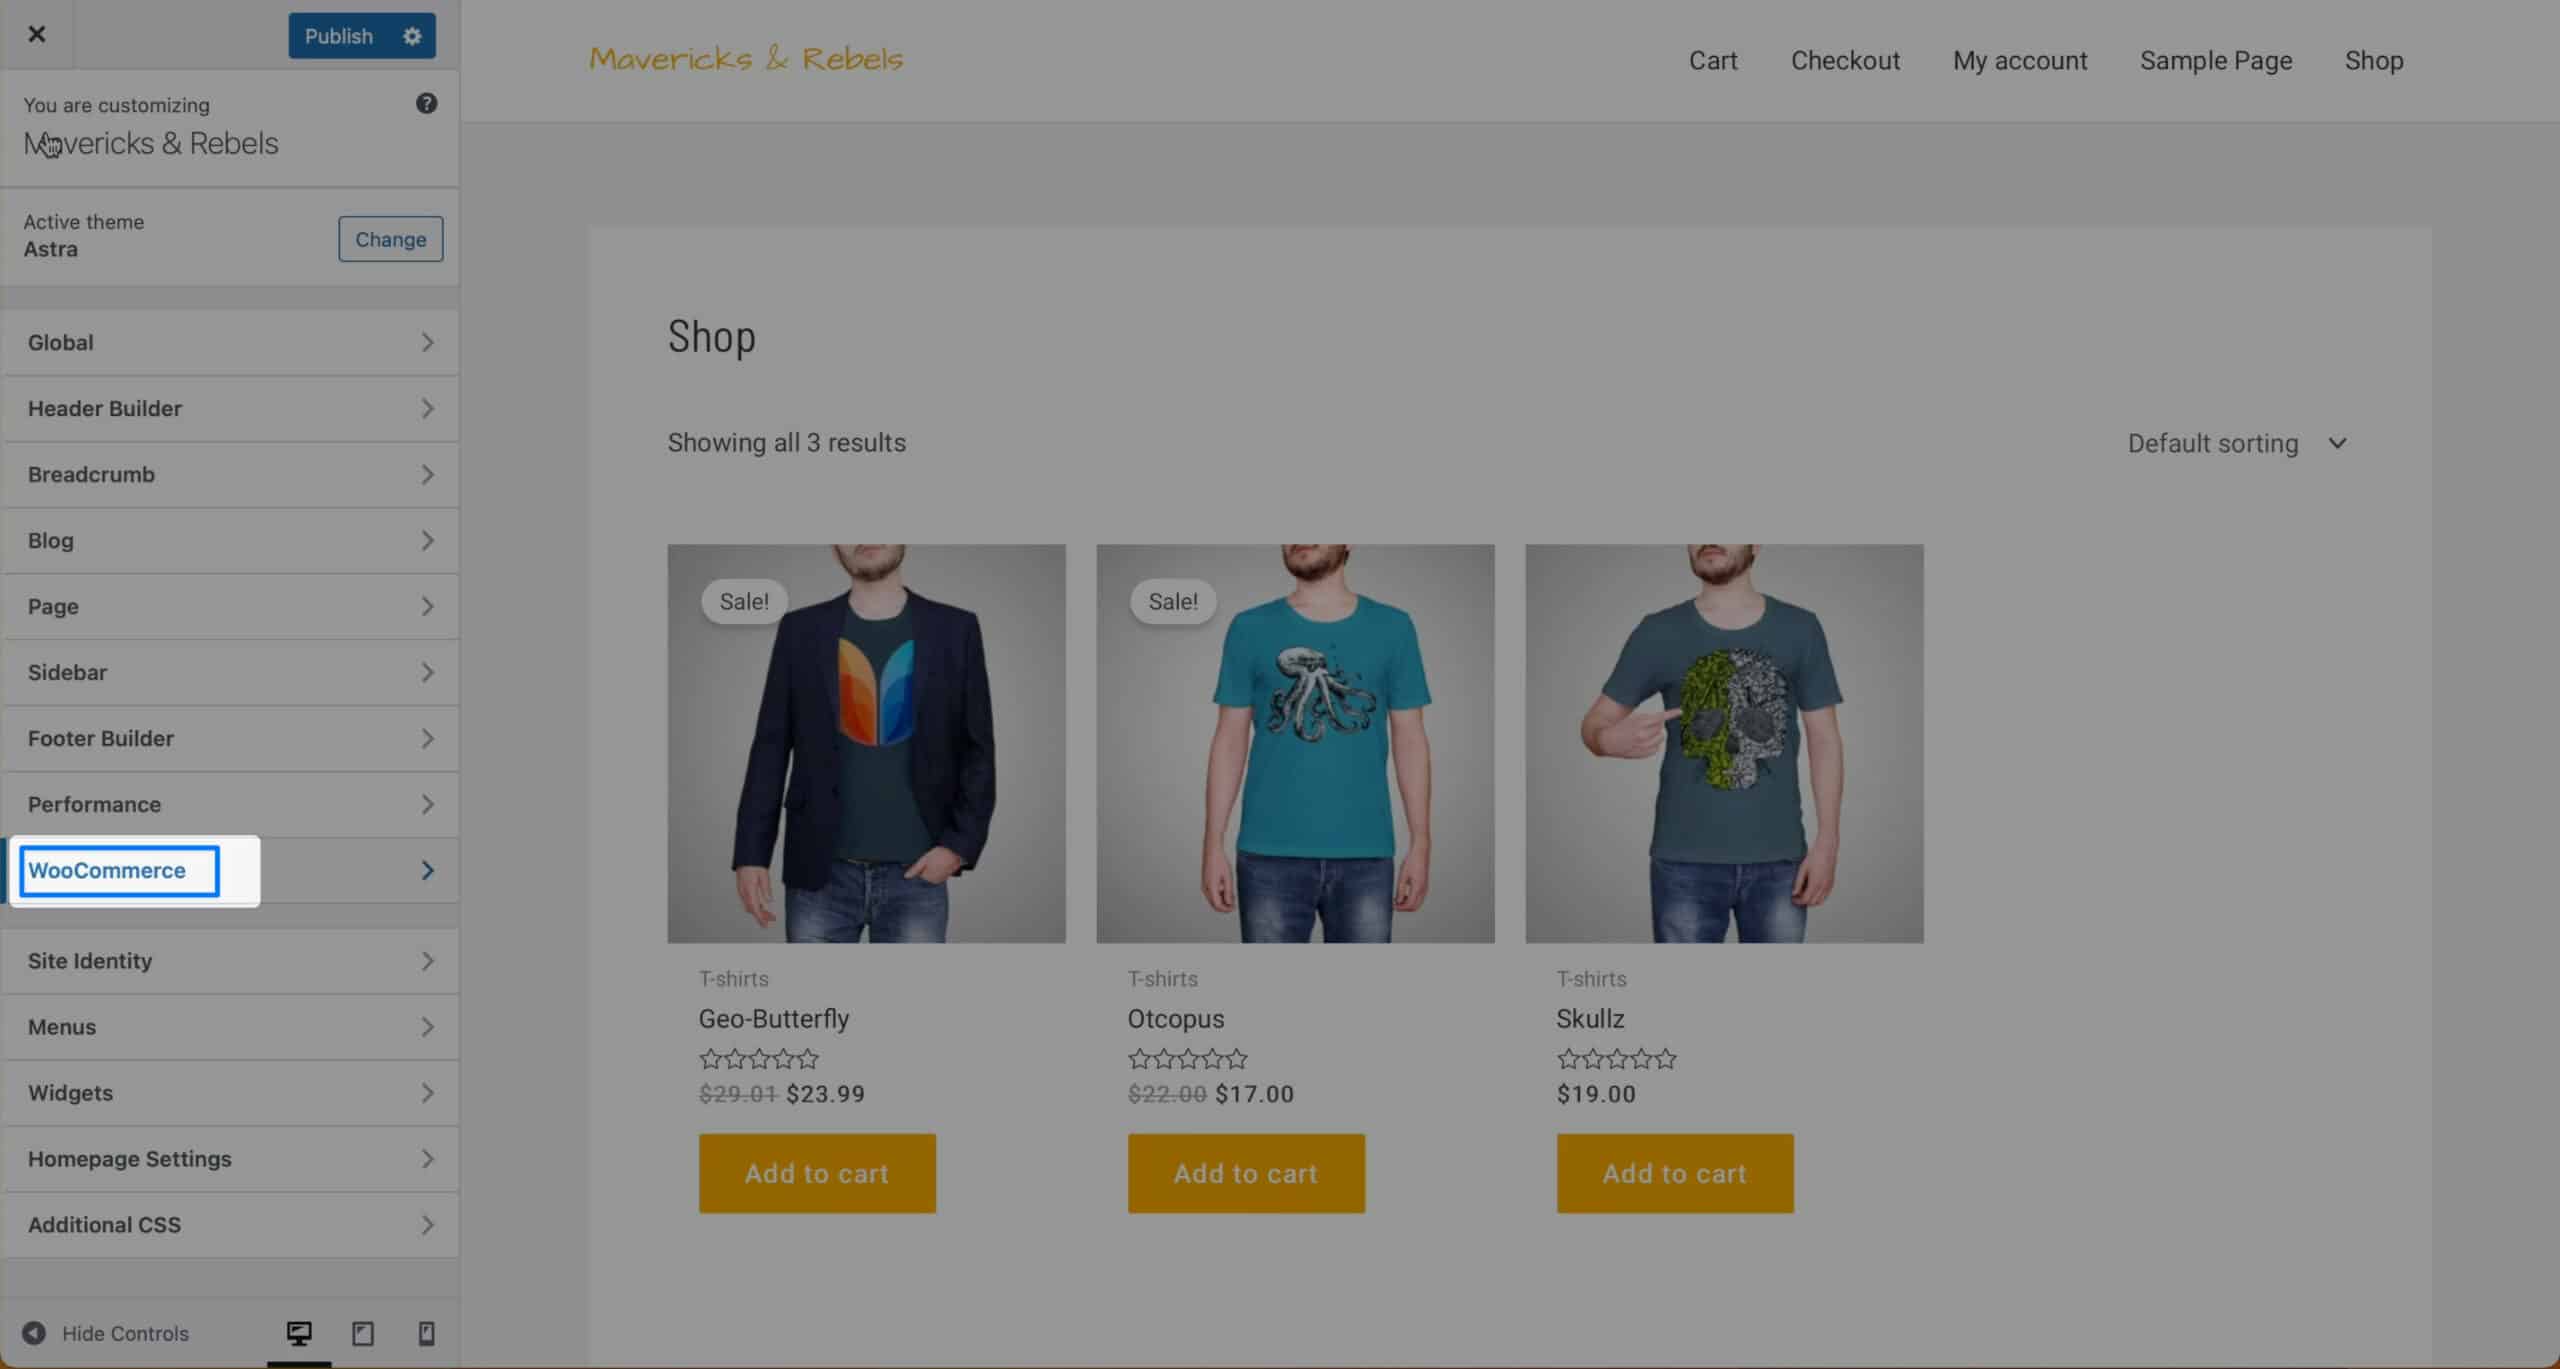
Let’s return to the Customizer’s top level once again. Here you’ll see a WooCommerce option.
I’ll show you. I’m going to disable the page title under Product Catalog. I’ll also disable the result count & I’ll go to a 2-column layout. Finally, I’ll choose a different design for the shop card.
You can see how powerful this is. I encourage you to continue playing around with each section of
Connecting Stripe & PayPal
You might have specific payment processors you want to support for your country. Still, I believe every eCommerce store should accept payments from both Stripe & PayPal. Here is how to connect your Stripe & PayPal accounts to WooCommerce.
As I continue, I assume you already have business accounts on both platforms. If you don’t, set that up on your own before proceeding.
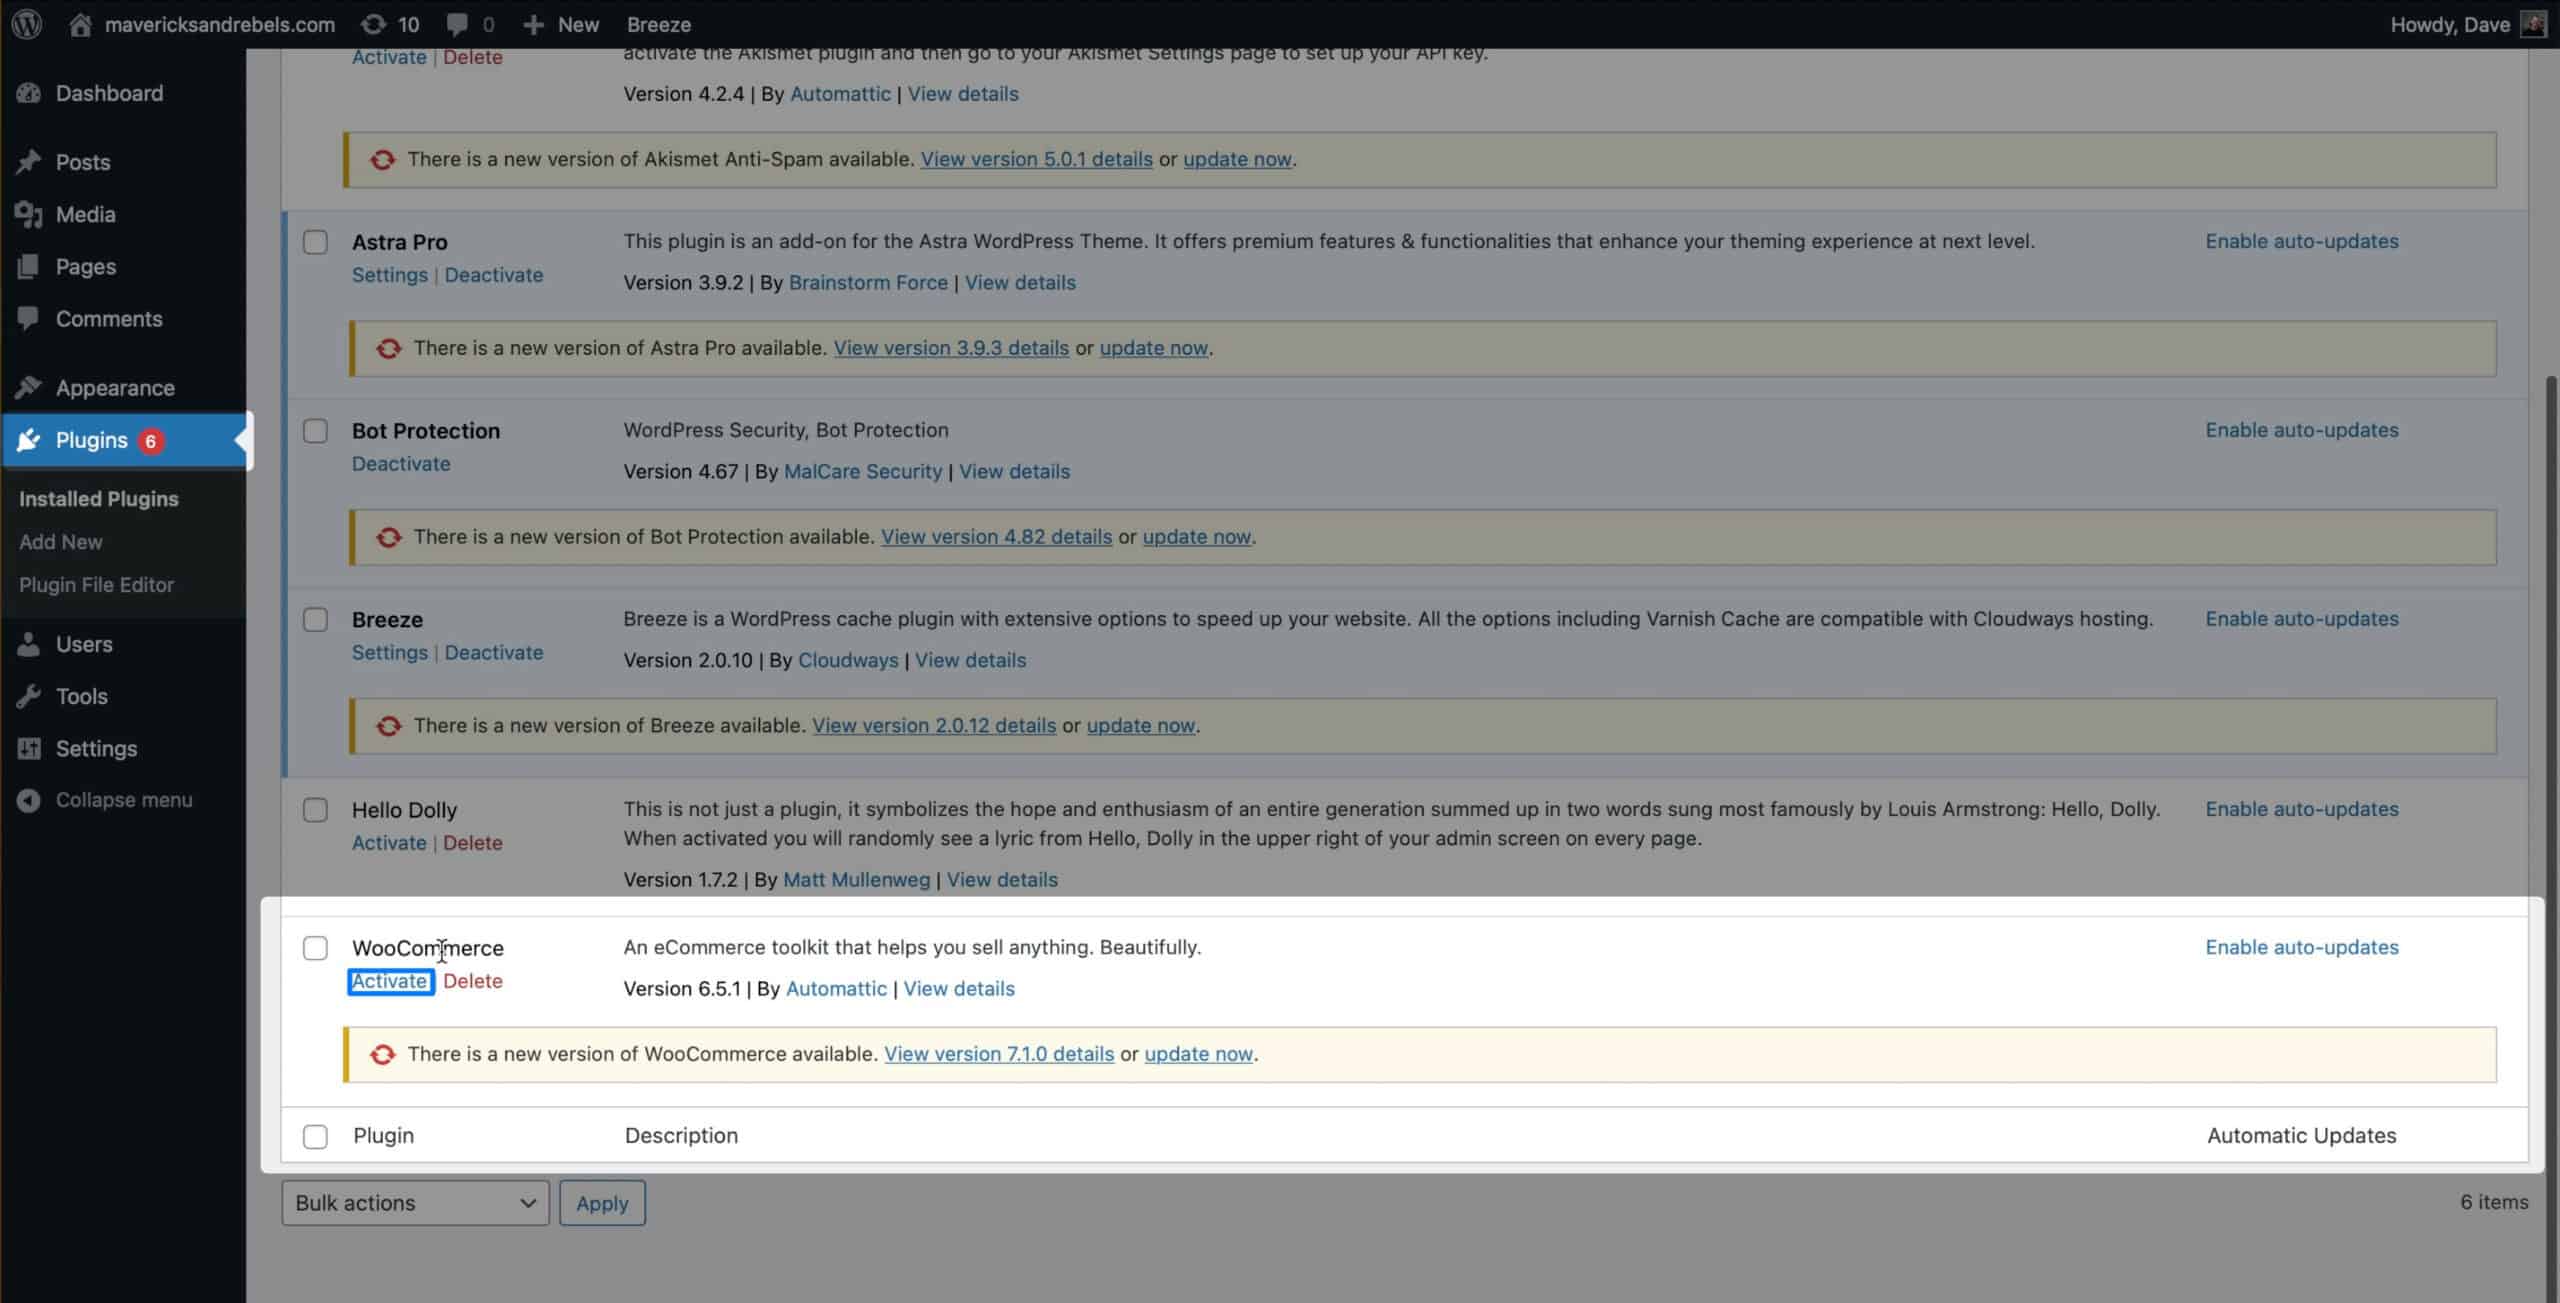
From the WordPress admin area, choose Plugins, then Add New.
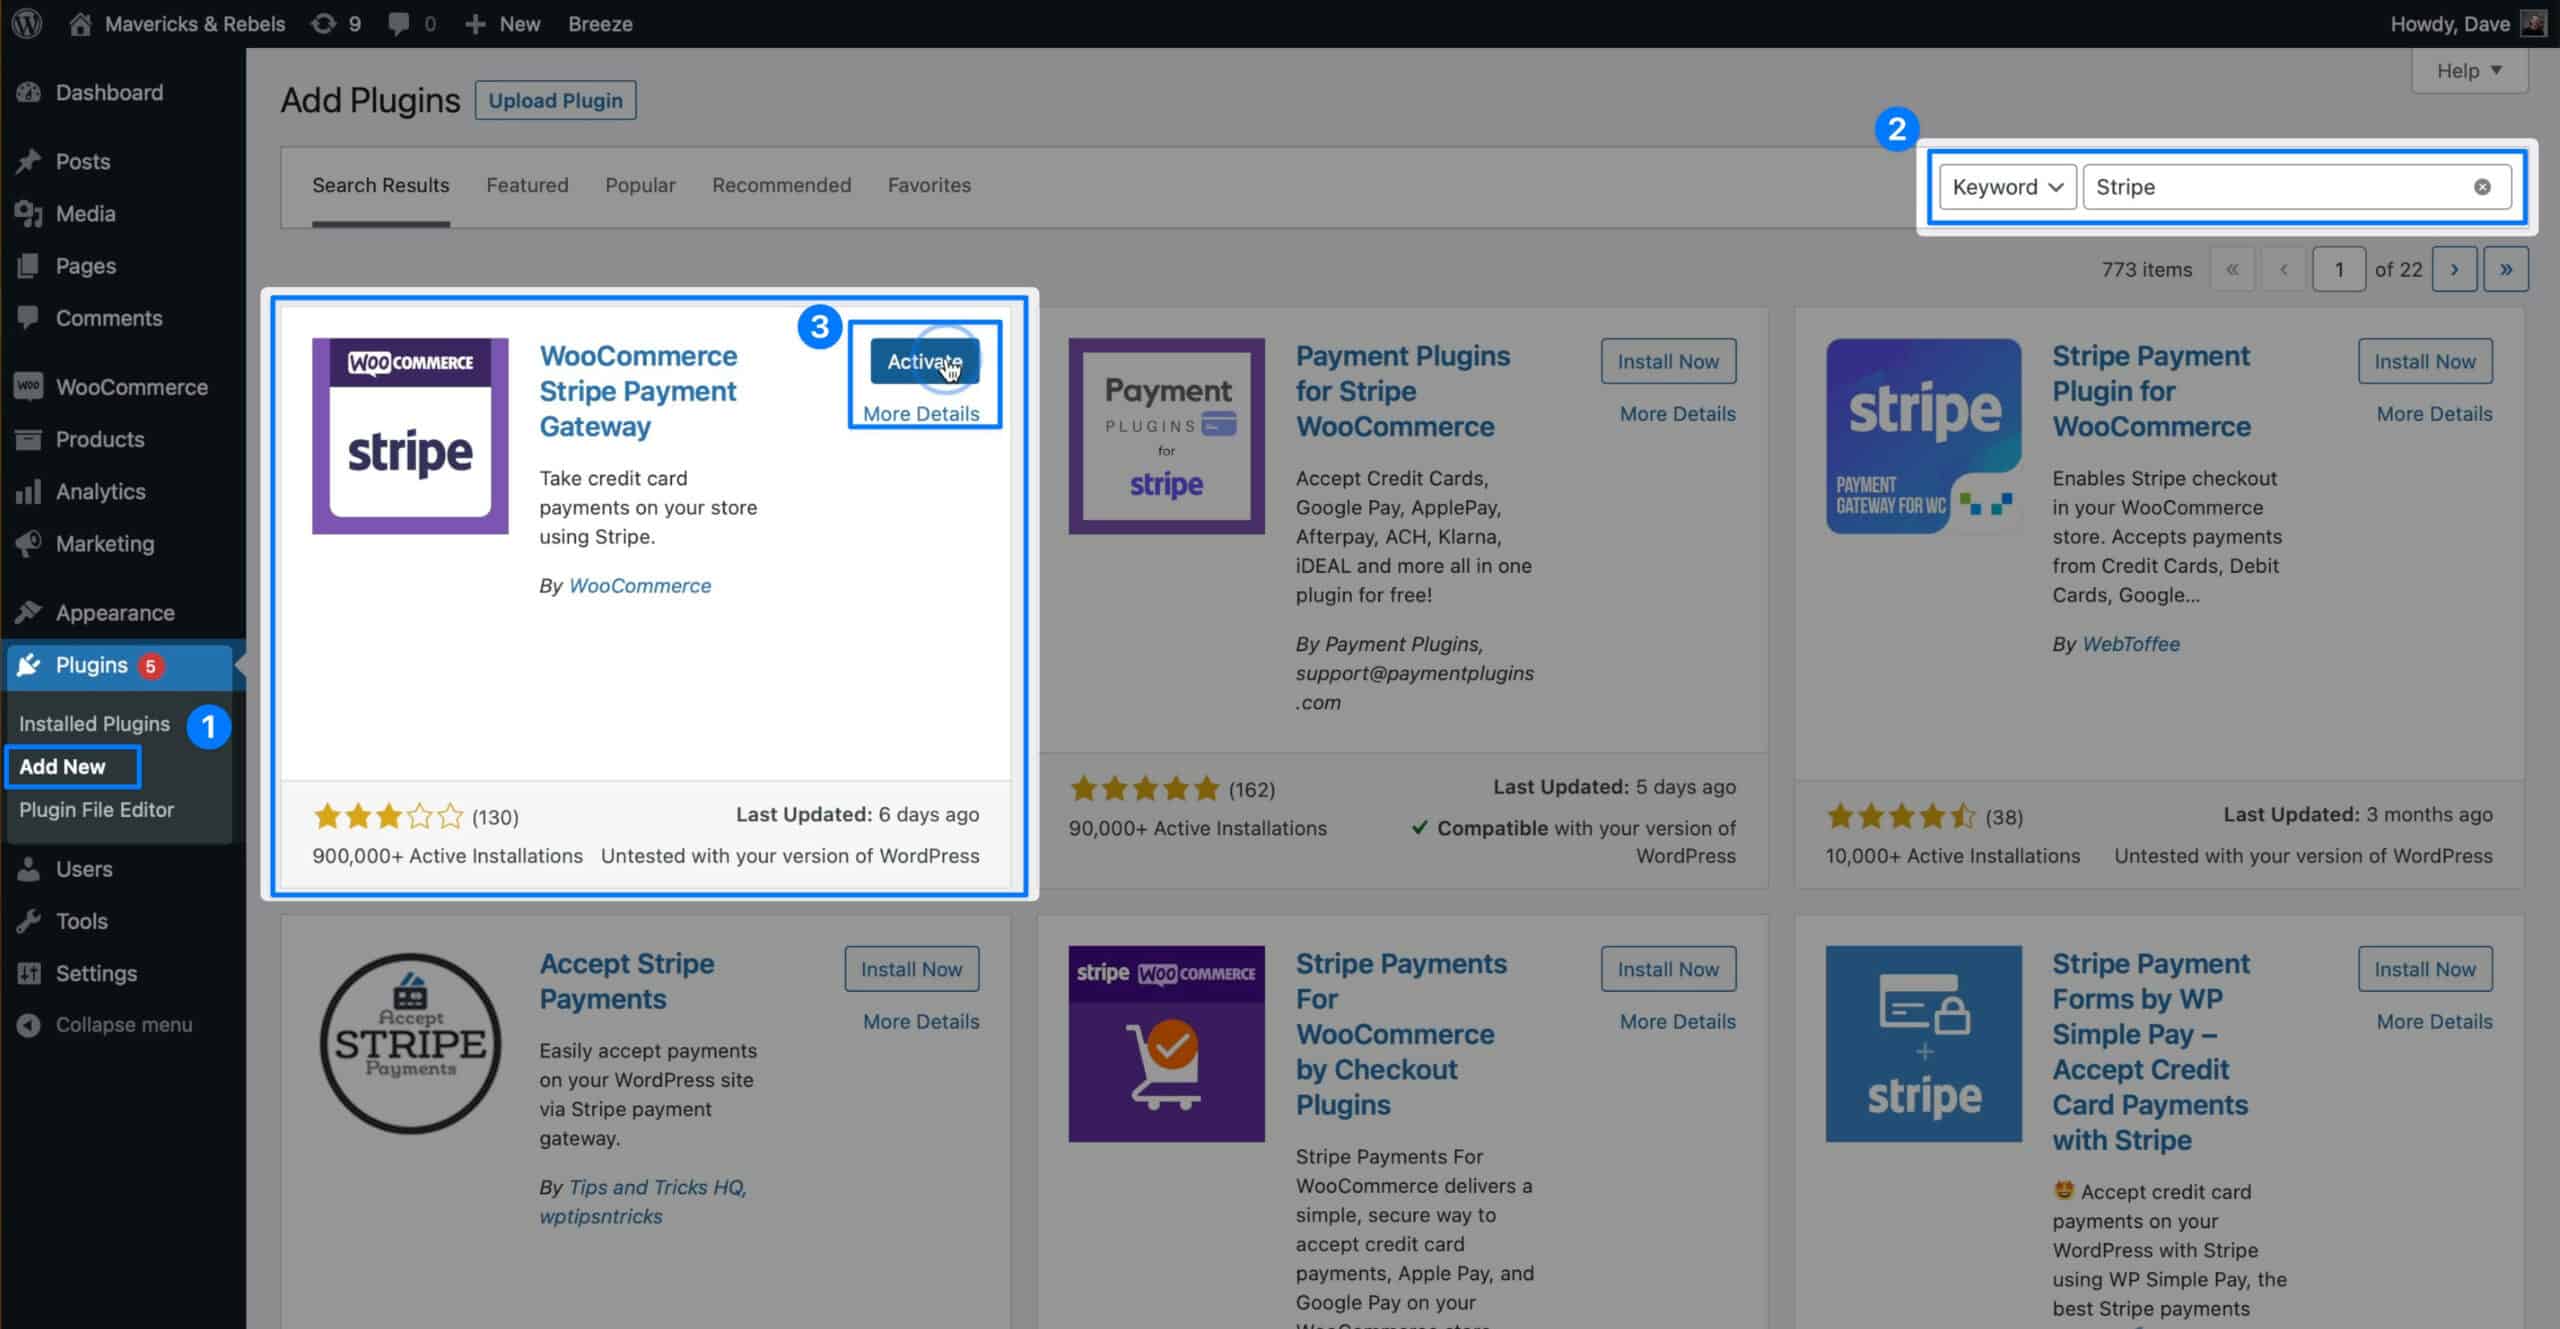
Next, search for Stripe and install and activate the WooCommerce Stripe Payment Gateway.
Next, go back to Plugins, then Add New. This time, search for PayPal.
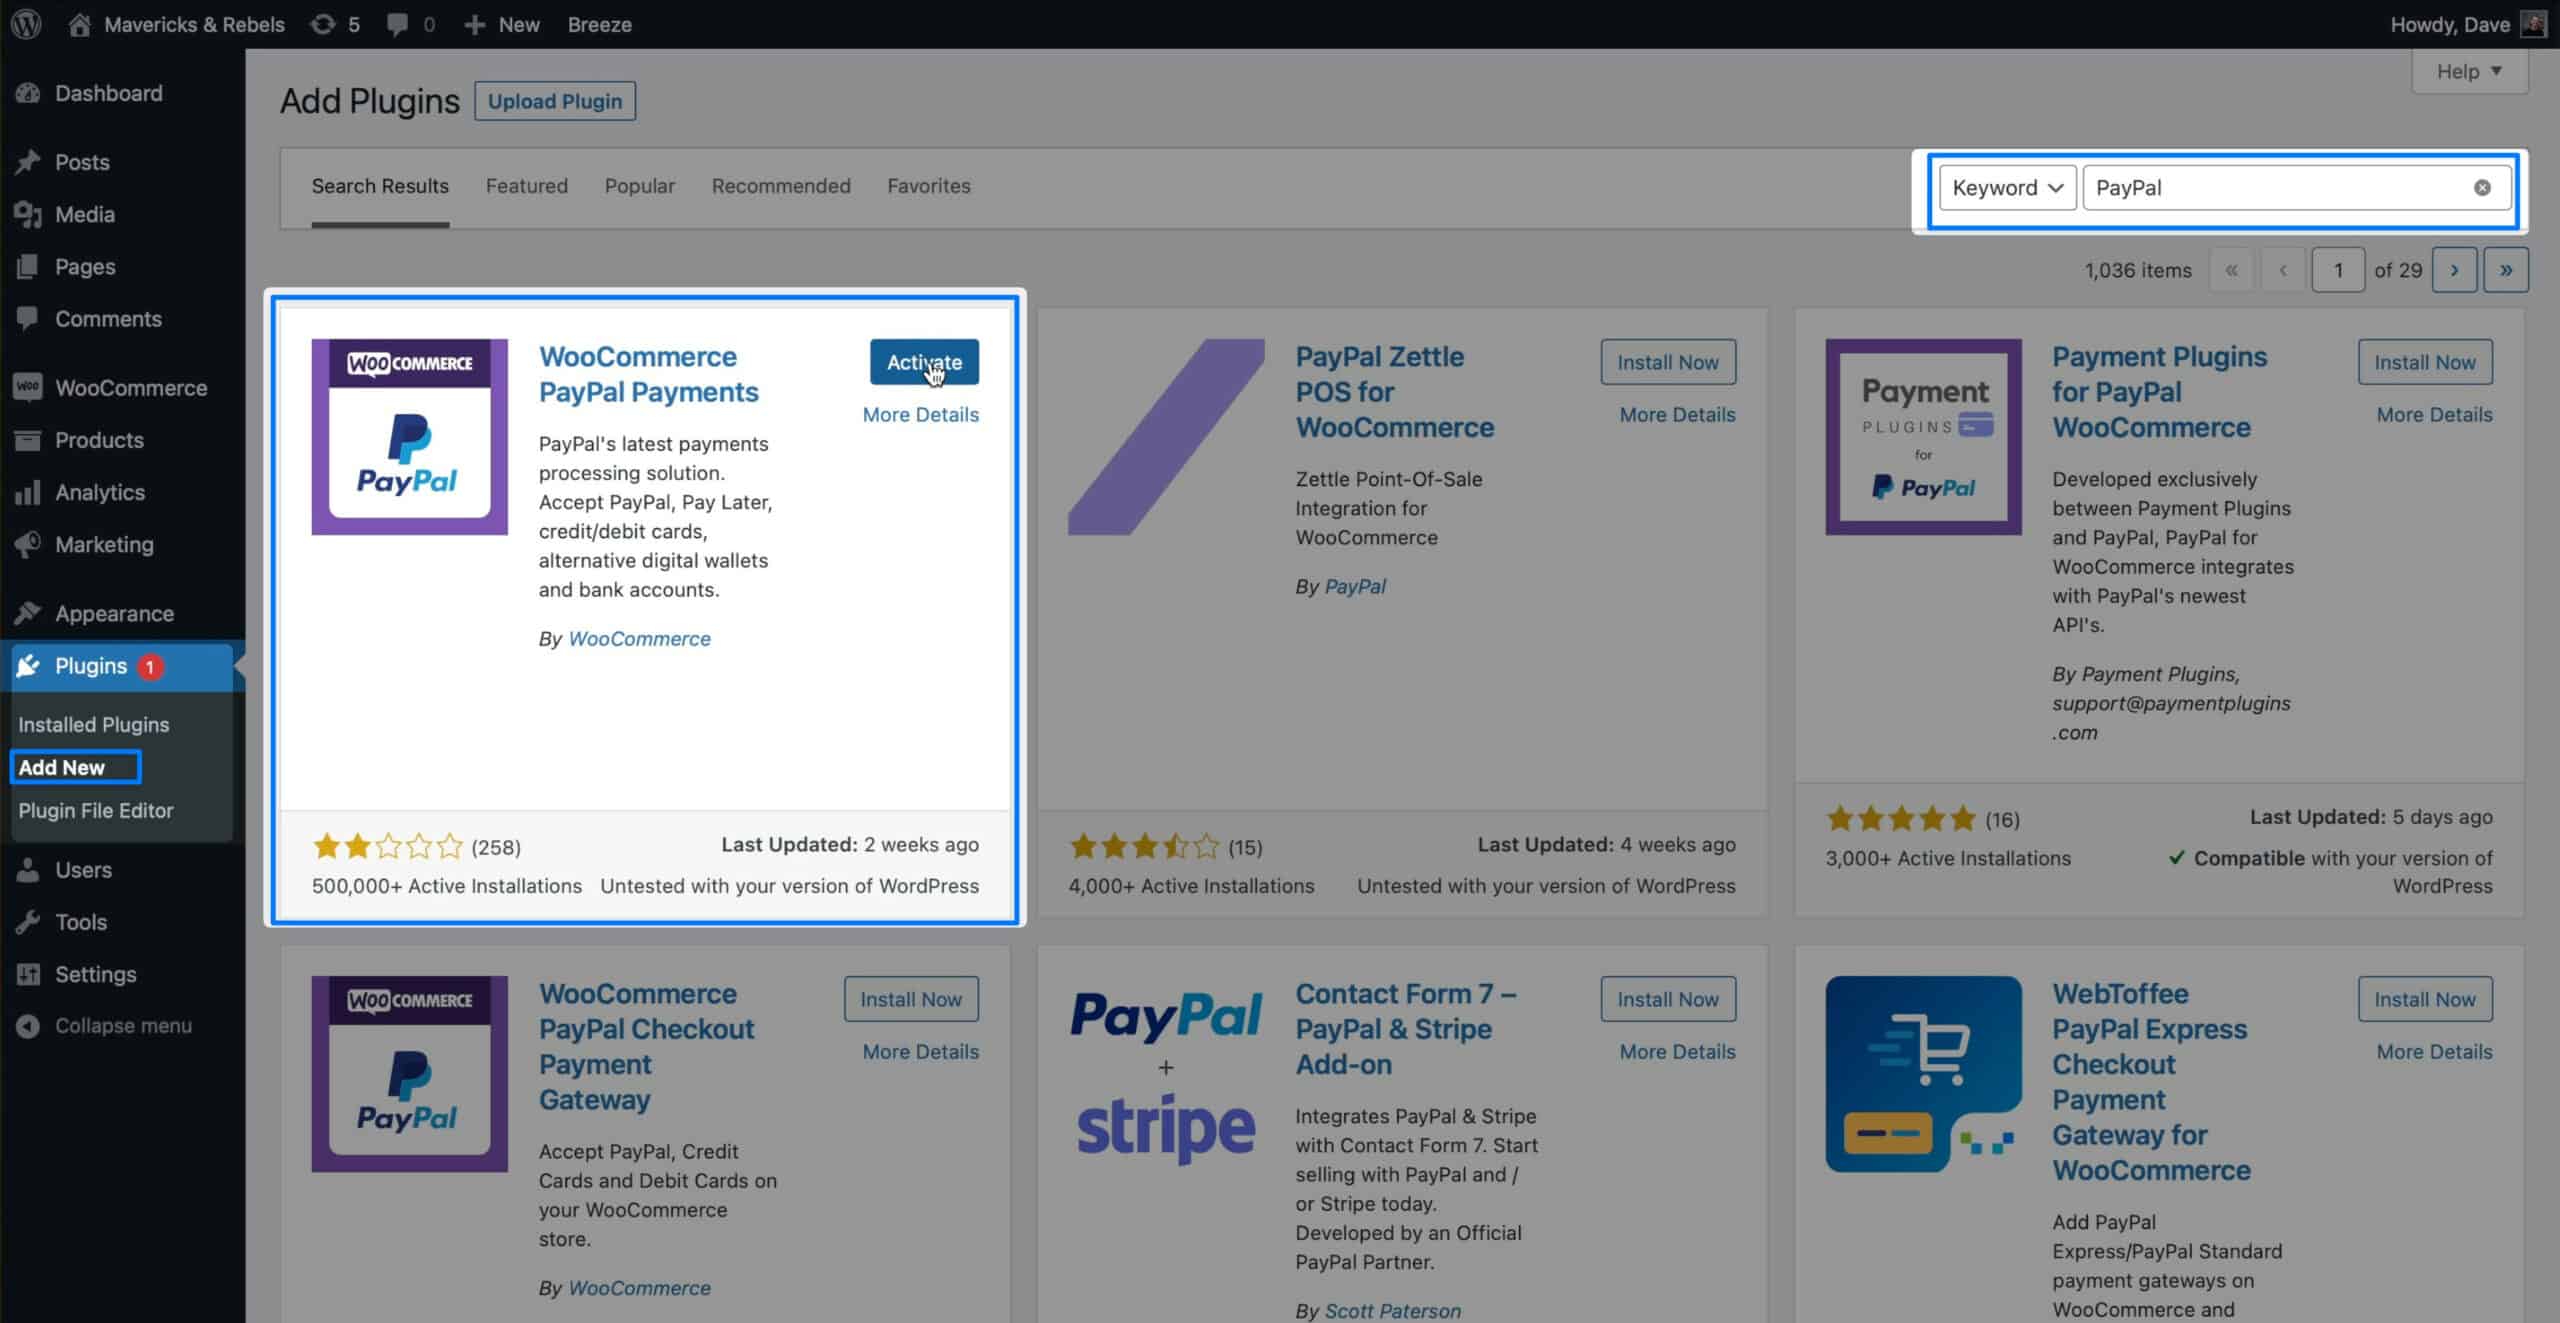
Install and activate WooCommerce PayPal Payments.
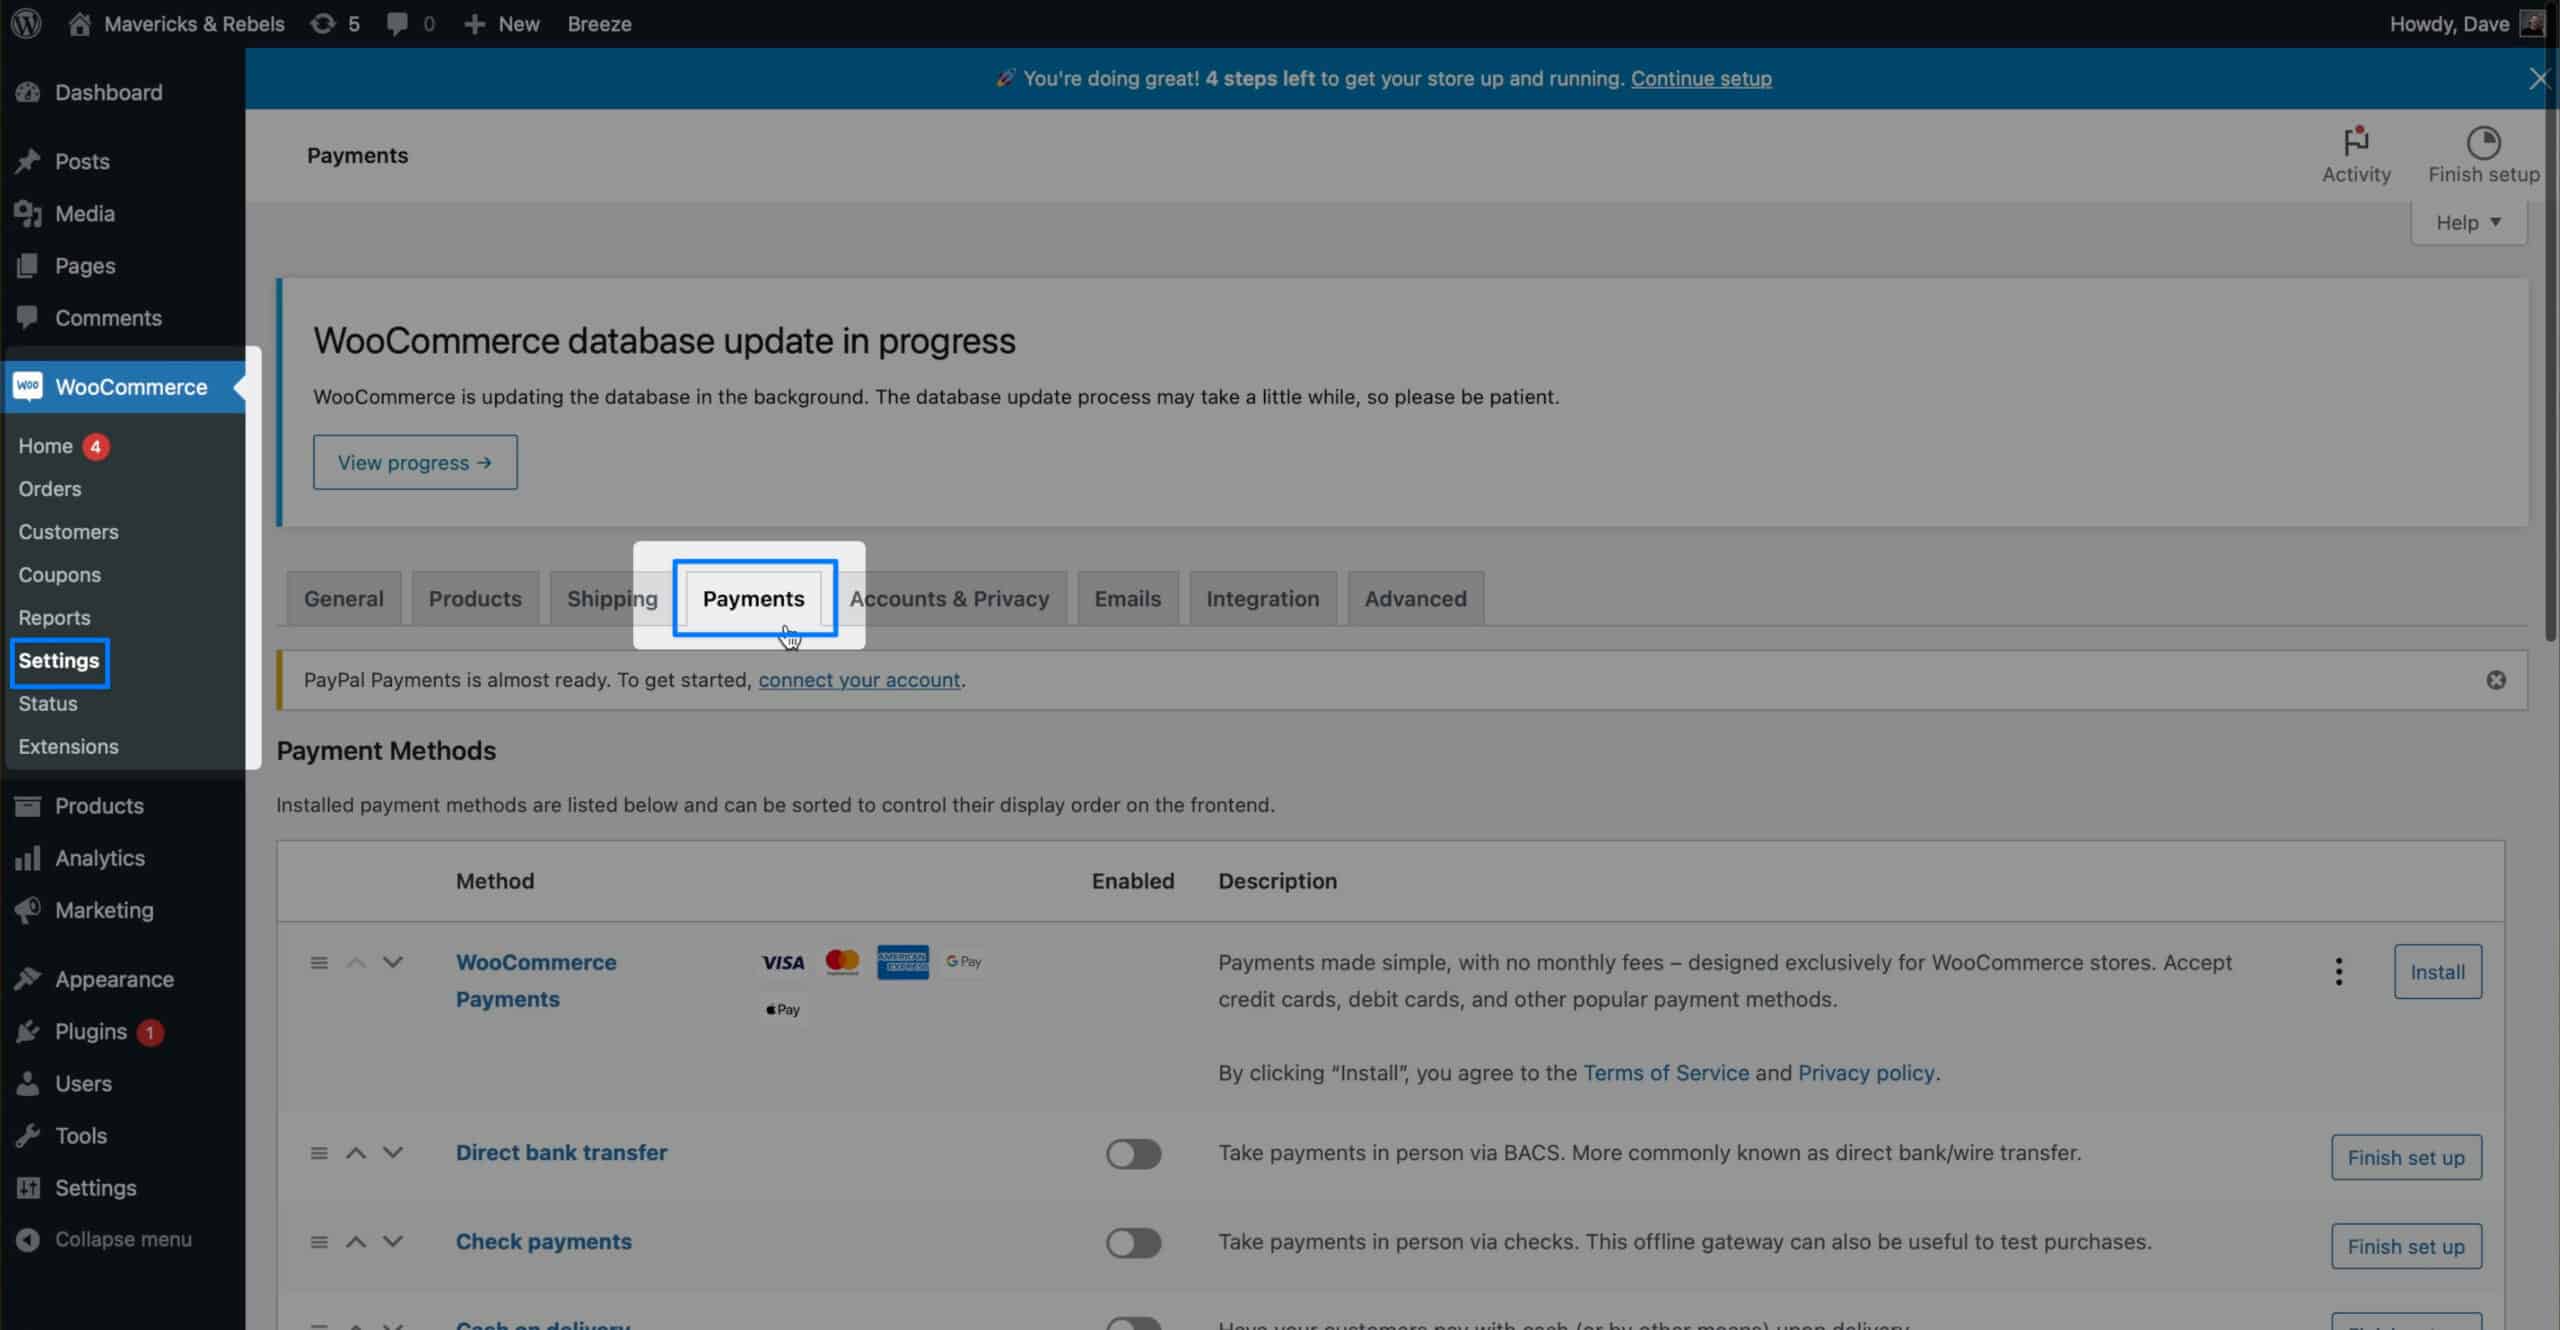
Now click WooCommerce > Settings, then choose the Payments tab.
Here we’ll need to toggle on both Stripe – Credit Card and PayPal.
First, let’s toggle on Stripe. A stripe dialog pops up, and logging in connects the account in just a few clicks.
Repeat this with PayPal. Click the setup button from the Payments tab. You’ll see a button that says “Activate PayPal.” Clicking that button will link to PayPal, which, after login, connects the account to WooCommerce.
All done. People who purchase on the site can choose between Stripe & PayPal.
Ready for Customers but Not Done Yet
The site looks excellent and accepts payments, but we still need to secure the site and ensure it responds quickly. For this, we’ll head back to Cloudways.
Keeping Your Site Fast & Secure
Cloudflare
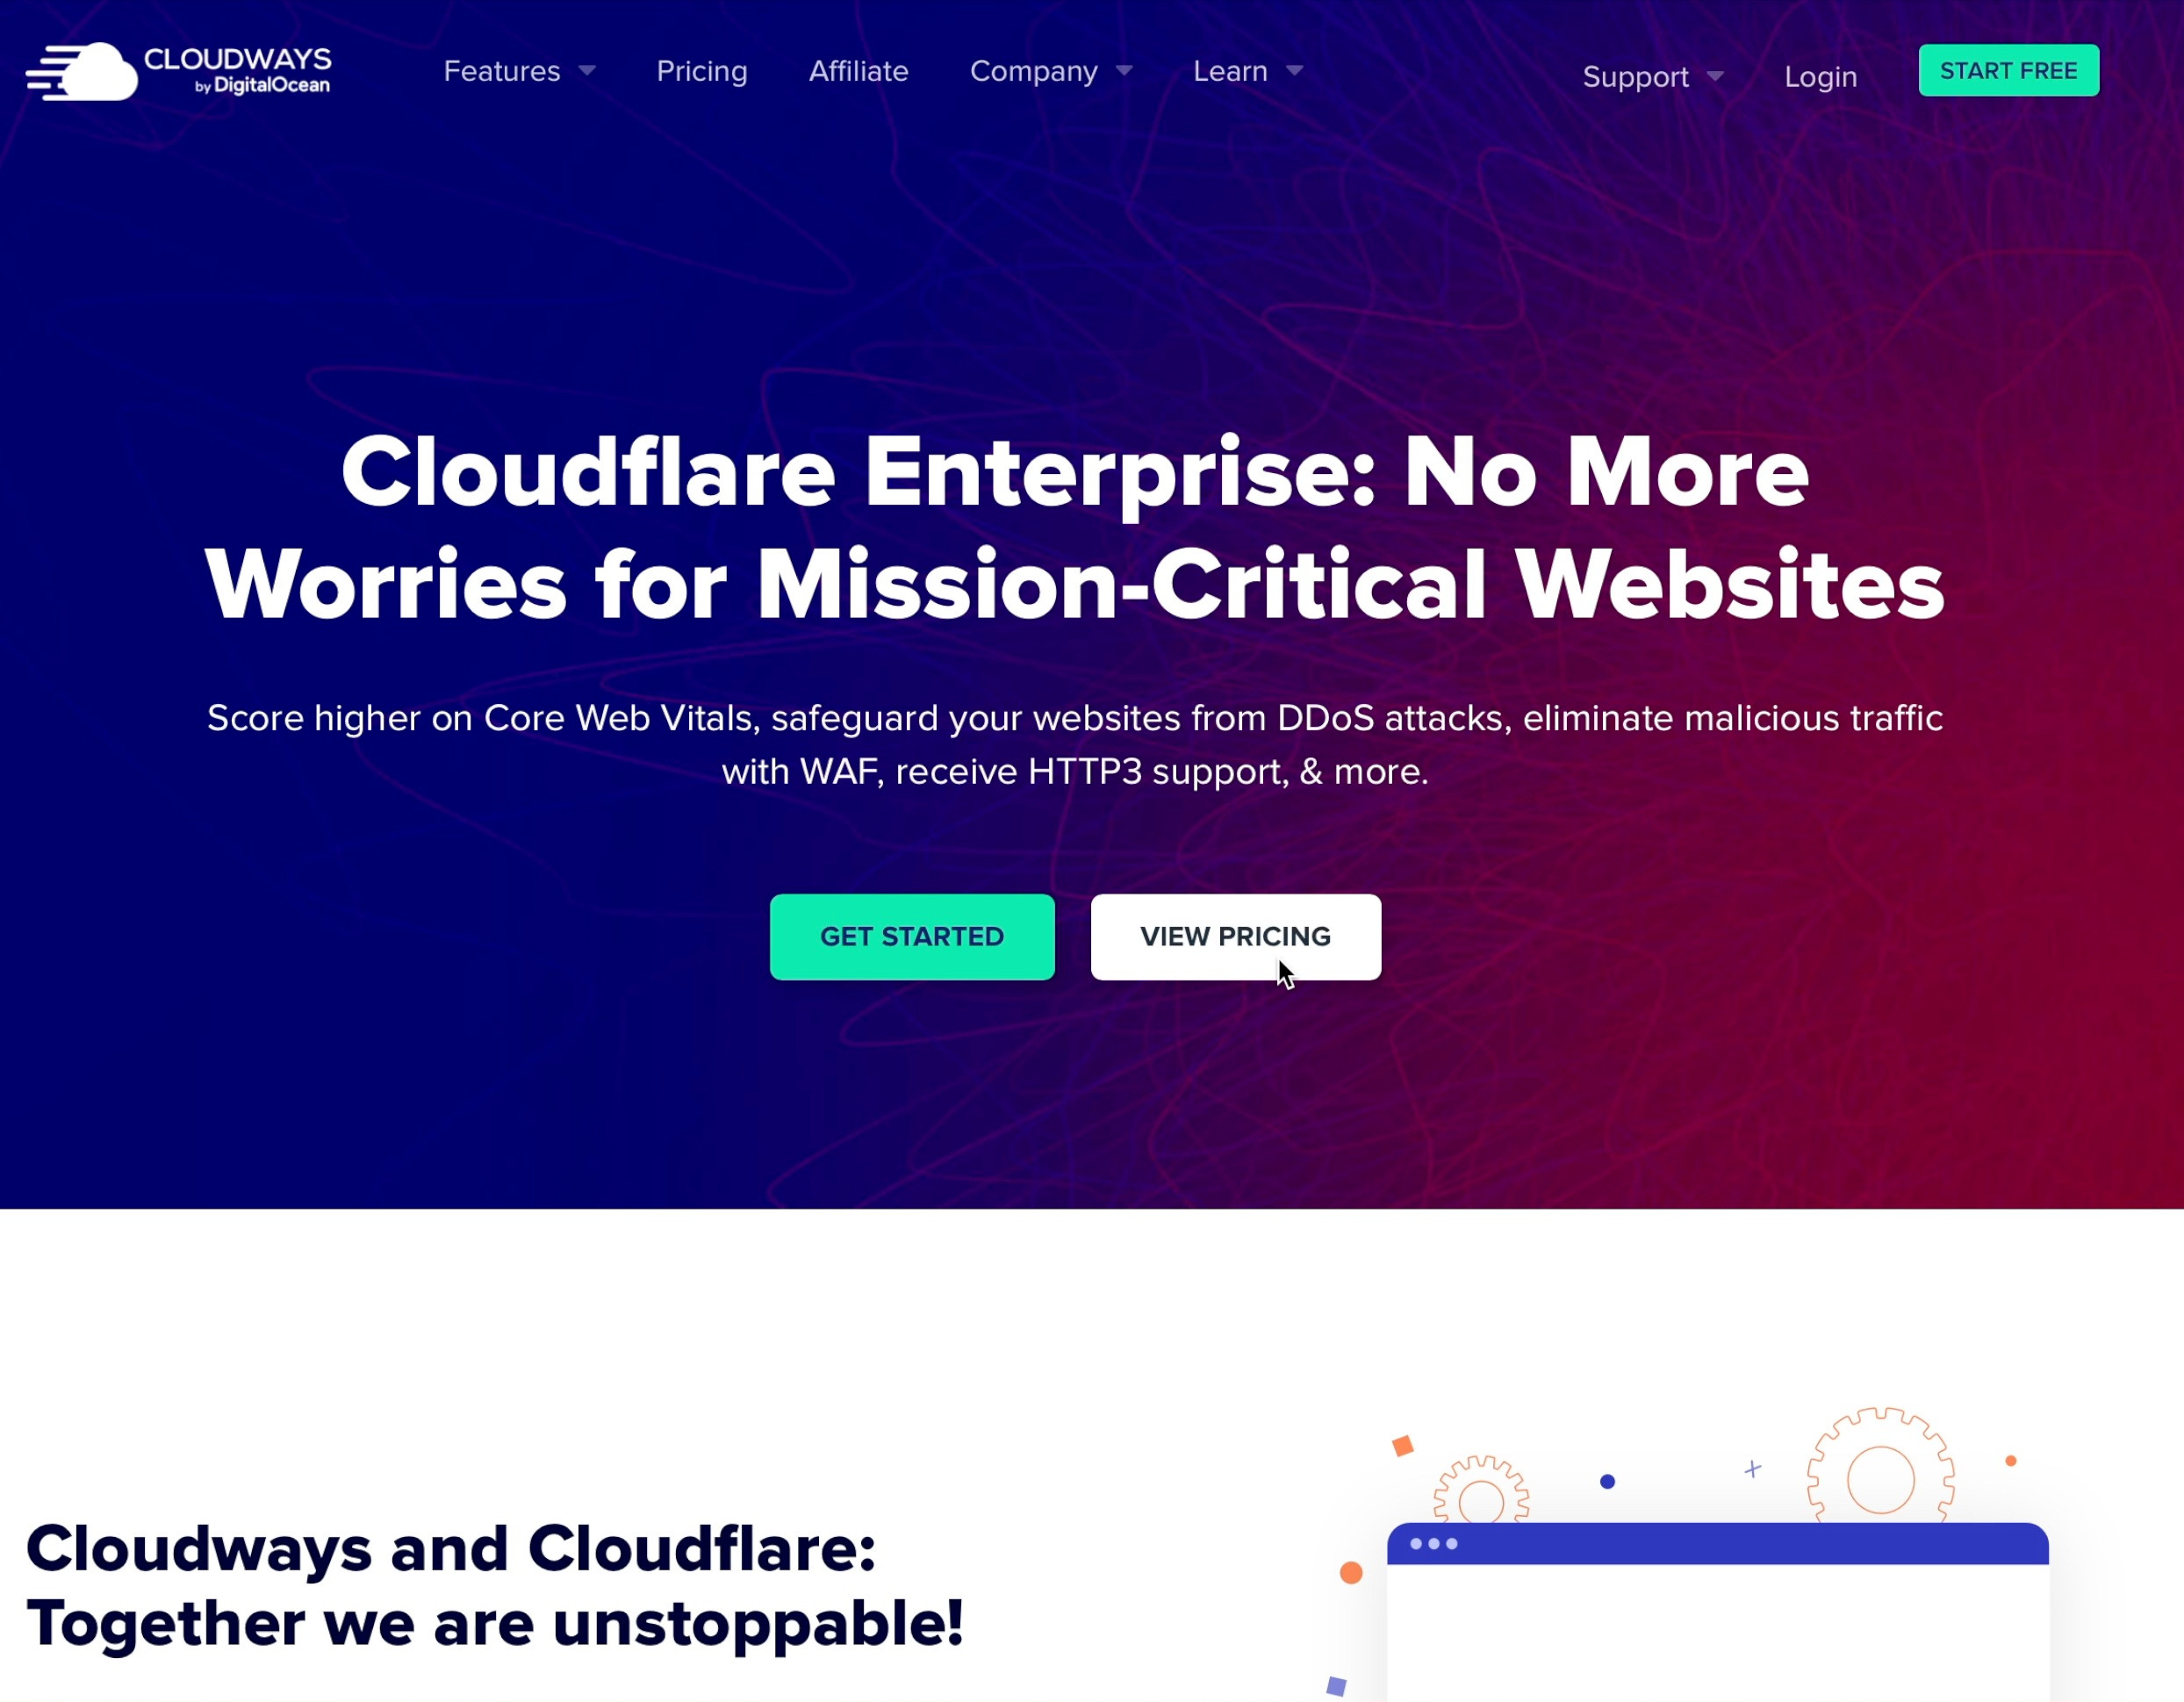
The best way to keep your site fast and secure is to integrate Cloudflare Enterprise. Cloudflare Enterprise is a service that would be prohibitively expensive to most new e-commerce sites, but Cloudways gives it to you for just $5 per month. If you have more than five sites, that fee decreases considerably. If you’re an agency with over 25 sites, it’s just $1.99 per month per site.
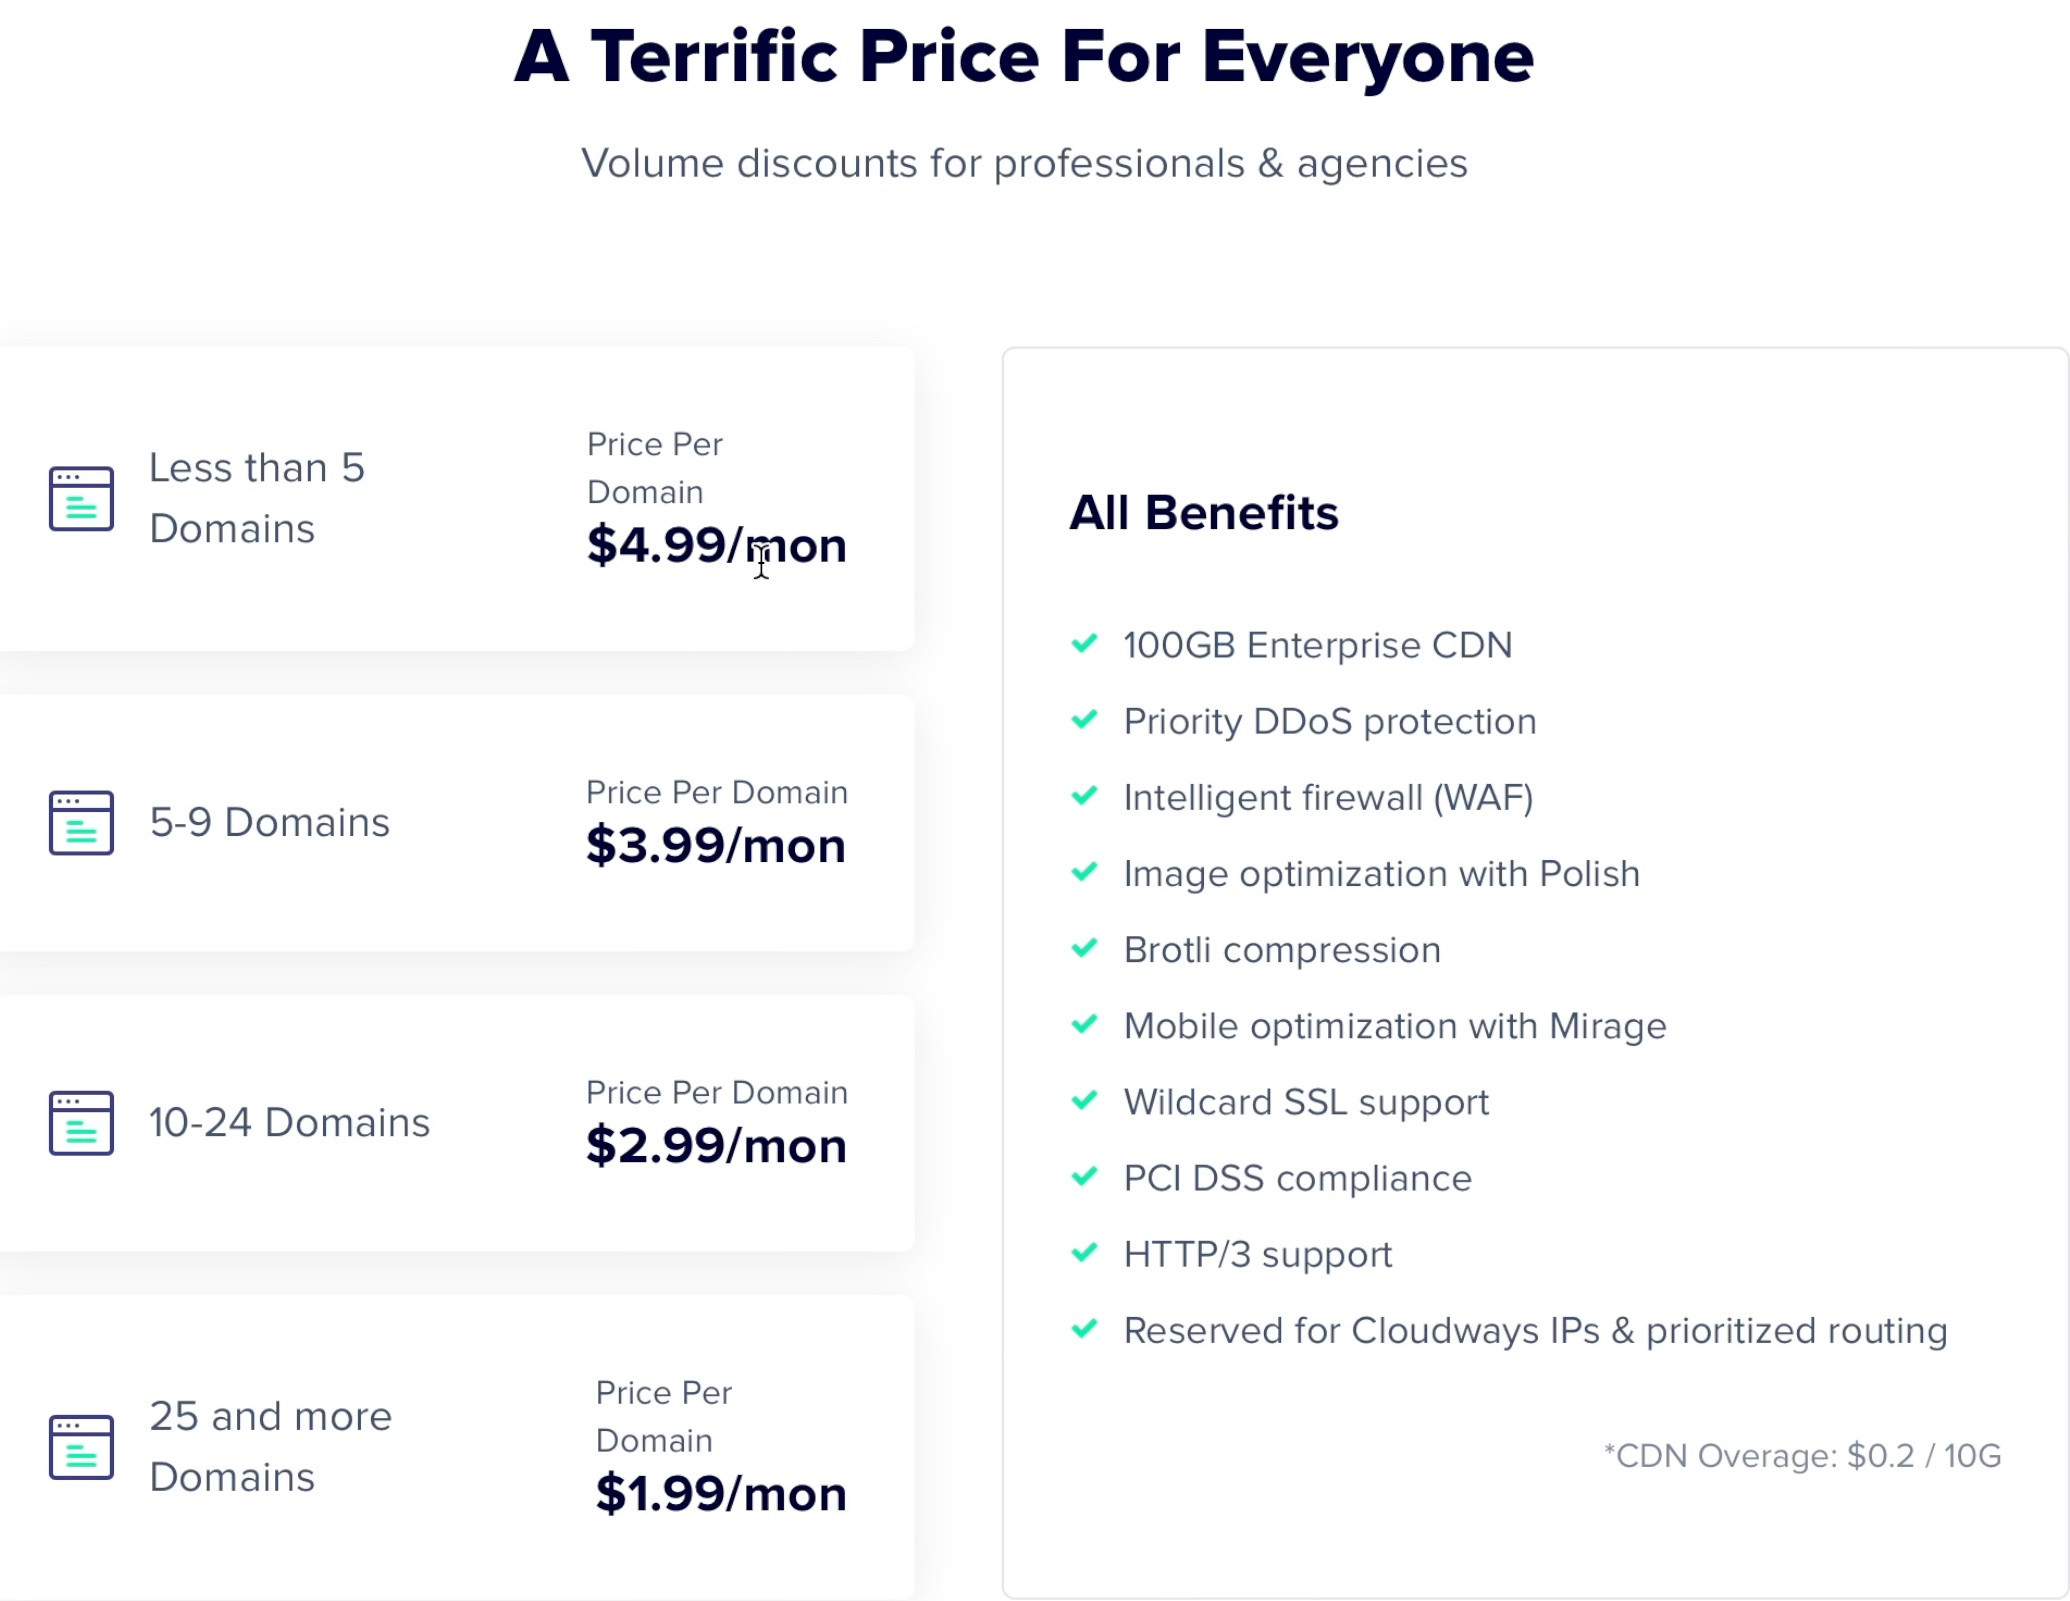
Cloudflare Enterprise helps make your site fast with three key features. The first is the world-class Cloudflare CDN. With over 200 points of presence scattered bout planet earth, your images and scripts will load quickly across the globe. Cloudflare also gives you mobile optimization to give a better experience for users on phones. You’ll also get image optimization to ensure images arrive to users with minimal file size and uncompromised quality.
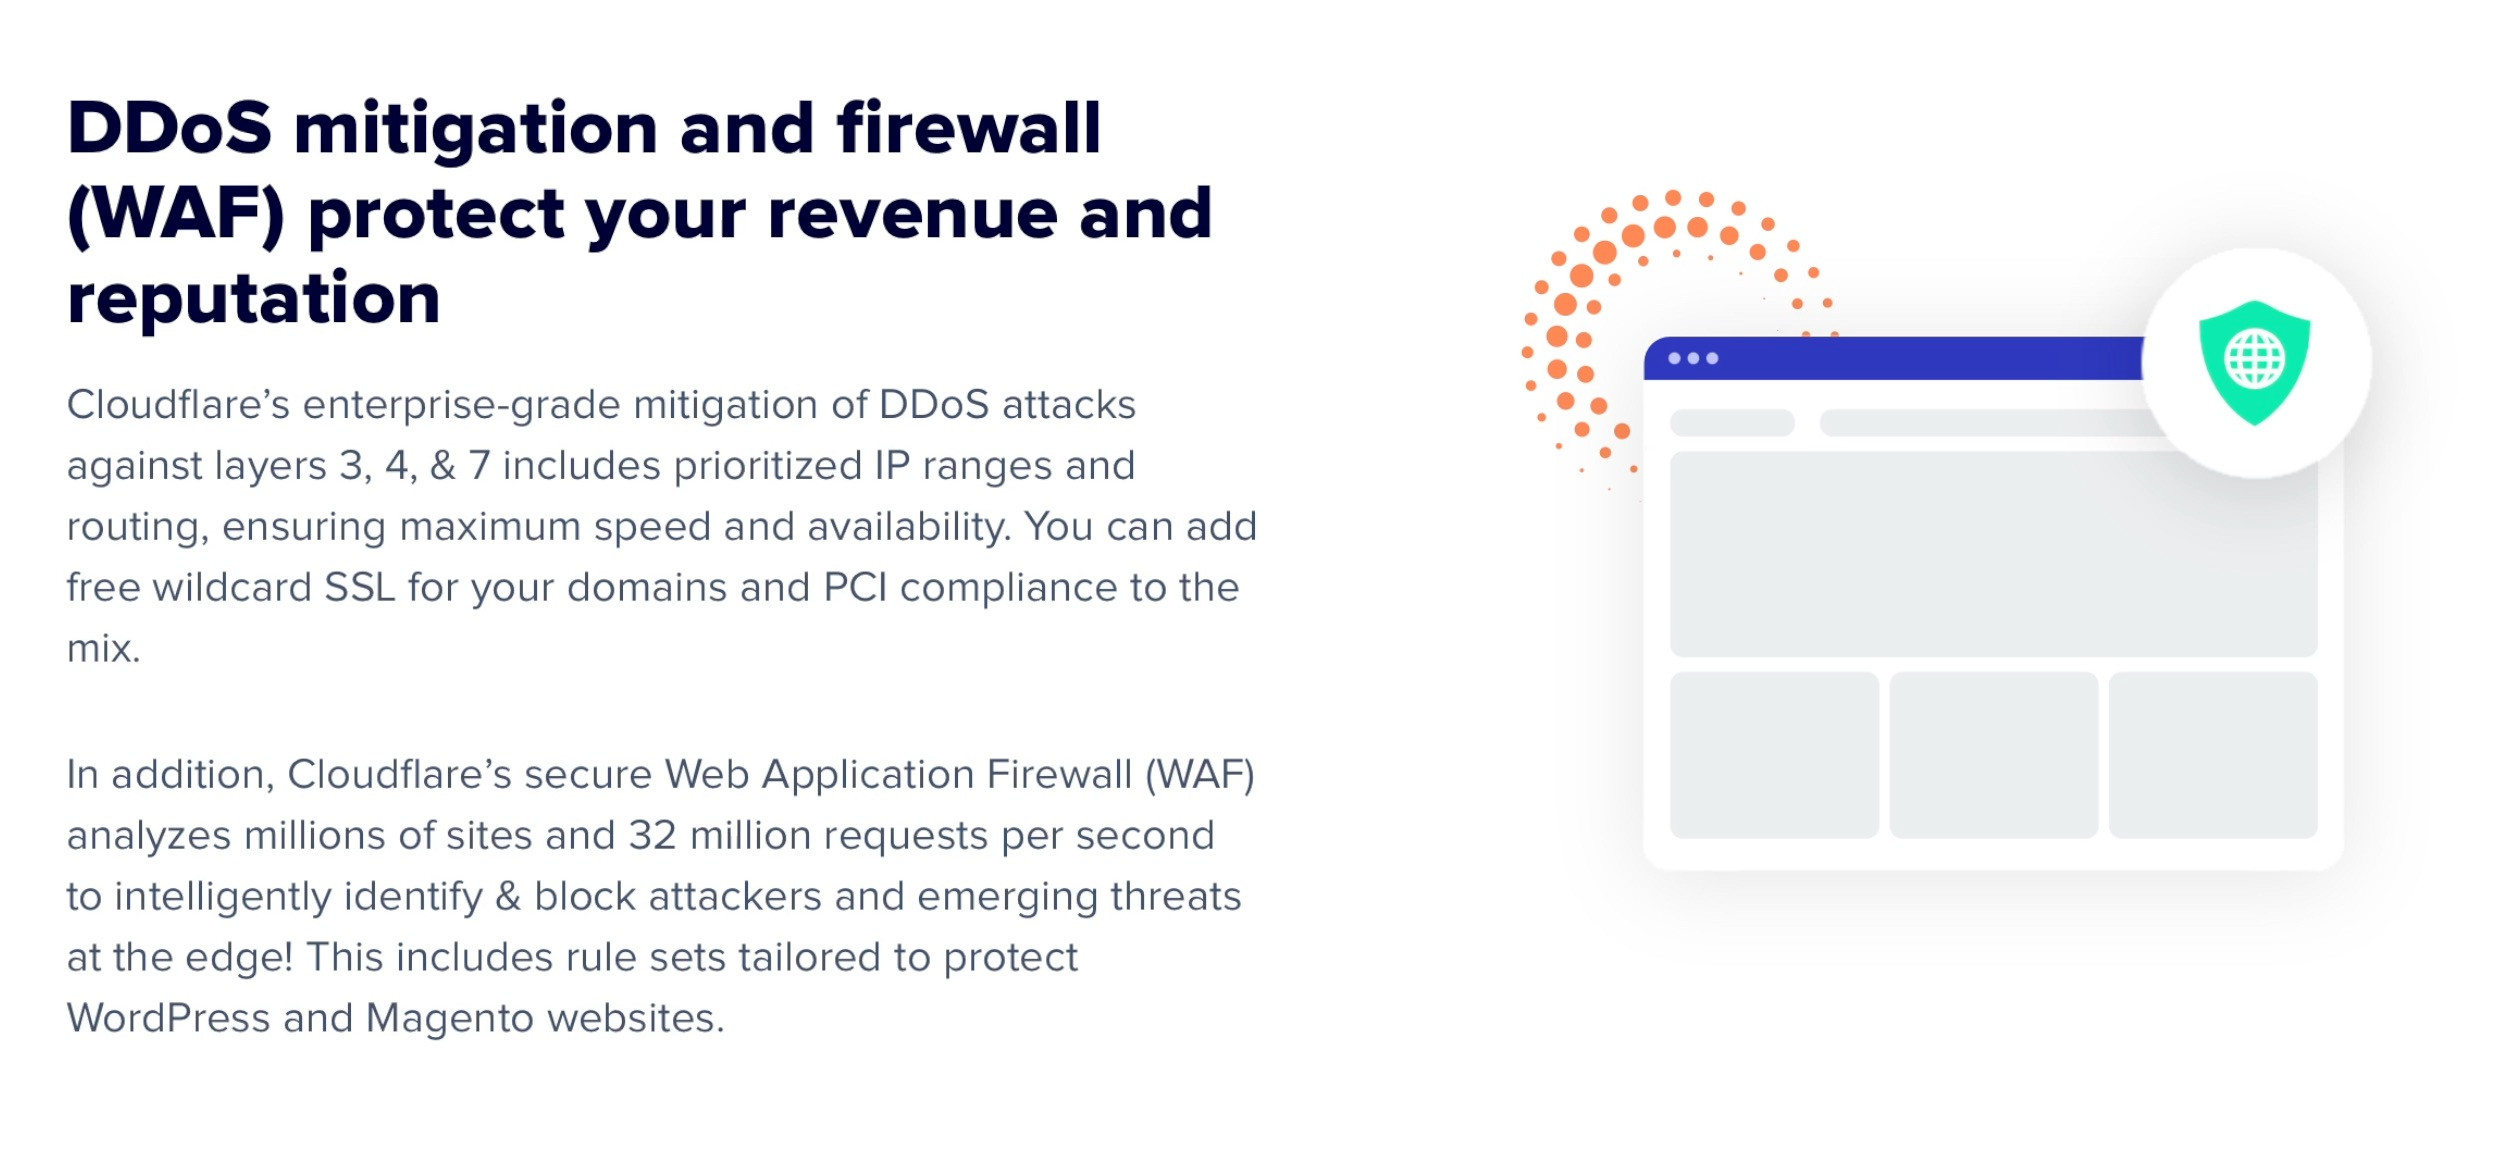
From a security standpoint, Cloudflare gives you a managed firewall, meaning you don’t have to do anything. It will just keep the bad guys out. It also includes DDOS protection, so if someone tries to take your site down with an army of angry bots, Cloudflare will mitigate it.
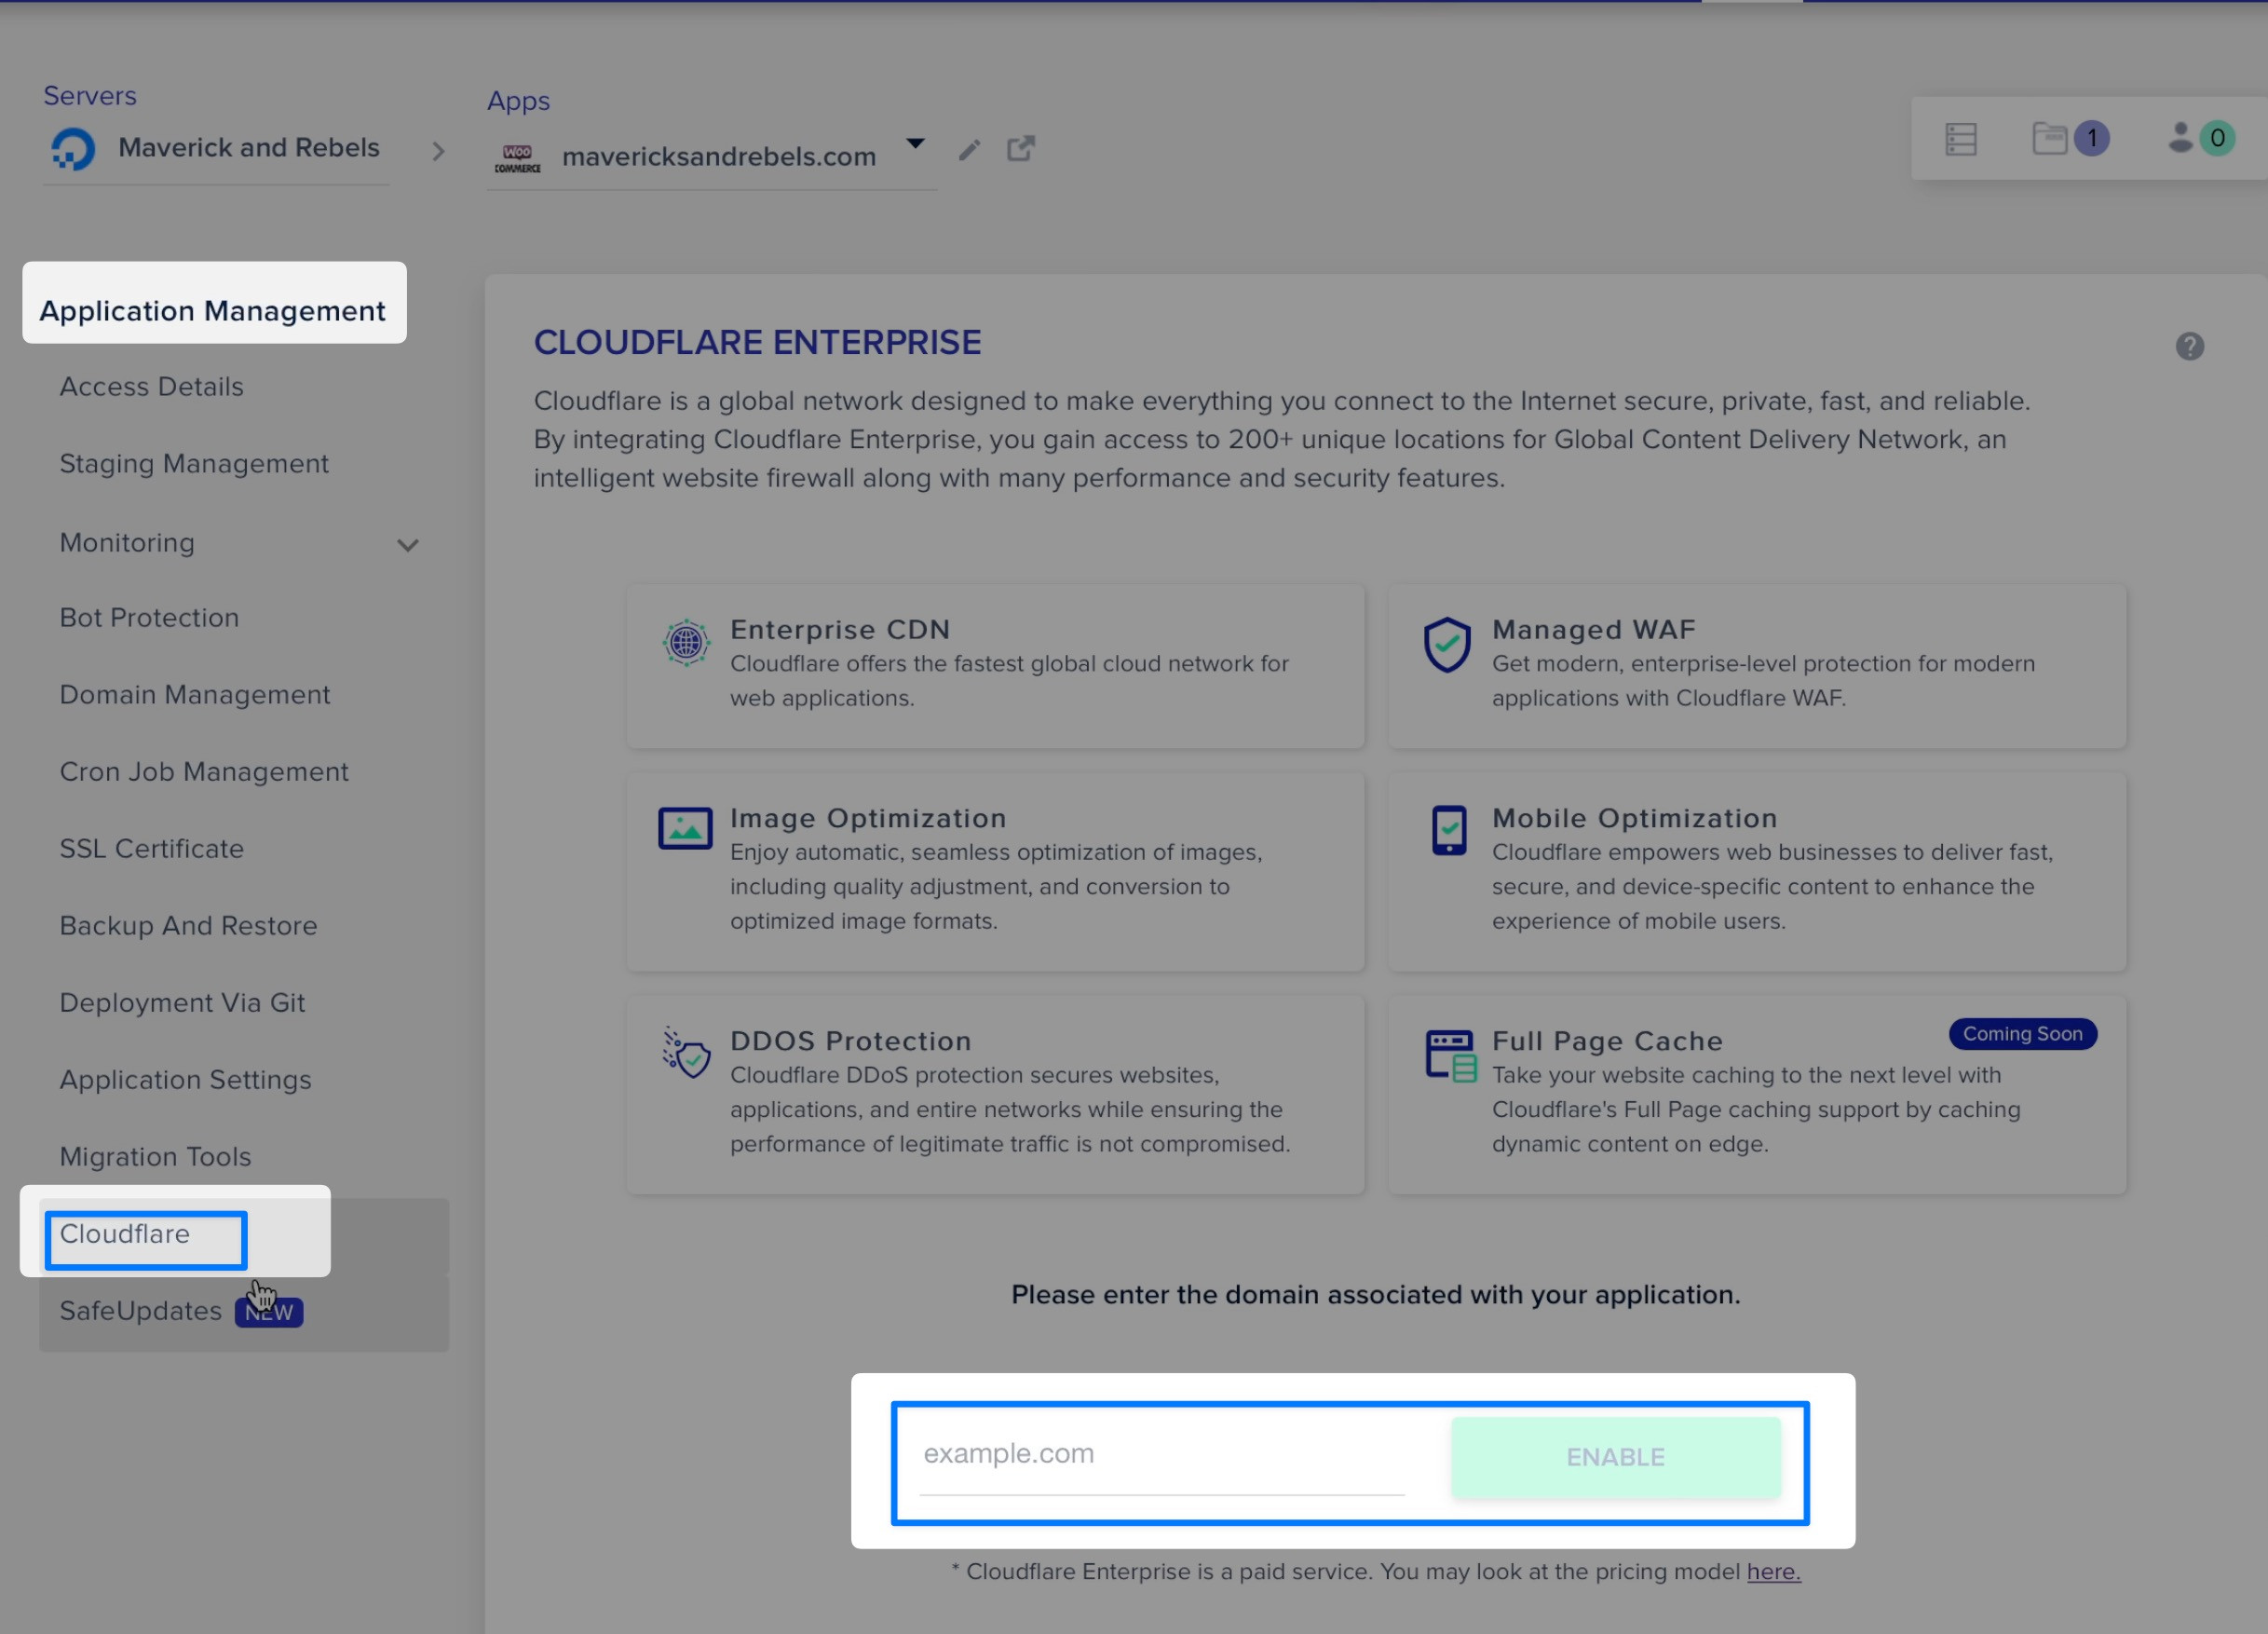
To get started with Cloudflare on Cloudways, click Cloudflare under Application Management. Then type in your domain name and click Enable.
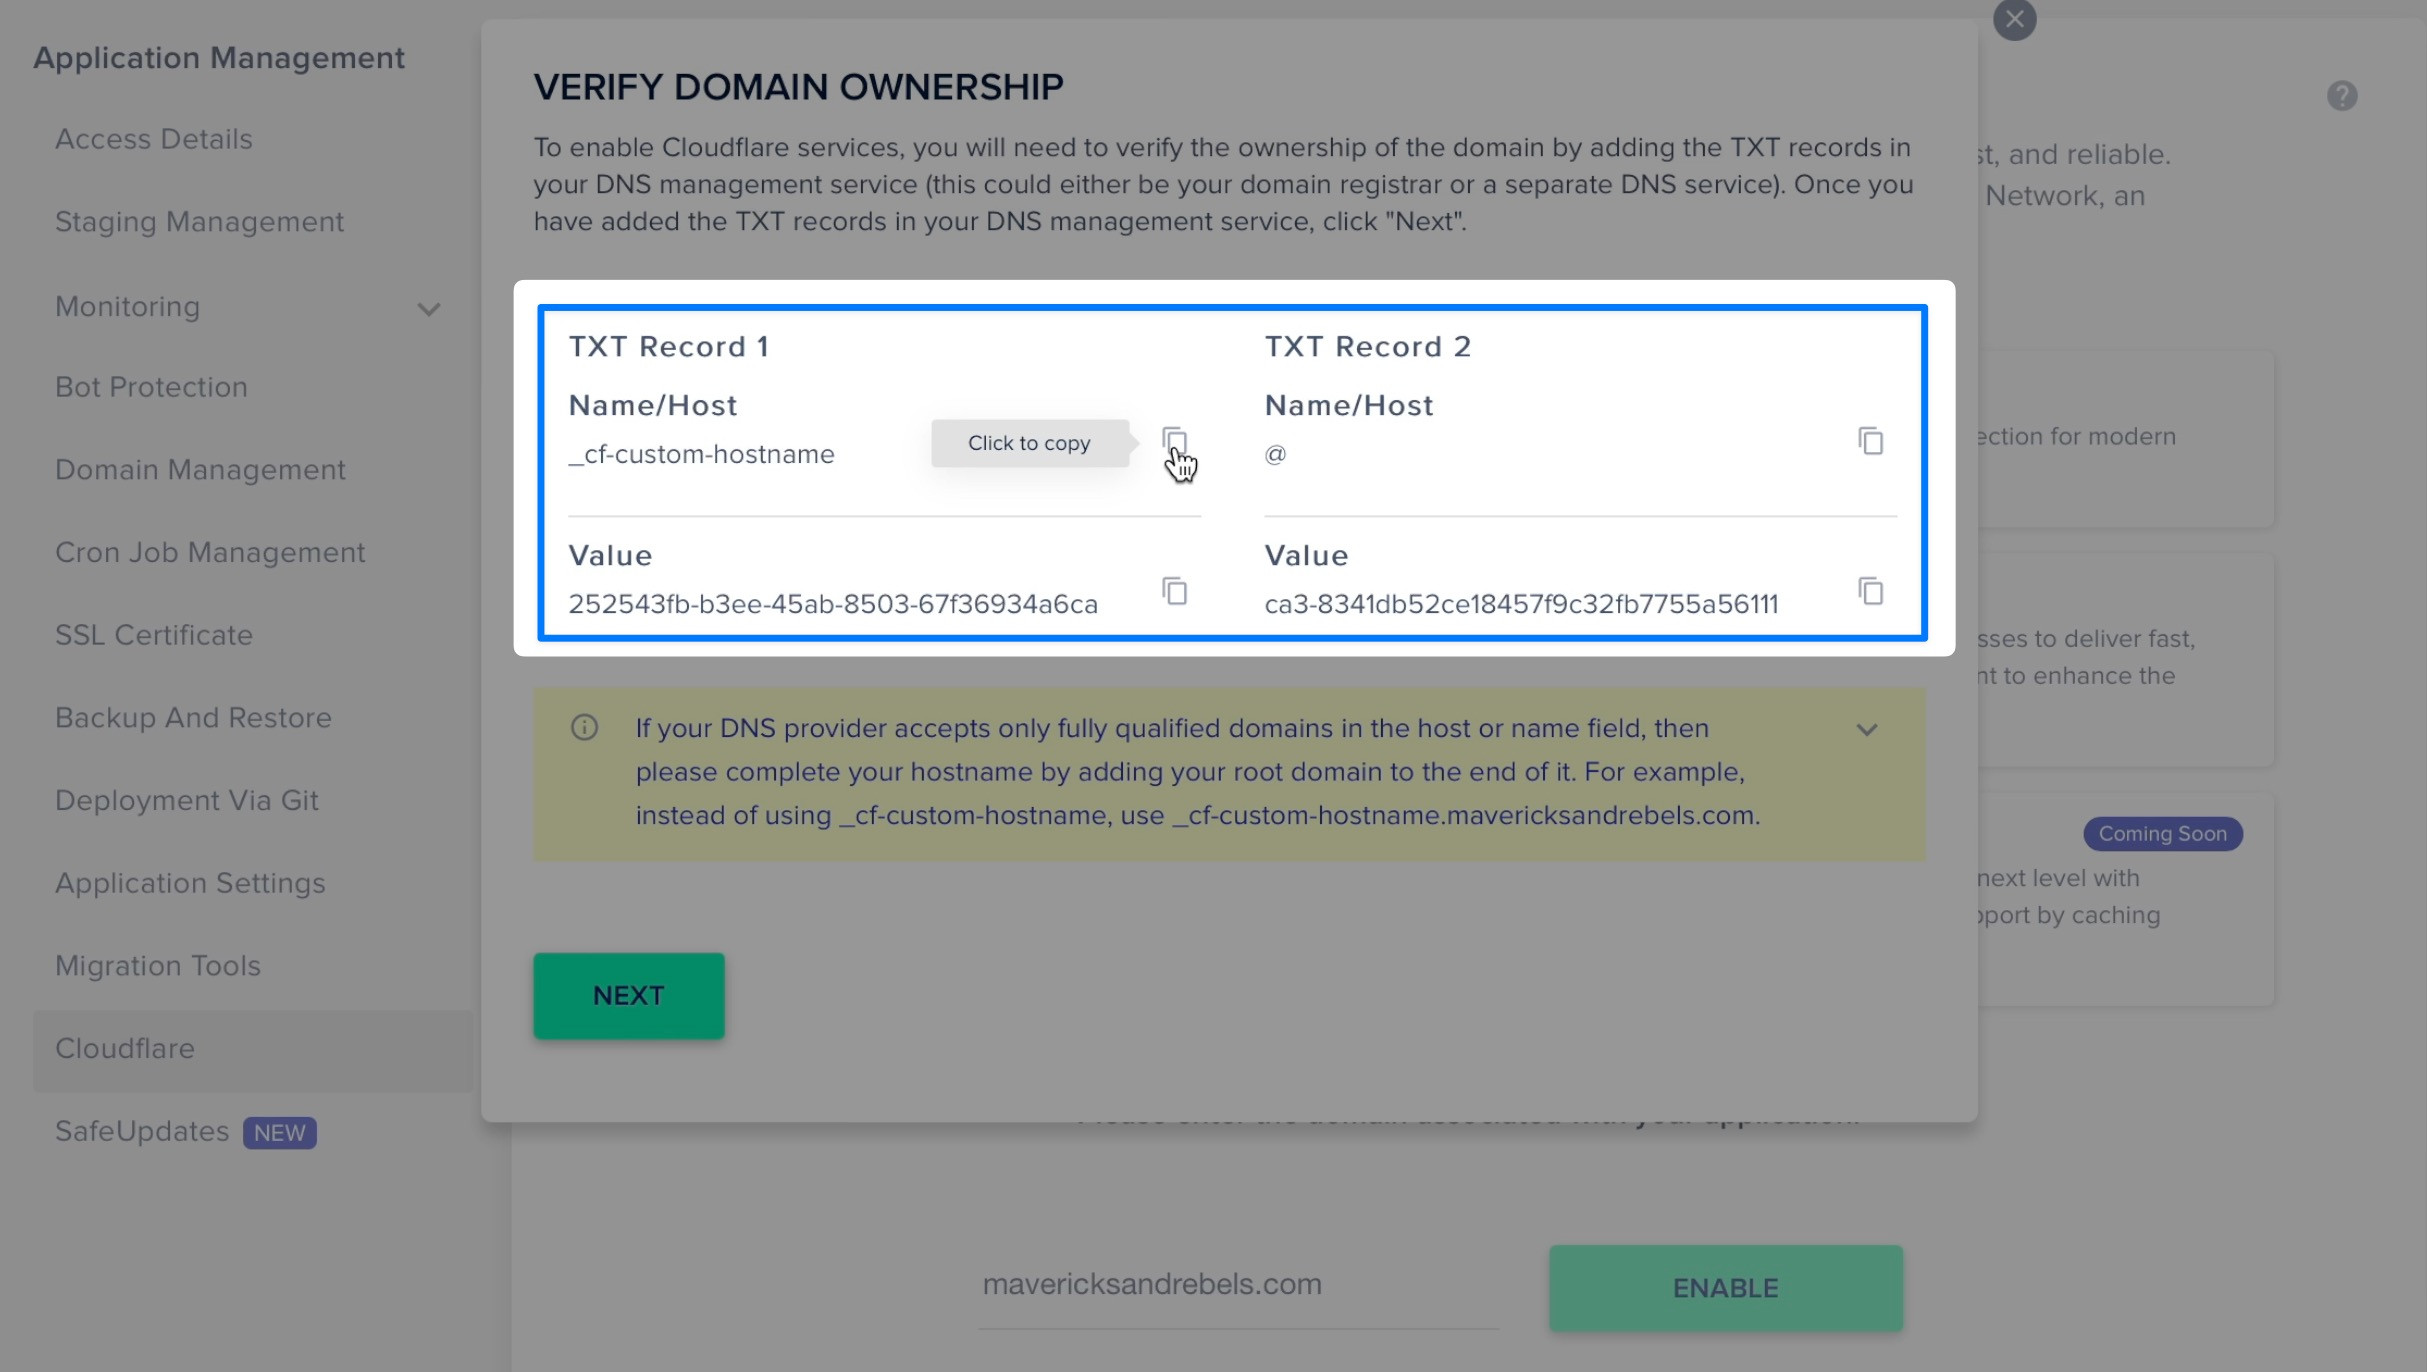
After a few moments of processing, Cloudways will spit out 2 TXT Records that we need to add to our domain name registrar. Go to the same screen you visited earlier when creating CNAME and A Records.
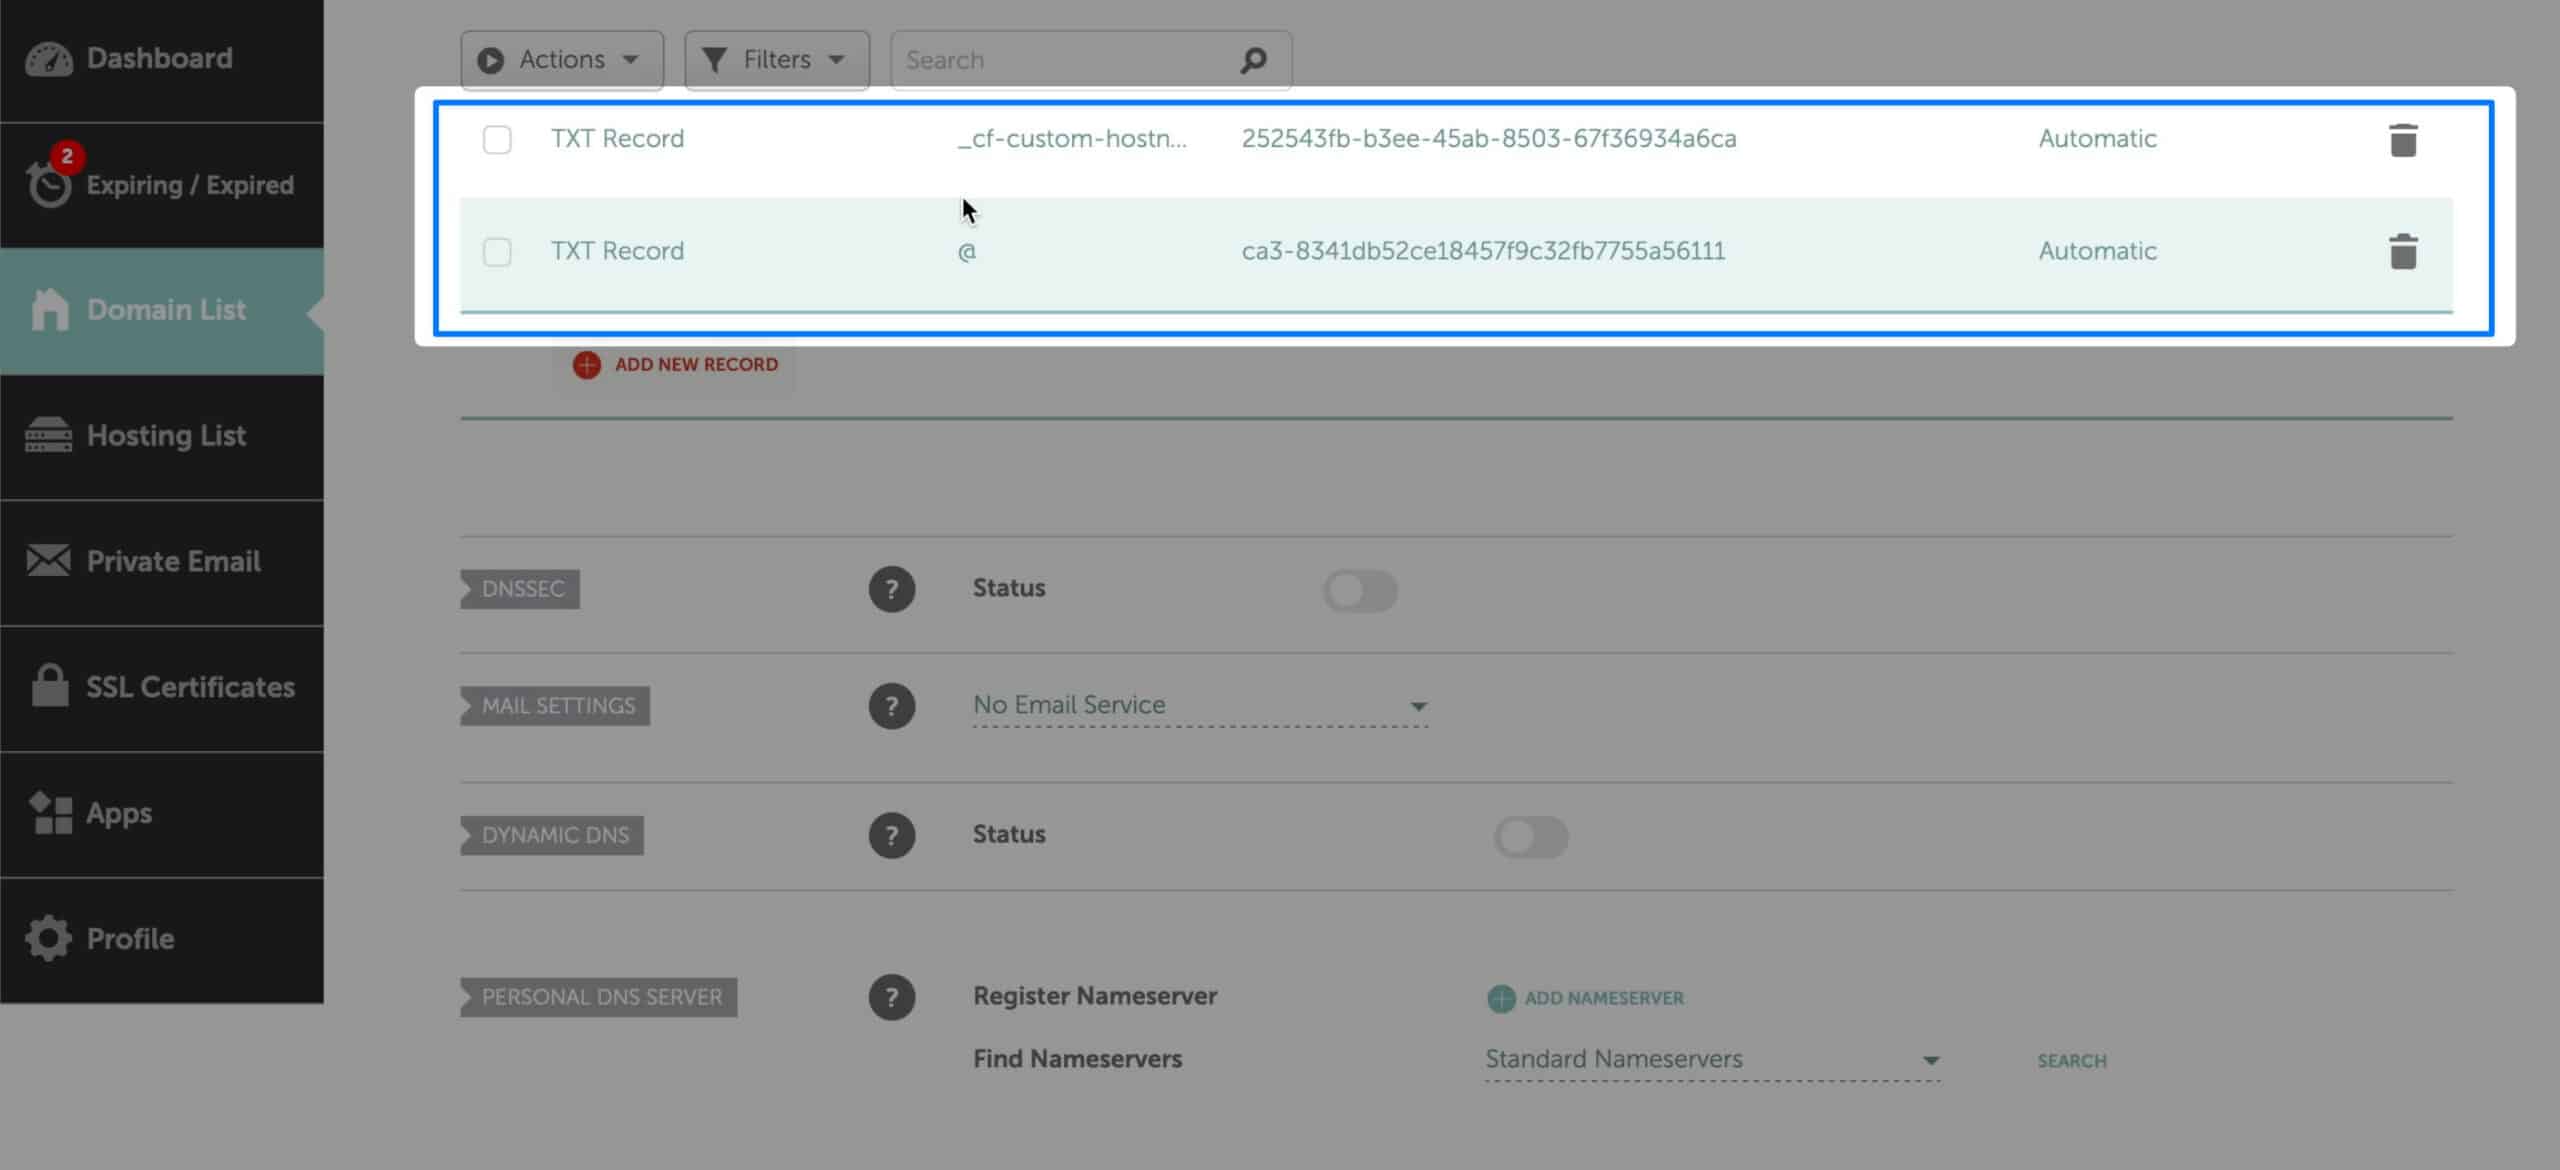
I’m back over in NameCheap, and I’ve added both records by copying and pasting the values from Cloudways.
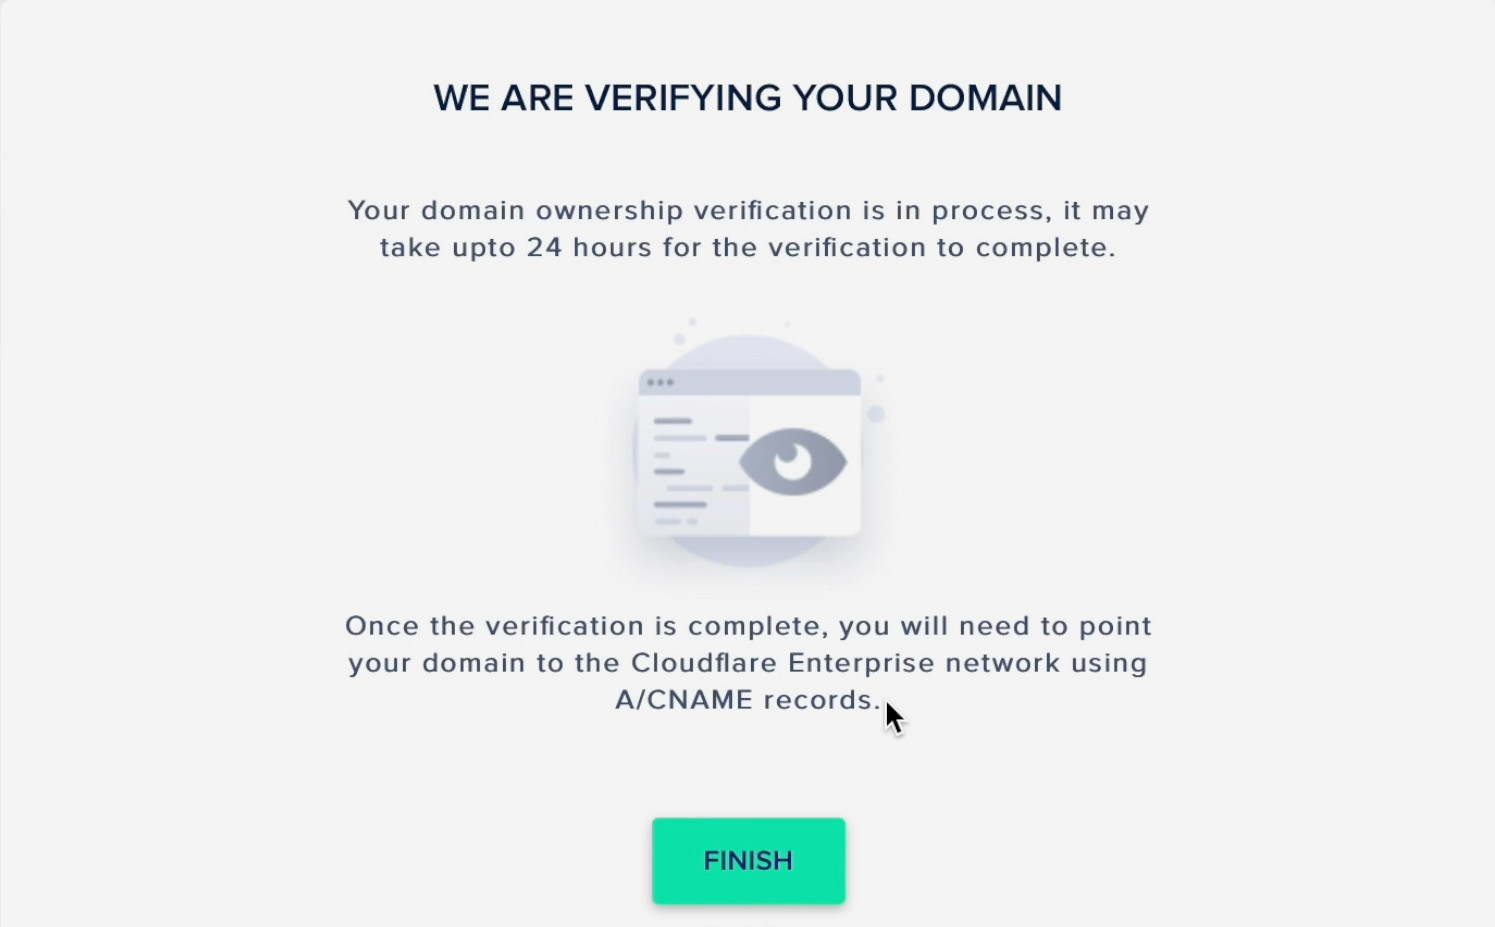
With that done, I’ll return to Cloudways and click Next to complete domain ownership verification. This process can take up to 24 hours to complete, but in my experience, it typically only takes a few minutes.
When verification is complete, you’ll need to update your A Record to point to Cloudflare’s Enterprise network instead of directly at the server.
Click View A Records, copy the first IP, paste it into your existing A Record’s value field, and hit the green checkbox.
Next, create a new record; this one is also an A Record. Here you’re going to set the host to @ and paste in the second IP address from Cloudway’s Cloudflare integration. Again, hit the green checkbox.
Back over in Cloudways, click Done.
Refresh the status, and you should get a message that says Active. If not, wait a few moments and try again.
Breeze Page Cache
Right now, Cloudways is still working on its integration with Cloudflare’s Full Page Caching. You might not need a plug-in for page caching in the future, but you do now, and Cloudways gives us Breeze for free.
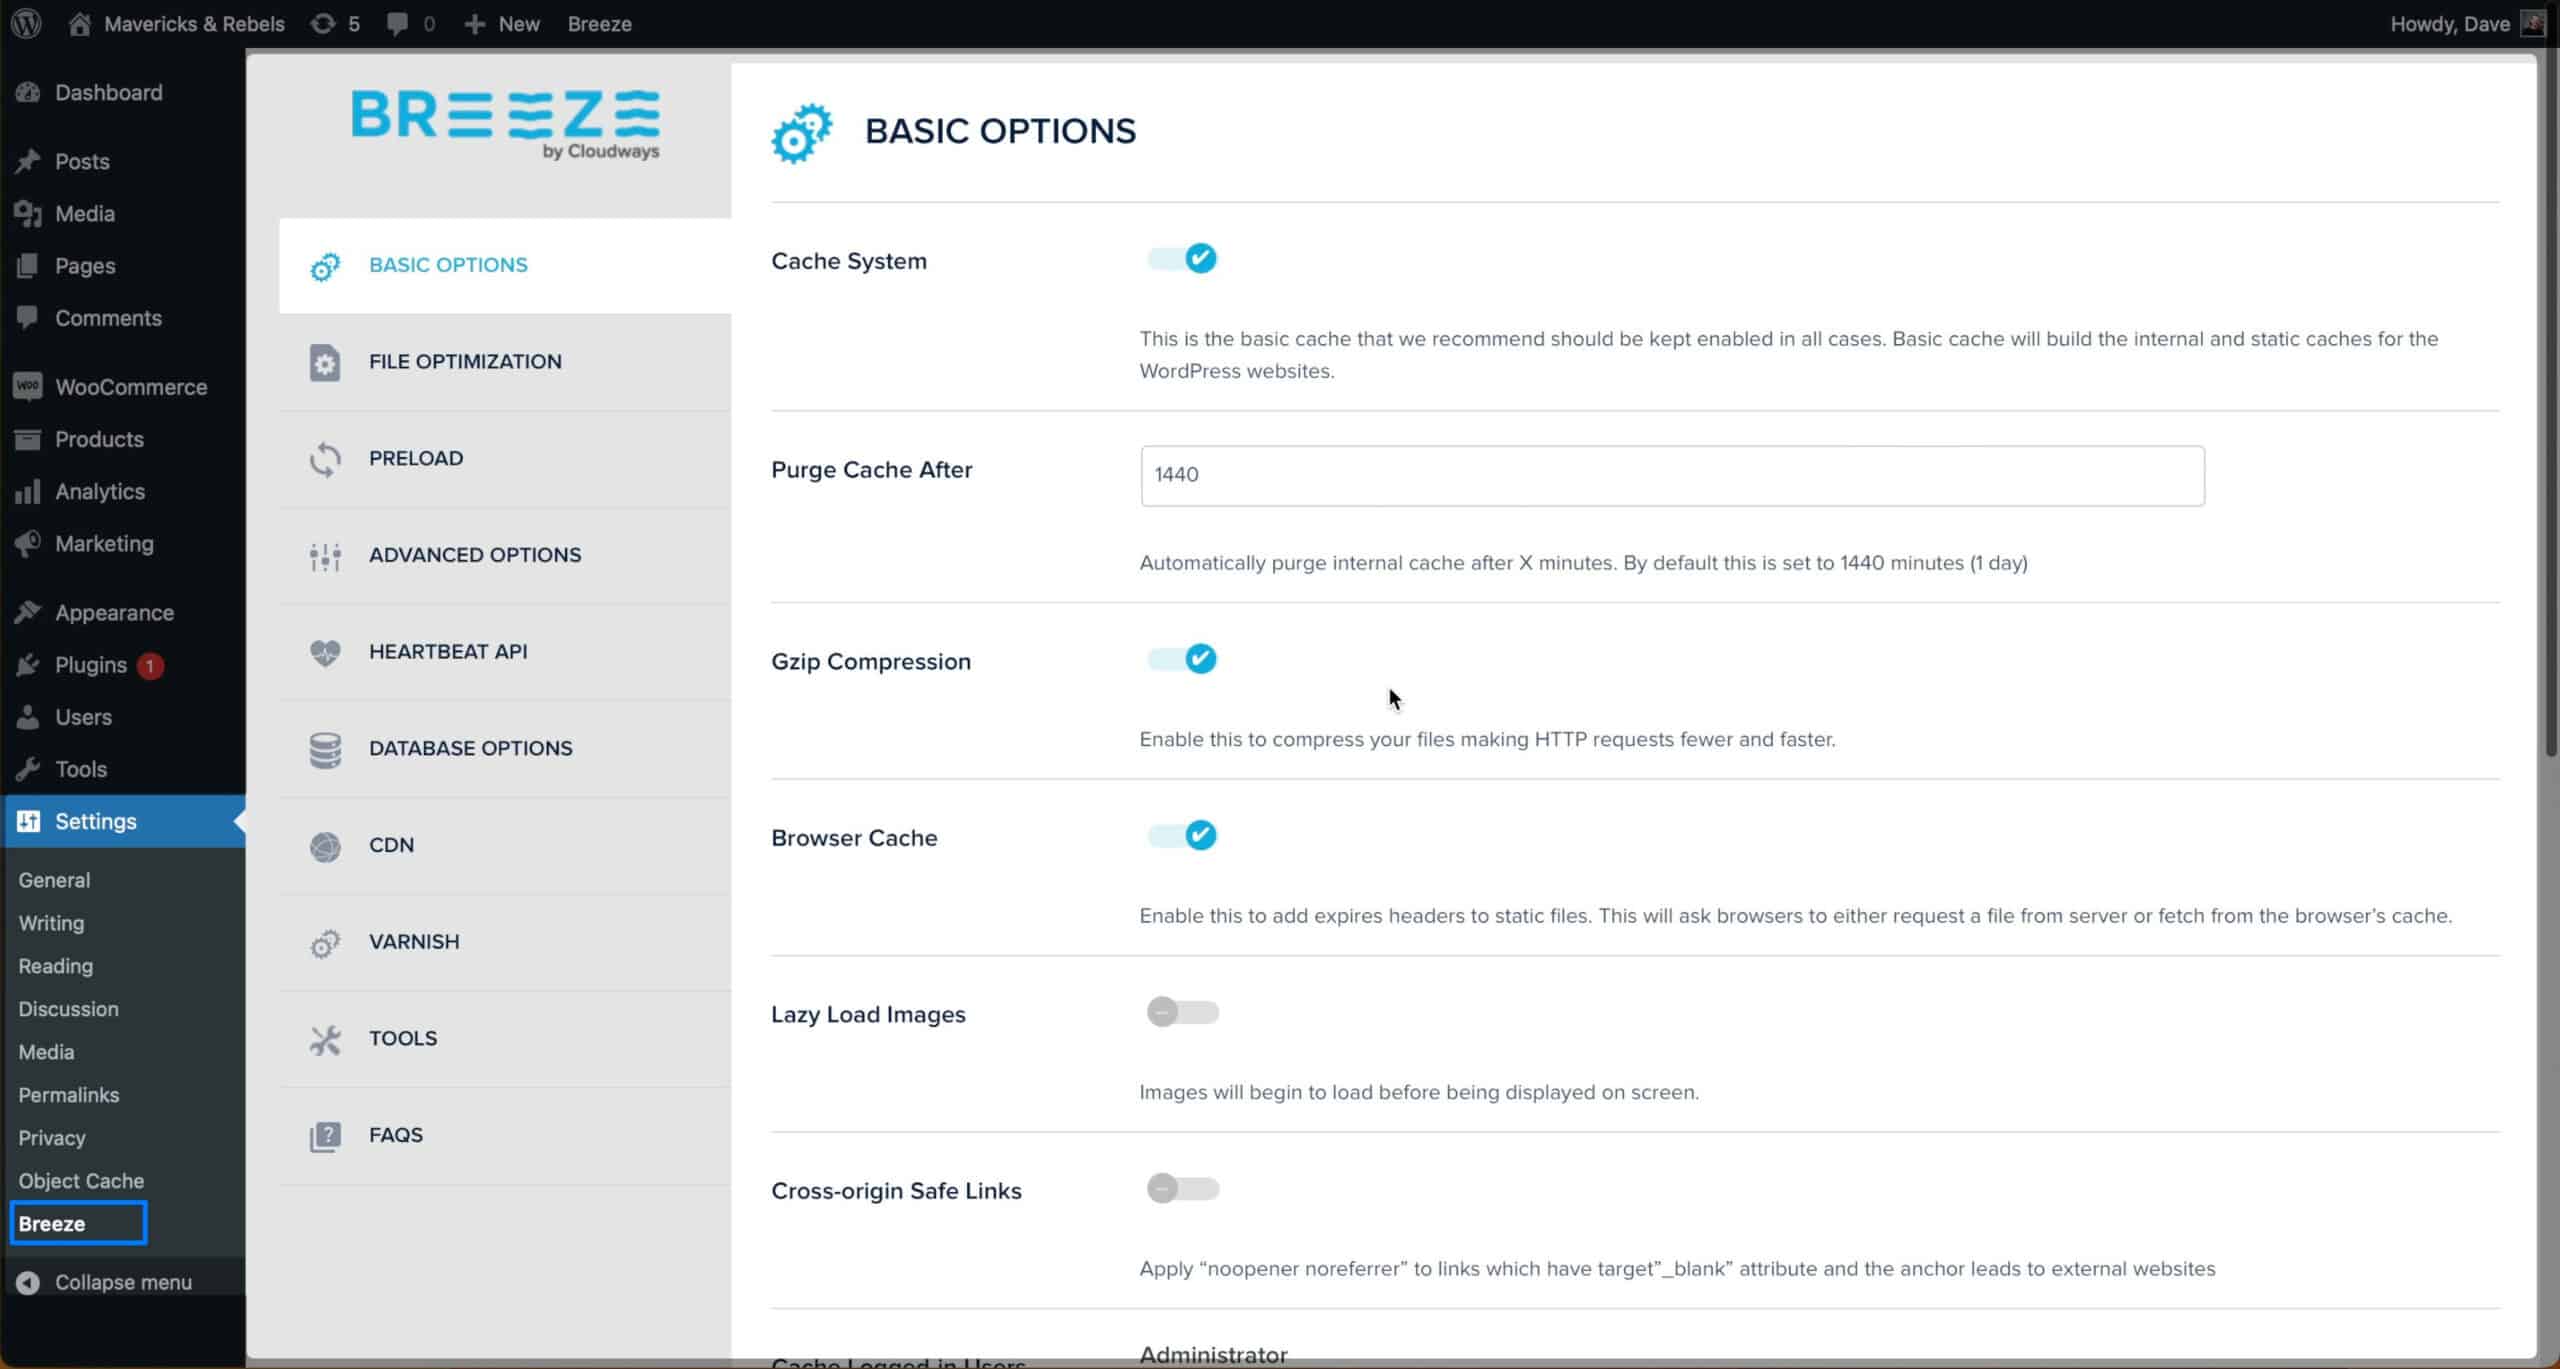
Breeze is effortless to use. It comes pre-installed on all Cloudways websites. You can find the settings under Settings > Breeze.
The default settings are probably fine, and you don’t need to tweak it much unless you know what you’re doing and want specific results.
I like that it automatically clears Varnish server caching when you make a change to your site. Breeze makes the common issue of content not updating because of caching problems straightforward to manage.
There is even a big Breeze > Purge All Cache button in the top menu bar.
Redis Object Management
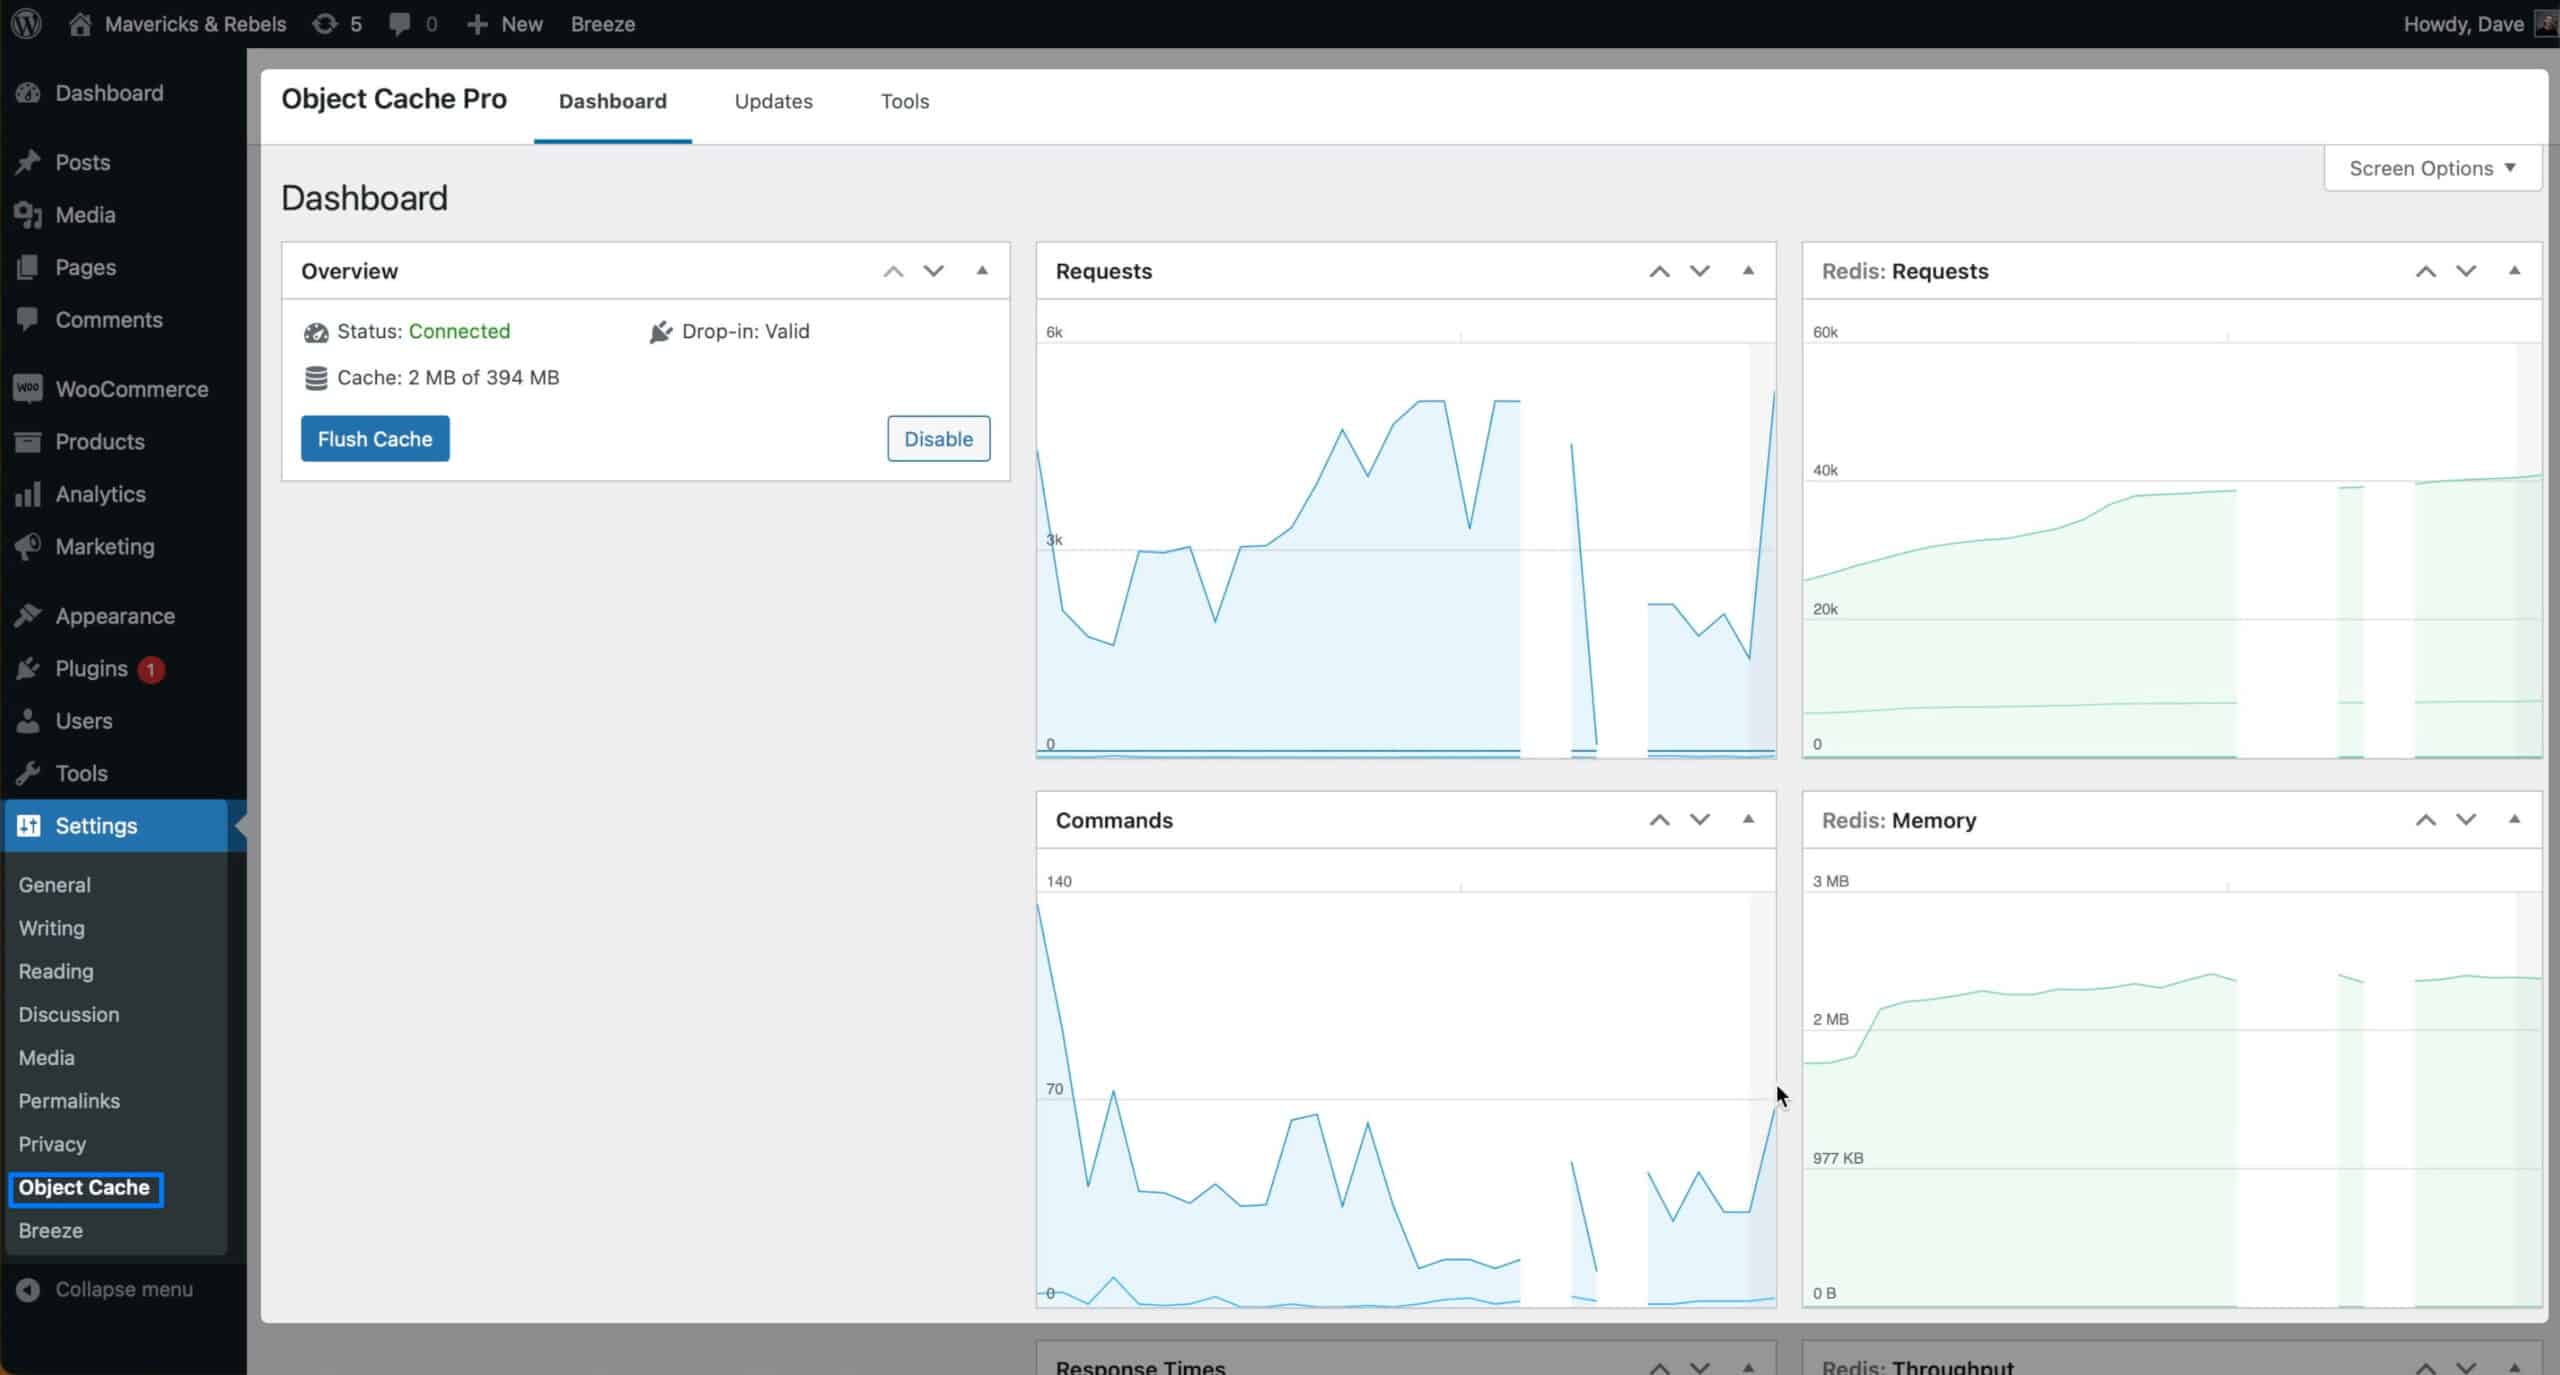
This ultimate guide wouldn’t be complete if I didn’t at least mention Redis Object Management. Cloudways gives you Object Management Pro free on all servers with over 2GB of RAM. This plug-in makes WooCommerce fly and typically costs $950 a year. What do you need to do with it? Nothing. It comes pre-installed and does all the heavy lifting to make WooCommerce faster in the background.
Backups
If anything were to happen to your site, you’d be heartbroken. That’s why you need backups — not just when you think of it, but taken automatically. Cloudways gives you a few options for this. I’m a big fan of their server-level backups.
Server Level Backups
The server-level backups are going to back up everything on your server. Still, if you follow my recommendations, you only have one site on the server.
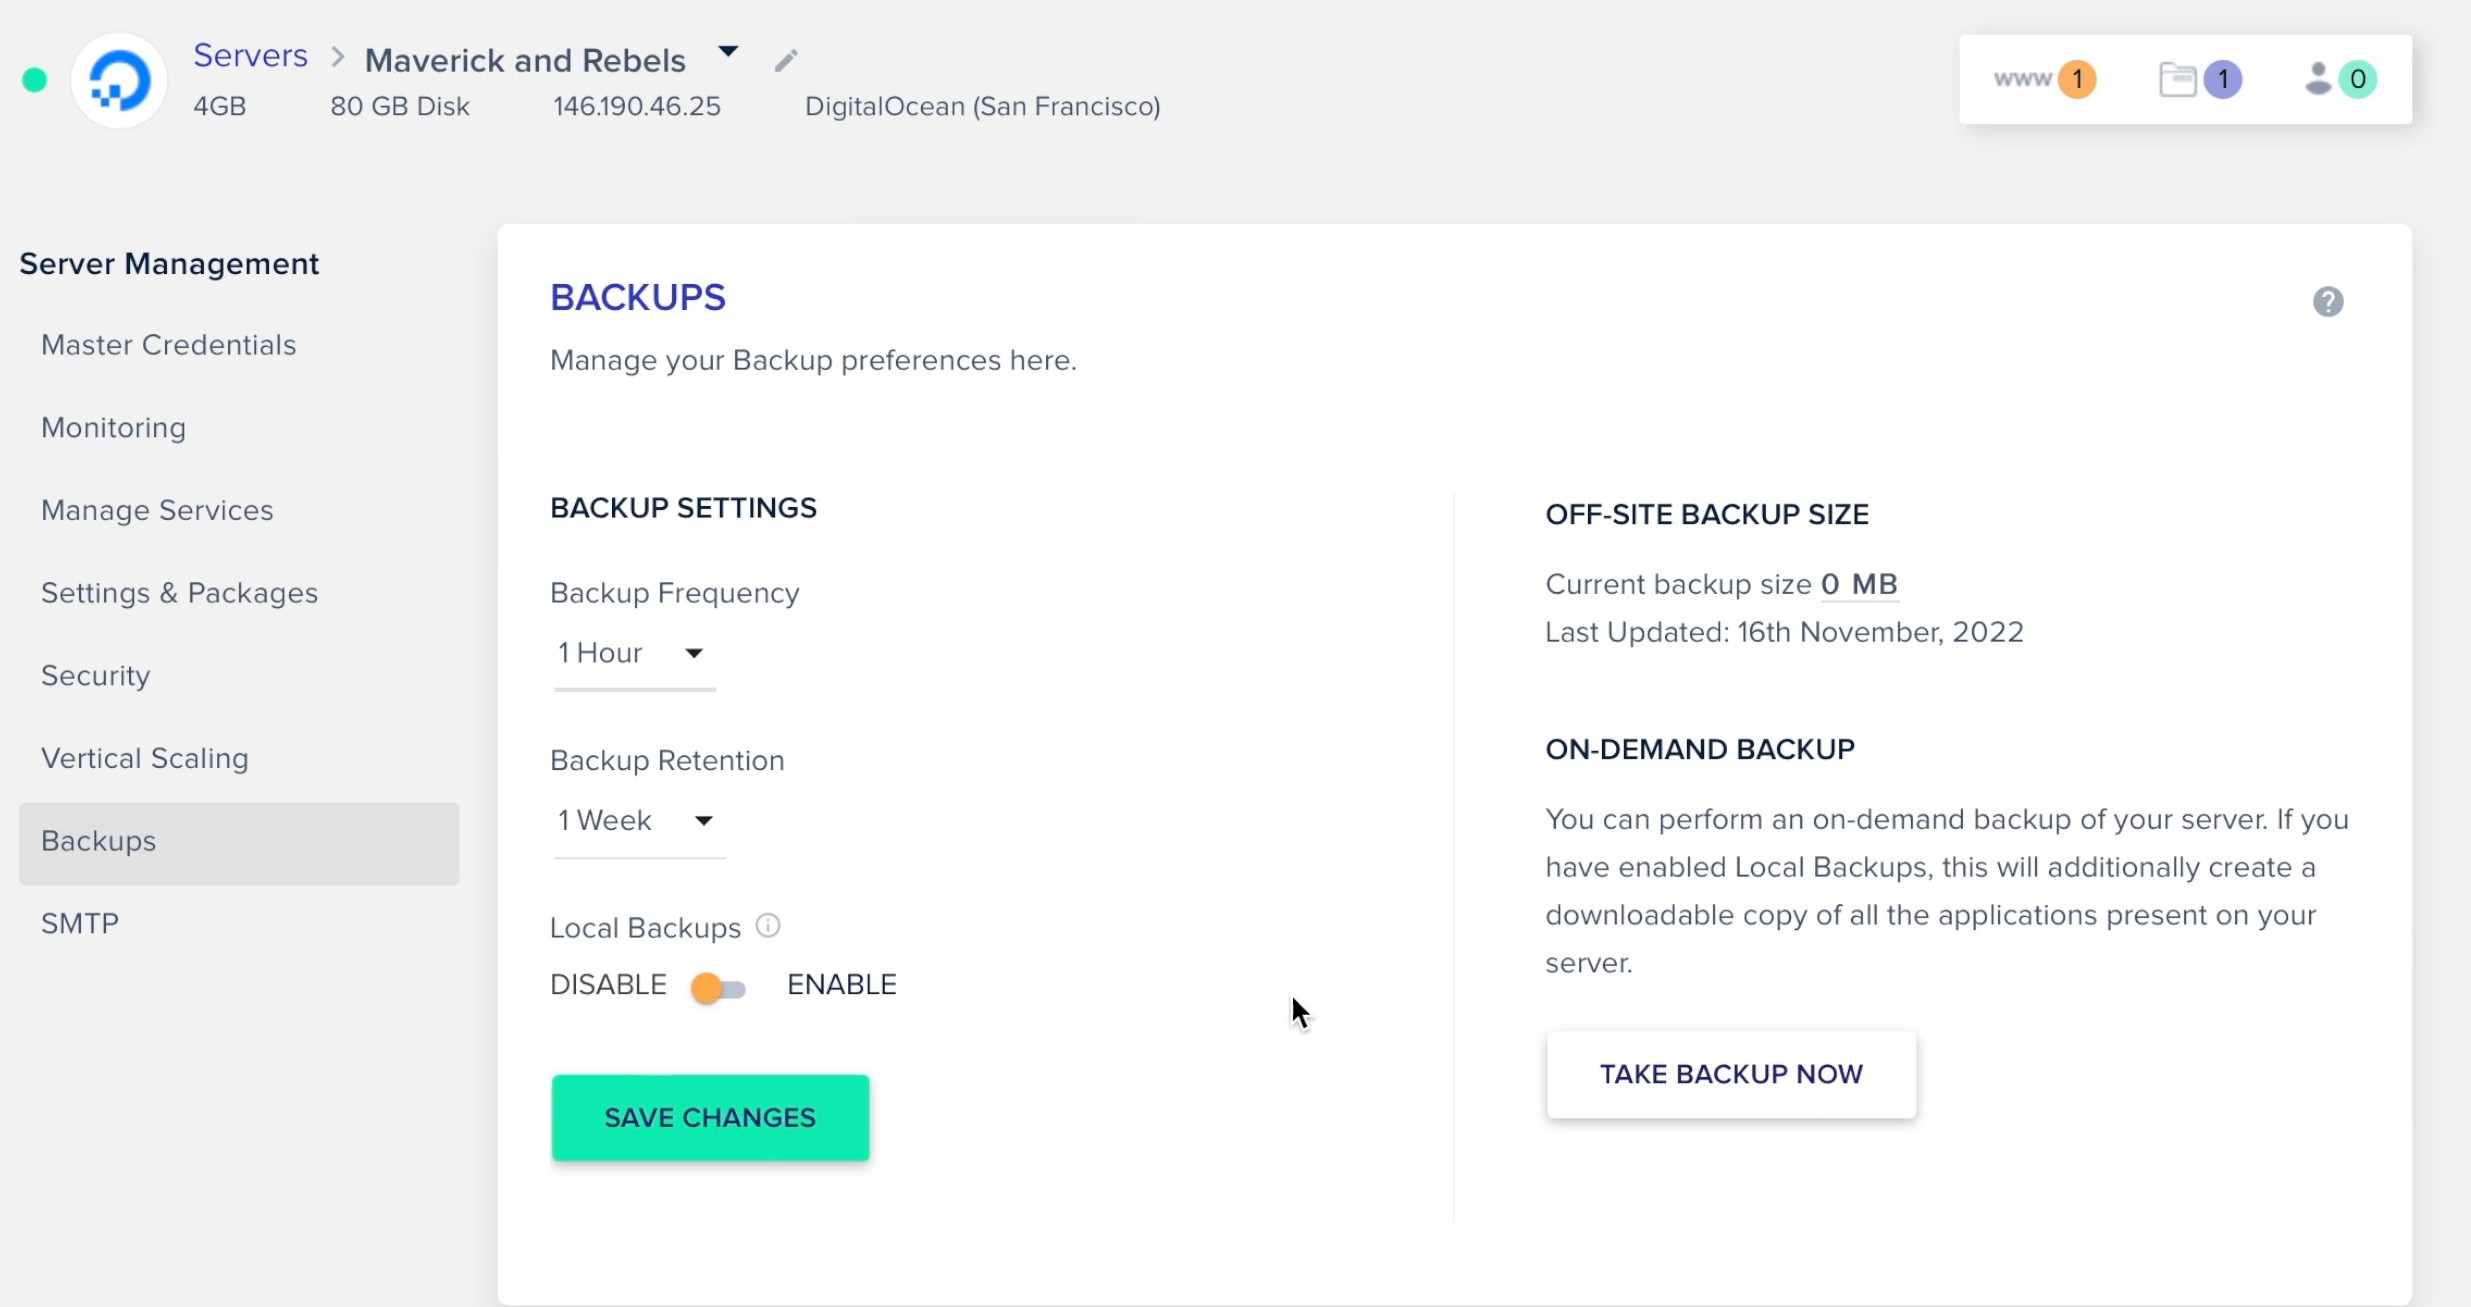
To configure, click on Servers from the top menu bar and then choose the server you want to backup and choose Backups under the Server Management sidebar.
Suppose you’re generating a lot of sales. In that case, I recommend a higher backup frequency to ensure you always have the latest transactions backed up. Keep in mind that these backups are off-site and require a small extra fee. Also worth noting — each time you run a backup, it will take up server resources. I might do hourly backups for a very busy site if the budget allows for the backups and extra server resources required.
Other Backup Options
I don’t recommend local backups because they will take up space on your server. Modern cloud servers don’t typically come with an abundance of space. Local backs are nice to have for quick restores, but in practical experience, off-site backups are more userful and don’t have the potential to fill up your server space. Your mileage may vary here, so do what you think is best for your situation.
At the application level, you can check out SafeUpdates. This new feature from Cloudways combines automated backups & site updates. It uses multiple testing processes to ensure updates don’t break your site. I have a dedicated video on SafeUpdates, which I’ve linked to here.
Enable Email Sending
What is an eCommerce store without sending customers receipts? To enable your site to send emails, you can use Cloudways Elastic Email integration.
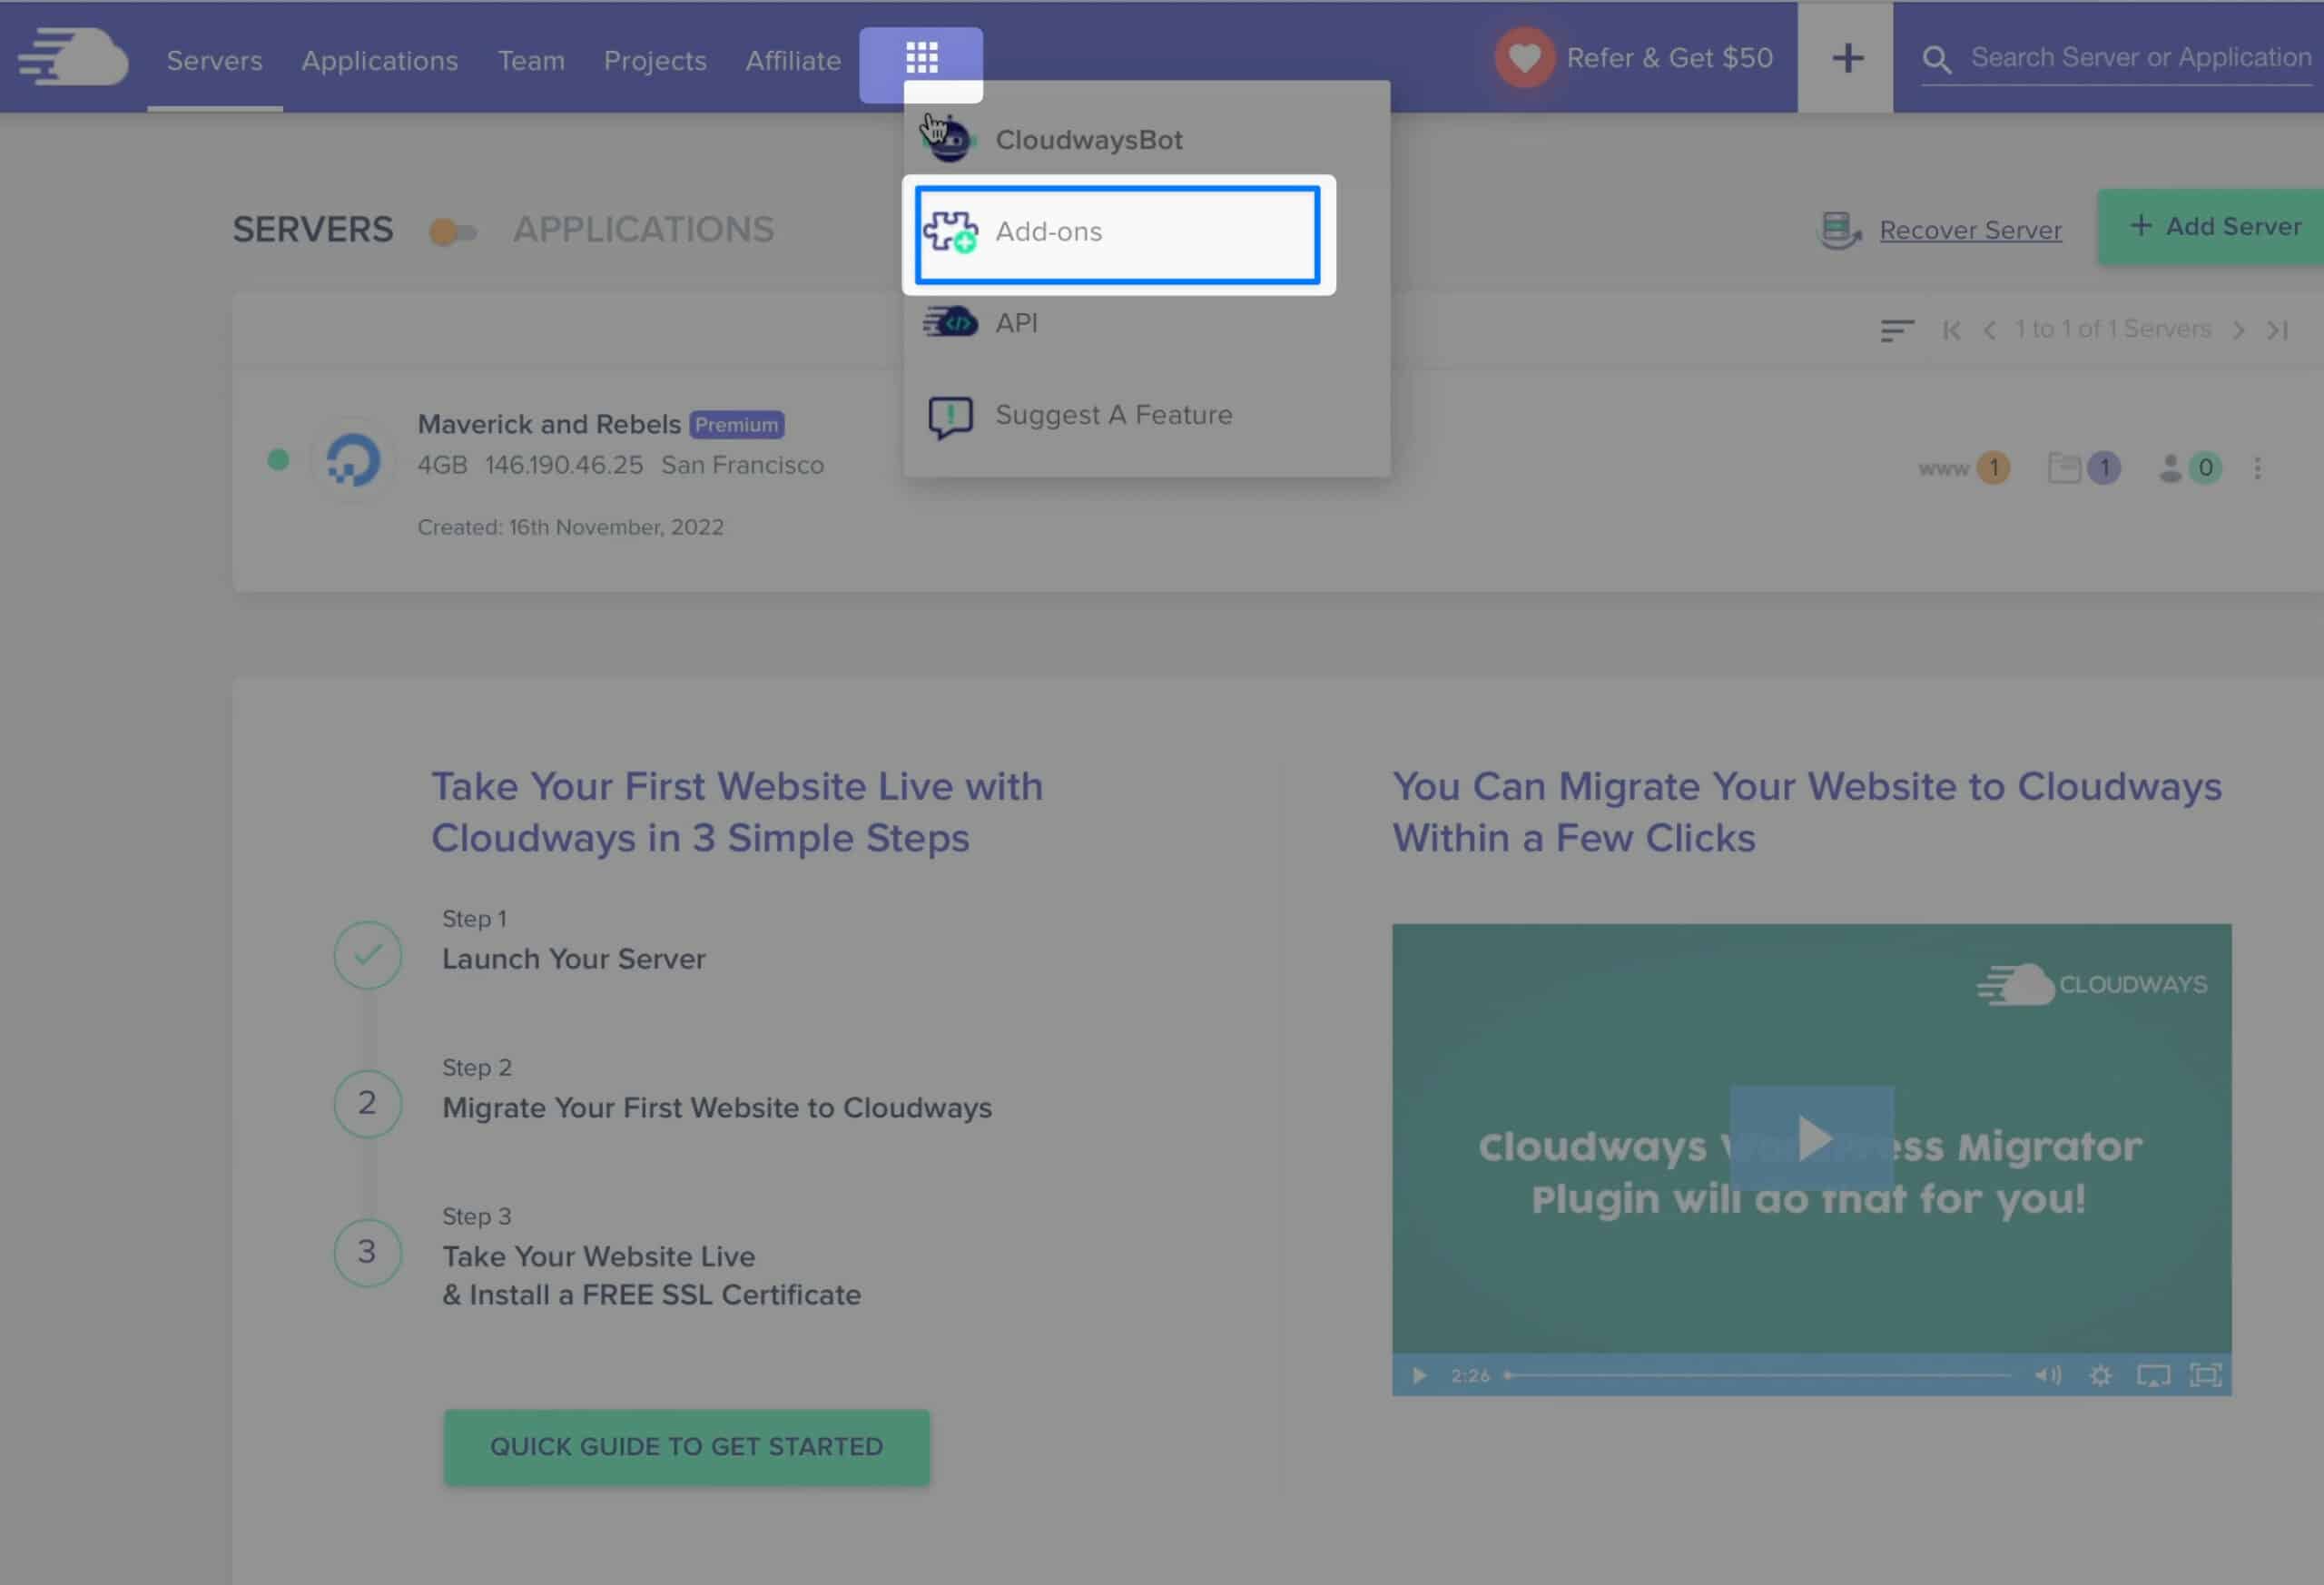
This add-on allows you to send 1000 emails for just $.10 a month. To subscribe, click on the grid of boxes at the top of the menu bar to access the add-ons menu.
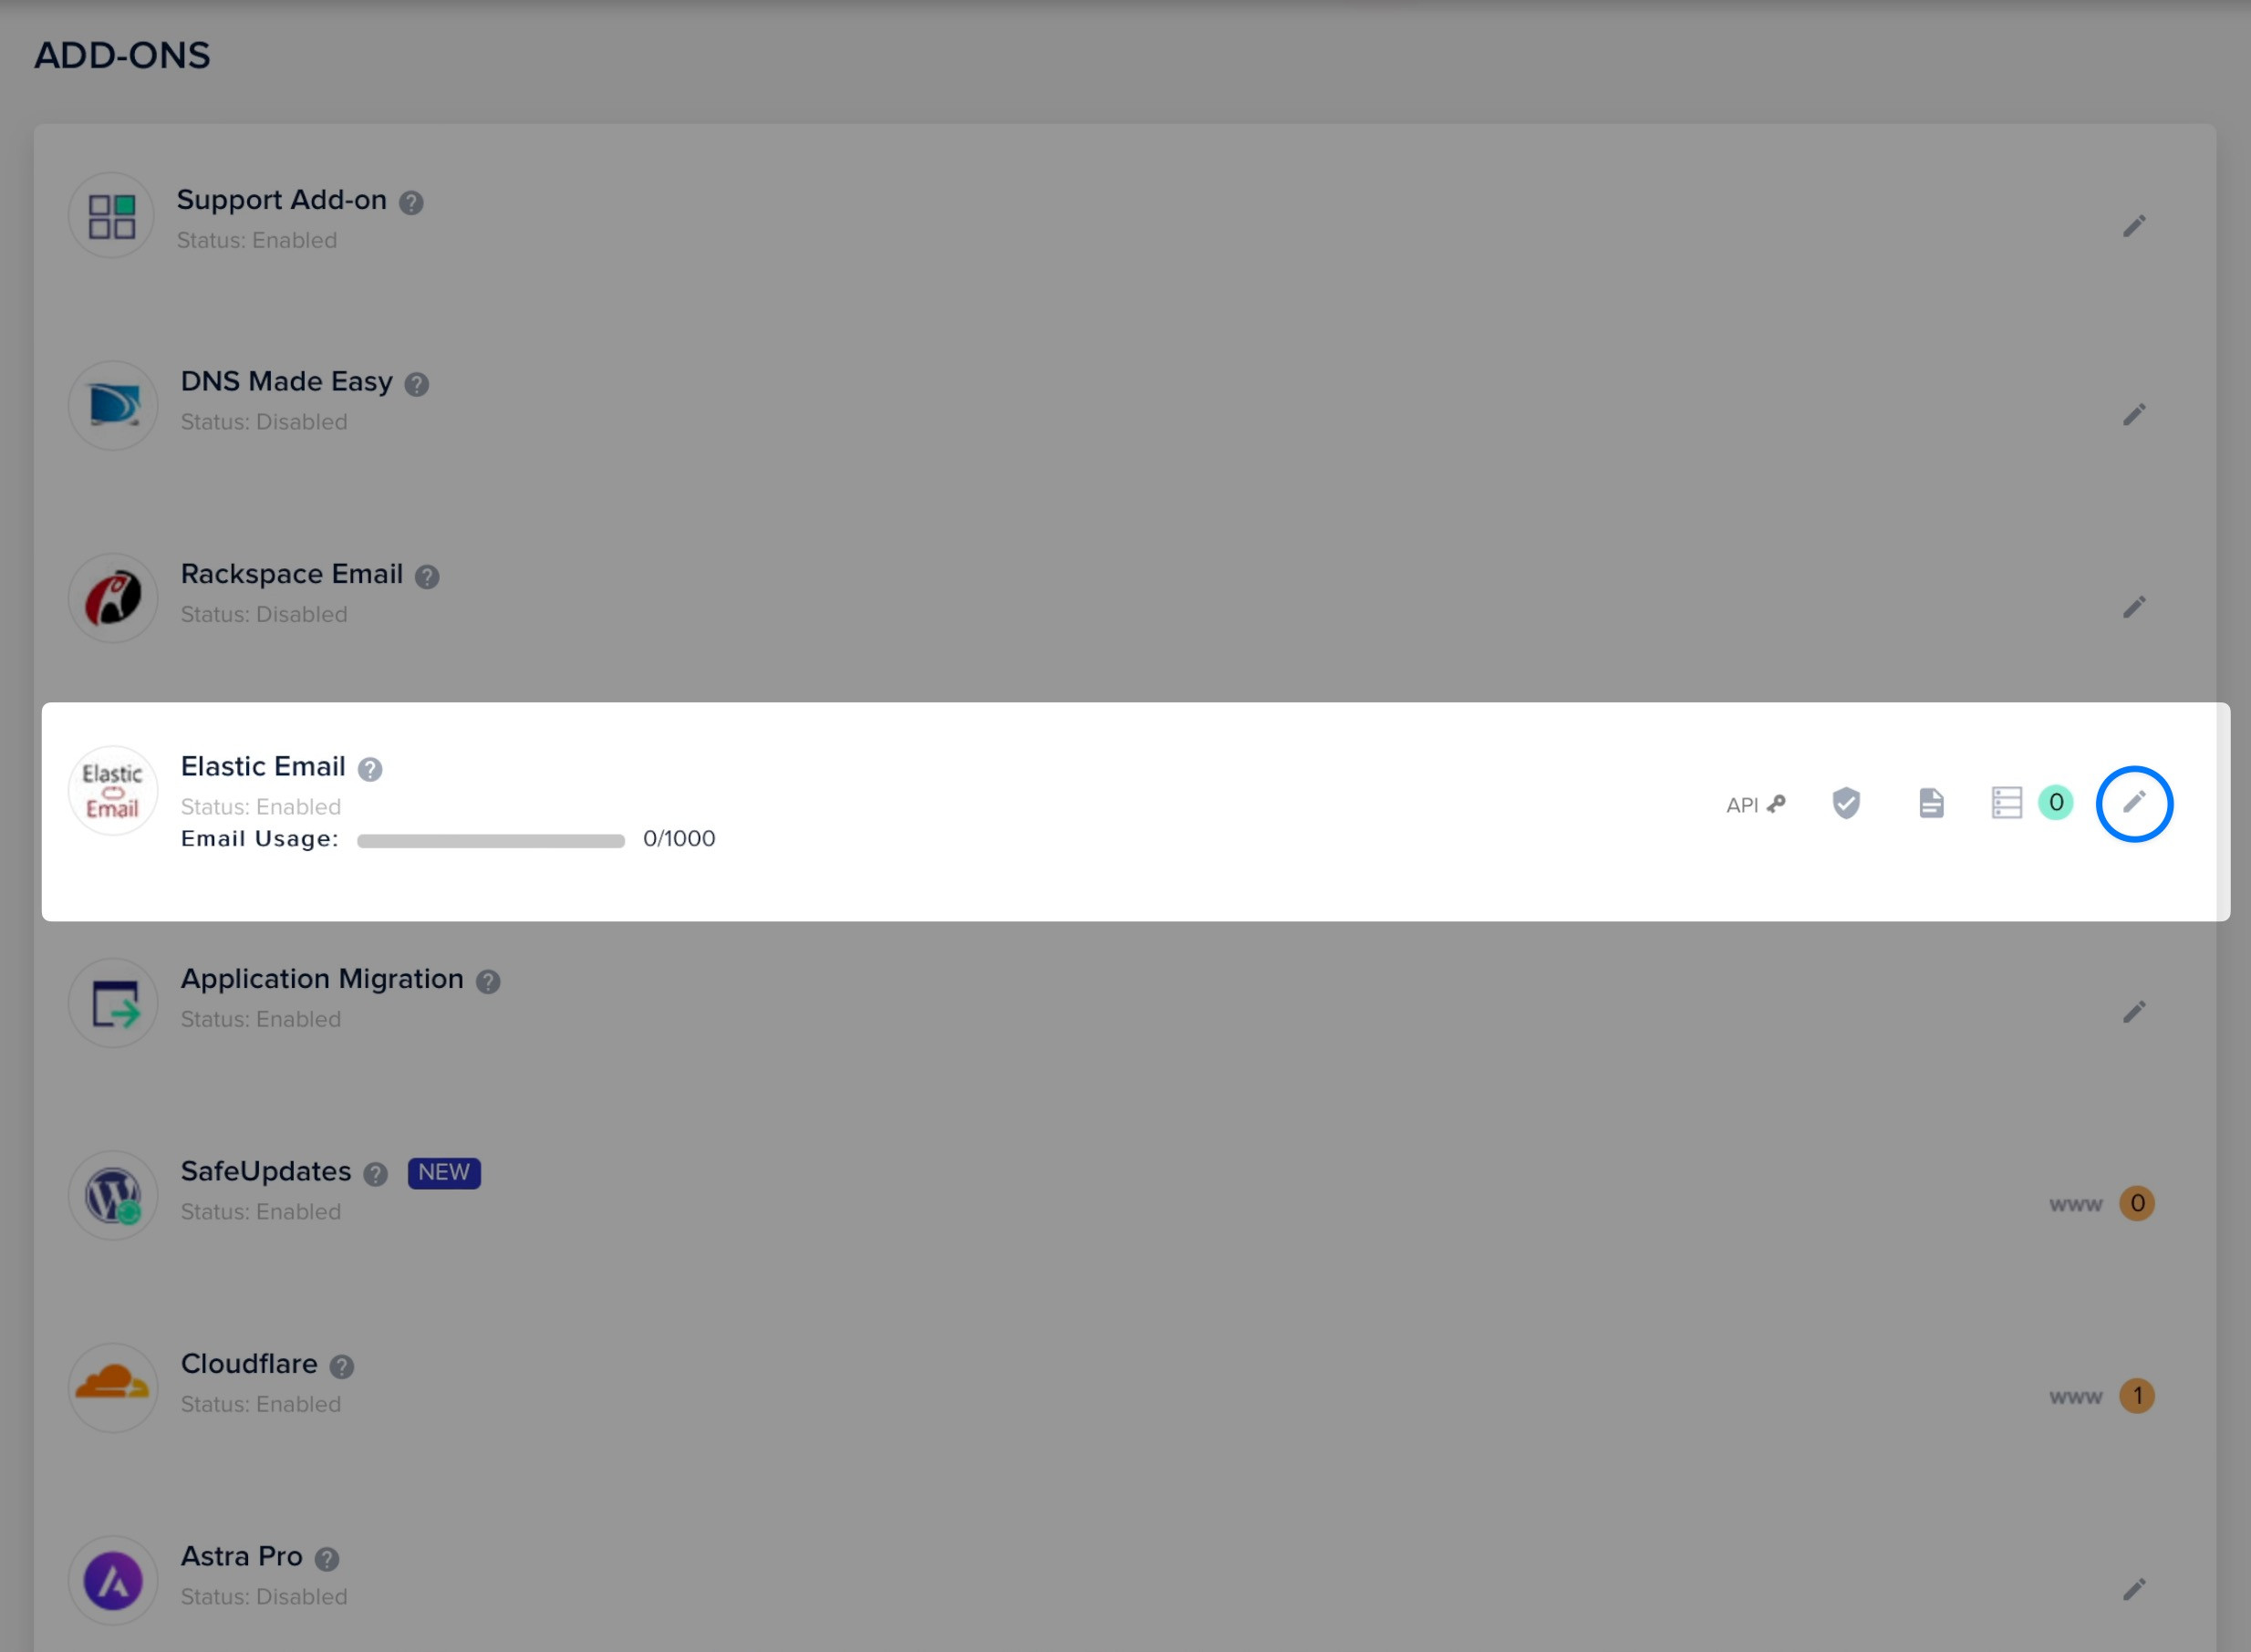
Click the pencil next to Elastic Email, choose the number of emails you want to send, and click Subscribe.

Next, click on Servers from the top menu. Choose your server and click SMTP under the Server Management sidebar.
From the Select SMTP dropdown menu, choose Elastic Email, and you’re ready.
Keep in mind this SMTP integration will work for any website on your server. You can also integrate directly from within WordPress with an SMTP plug-in if you prefer.
Cloud Hosting & Scaling For Growth
As I mentioned earlier, one of the most beautiful things about cloud hosting is the ability for vertical scaling without much effort.
Think of vertical scaling as upgrading the computer that is running your website. By dragging a slider, you can add more RAM, SSD storage, and CPU power.
When To Upgrade
So how do you know when to upgrade? Some reasons will be clear. Your site is running slowly or crashing due to increased traffic.
To be more precise with your decision-making process, you can use monitoring tools to see how hard your server is working. Cloudways provides easy-to-understand monitoring right inside the control panel.
Monitor Server Resources on Cloudways
From your Cloudways account, click Servers from the top menu bar and choose the server you want to investigate. Under the Server Management sidebar, choose Monitoring. The first screen gives you a general overview of your server usage. For more info, click the details tab.
Here you can switch between specific metrics. I like that Cloudways gives you advice on when to increase your server. For example, the first metric is Idle CPU time. I can choose a time scale of the last day and see that my server hasn’t dipped below 90%. Cloudways recommends increasing my server size when I drop below 20%.
The same thing applies to memory. If I choose the Free memory metric, I can see that I should increase my server size if free memory consistently drops below 100MB.
Scaling With Traffic Bumps
Of course, you can also upgrade your server in anticipation of traffic, such as before a new product release or a major sale event. So let’s say I have a big sale this weekend and expect a ton of new traffic. Upgrading the server is a few clicks away.
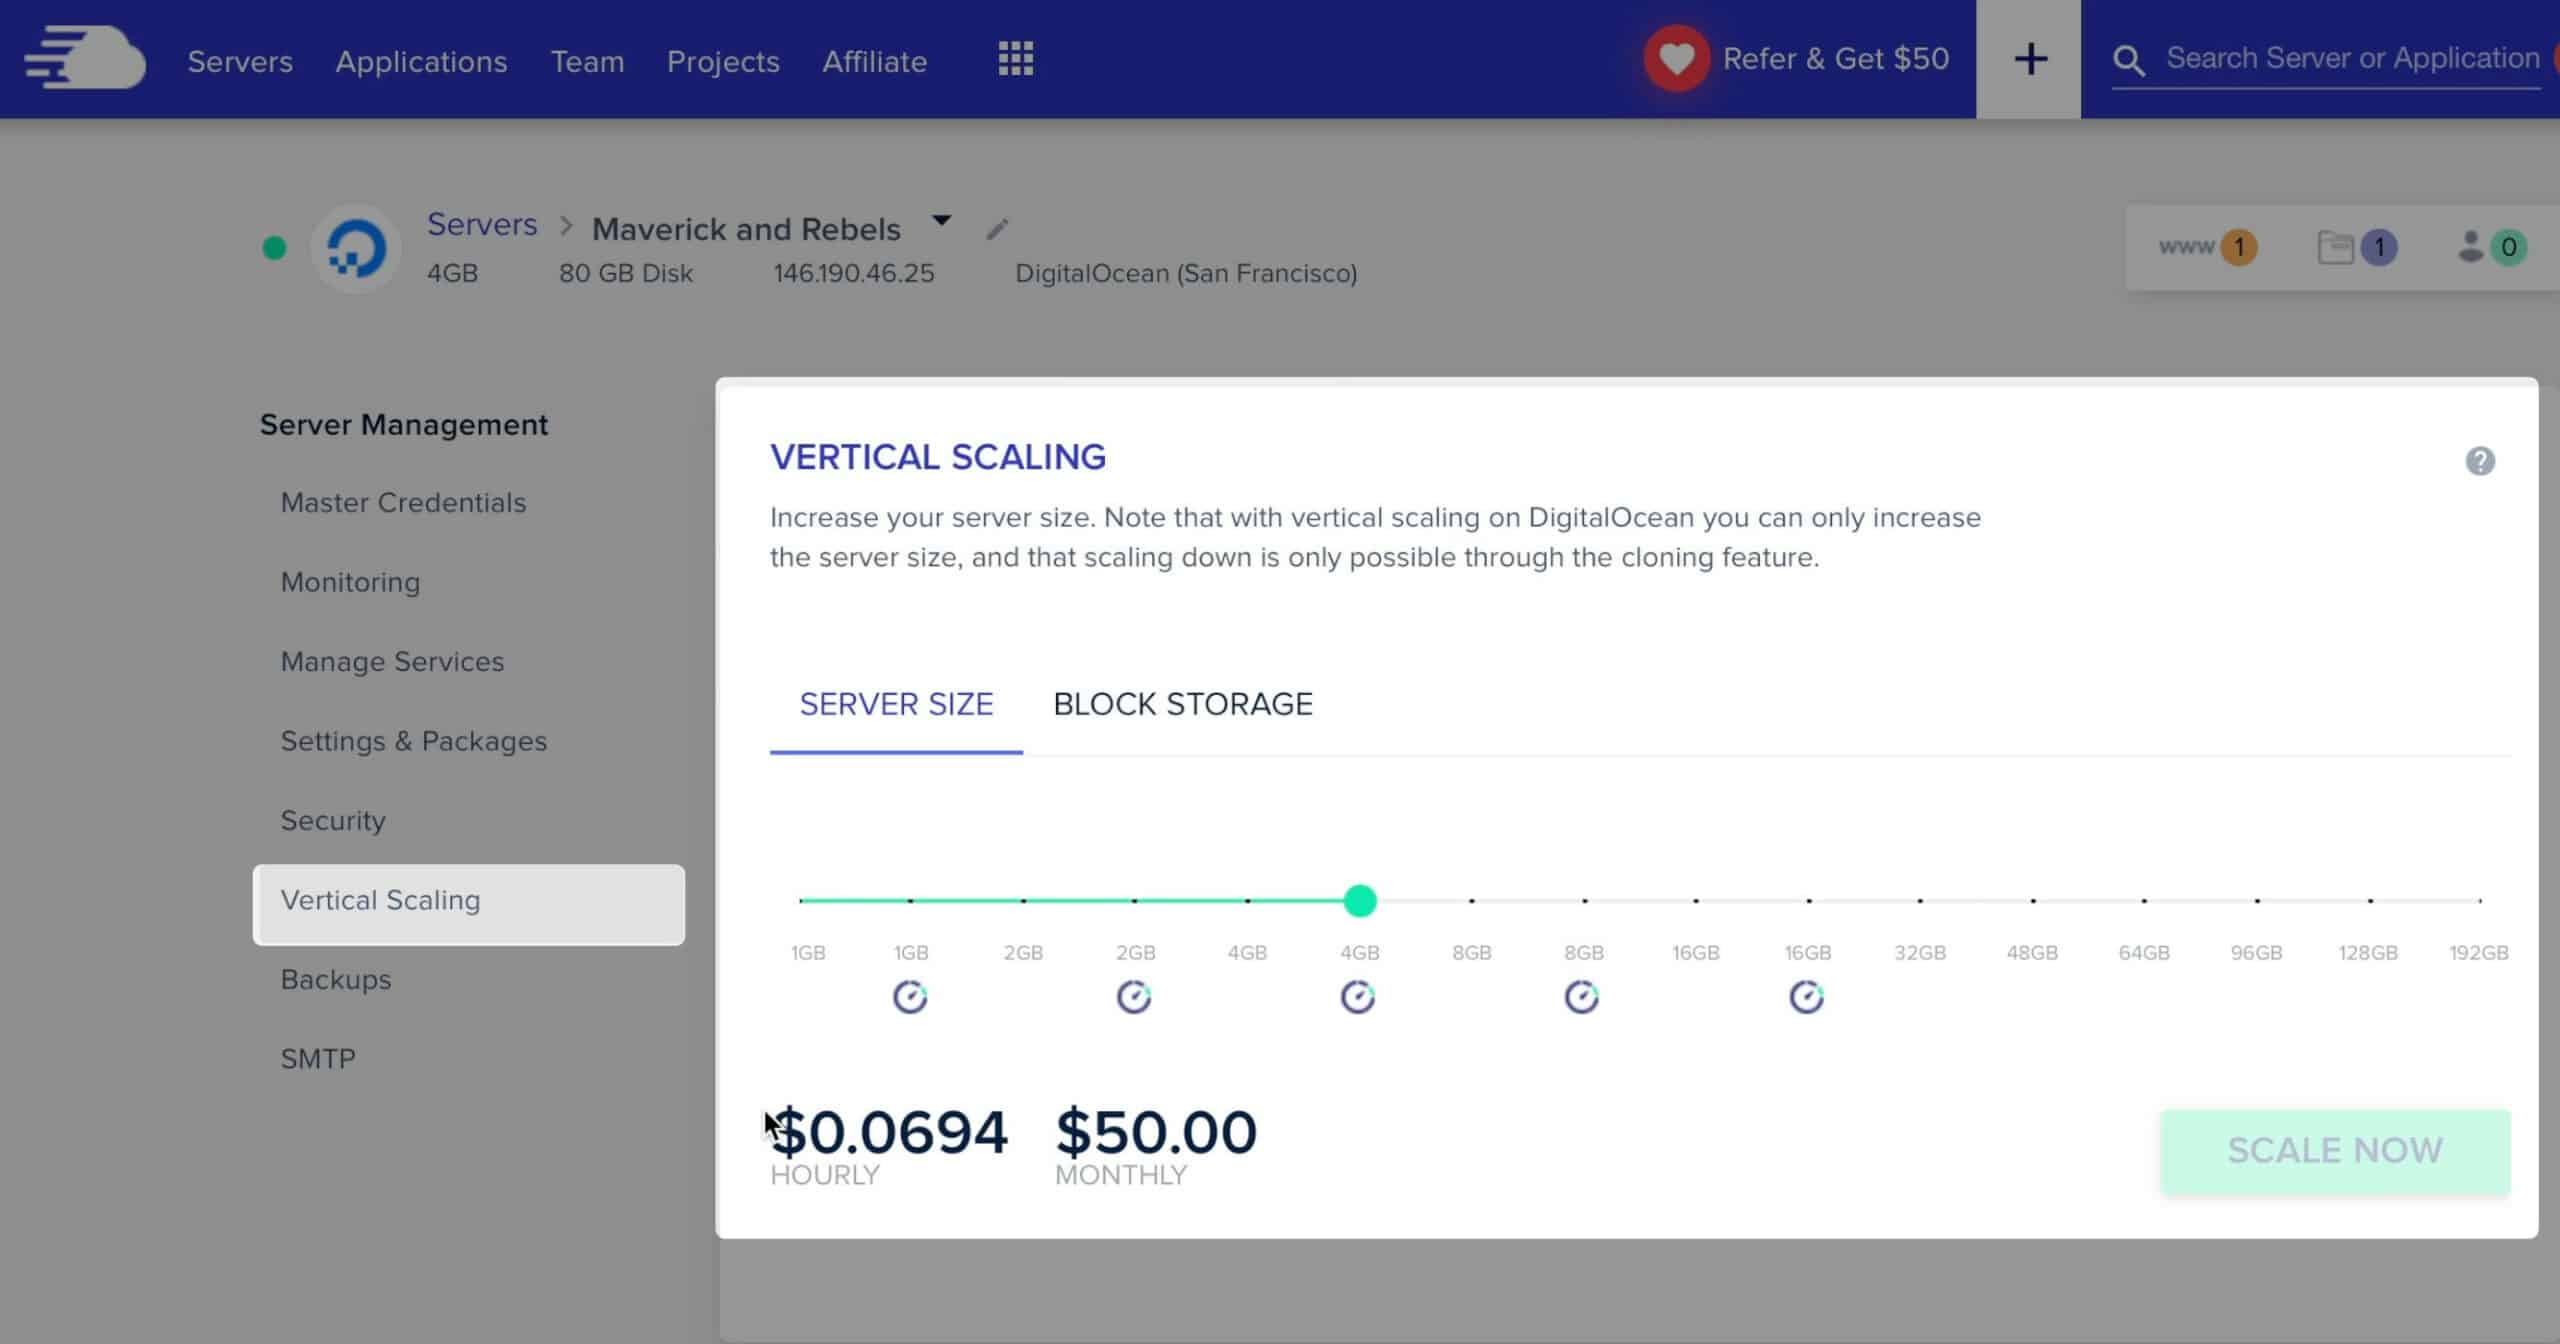
Vertical Scaling
From the Server Management sidebar, choose vertical scaling & drag the slider to the right. Remember to select one of the points on the slider with the speedometer icon for the faster CPUs. If you want to know what your getting, hover over a point on the slider and the server specs will appear. When you’ve found the specs and price combination you’re happy with click “Scale Now”. Your server will scale up, and in just moments, you’ll have a faster site capable of more selling capacity.
Scaling down to a lower-spec server is a different process. It requires cloning the site to a new server. Cloudways makes this pretty easy, but that’s a topic for another day.
Conclusion
Hopefully, this guide has given you everything you need to begin your journey with WooCommerce. If you have any questions or suggestions, be sure to leave me a comment. Thank you and good luck!